15 Small Kitchen Island Ideas for 2026: Dimensions, Cost, and Smart Layout Tips
A small kitchen can absolutely have an island. The hard part is figuring out what kind of island actually fits.
A four-foot island might be perfect in one kitchen and completely wrong in another. A little extra depth can be great for storage, but it can also make the walkway feel painfully tight. Add stools, a sink, or a cooktop and suddenly you’re dealing with overhangs, plumbing, electrical work, and ventilation too.
That is why choosing from pictures alone can be misleading.
The best small kitchen island ideas are the ones that give you something you actually need—more prep space, better storage, a place to sit, or simply a more useful layout—without taking over the room.
Below are 15 options, from very simple rolling carts to custom islands with seating and waterfall countertops. The dimensions and cost figures are practical planning ranges, while the technical notes cover the things that are much easier to think about before construction than after it.
What a Small Island Can Cost
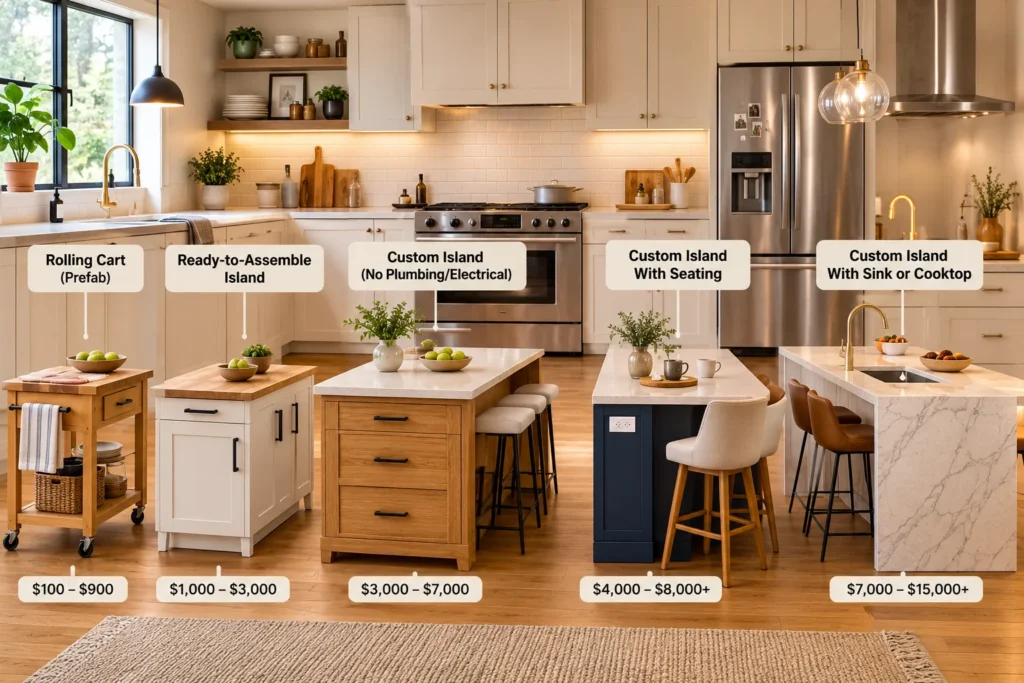
There is a pretty big gap between buying a movable cart and commissioning a custom island.
| Island type | Typical planning range | What usually changes the price |
| Rolling cart / prefab movable island | $100–$900 | Top material, construction, caster quality |
| Ready-to-assemble island | $1,000–$3,000 | Cabinet grade, countertop, assembly |
| Custom island, no plumbing or electrical | $3,000–$7,000 | Cabinetry, labor, stone fabrication |
| Custom island with seating | $4,000–$8,000+ | Countertop, overhang support, cabinetry |
| Custom island with sink or cooktop | $7,000–$15,000+ | Plumbing, electrical, ventilation, fabrication |
These are approximate U.S. planning ranges, not contractor quotes. Labor can vary dramatically by location, and a simple island can become an expensive project once you add custom cabinets, premium stone, plumbing, electrical work, or ventilation.
For example, the island itself may look simple in a rendering, but a sink means plumbing has to be planned before the countertop goes in. A large seating overhang may need steel support. A cooktop brings ventilation into the picture.
The more you add, the less the island behaves like “just another cabinet.”
Get the Clearance Right First
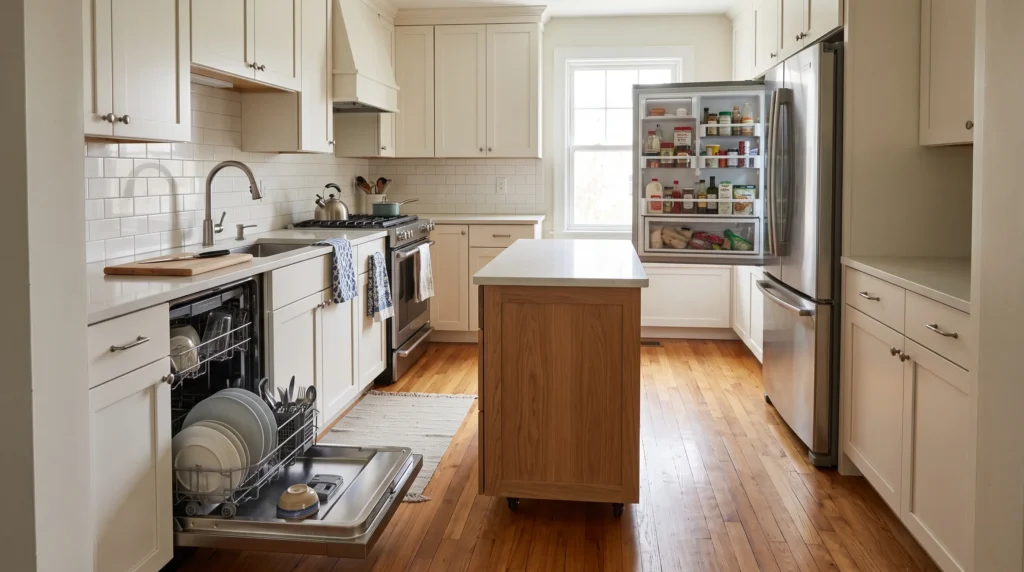
This is the measurement I would do before looking at countertop colors or cabinet finishes.
Tape out the proposed island on the floor. Then open the refrigerator. Open the dishwasher. Stand where you normally prep food. Walk past someone standing at the sink.
You will know very quickly whether the island belongs there.
As a general planning reference, these are useful numbers:
| Area | Planning guideline |
| Work aisle for one cook | 42 in |
| Work aisle for two cooks | 48 in |
| General walkway | 36 in |
| Practical island length for a prep zone | About 4 ft |
| Island length for two-person seating | About 6 ft |
| Seating area with no traffic behind | 32 in |
| Seating area with traffic behind | 36–44 in |
| Typical stool overhang | 12–15 in |
| Knee clearance per seated person | 18 in |
| Opposing counters in a U-shaped kitchen | About 60 in |
These are planning guidelines rather than universal legal requirements. Local building and accessibility rules can vary, so the numbers should be checked against the requirements that apply to your project.
And remember that the island is only part of the equation. Refrigerator doors, oven doors, dishwasher doors, stools, and the main walking path all need room too.
A Note About Island Electrical Work
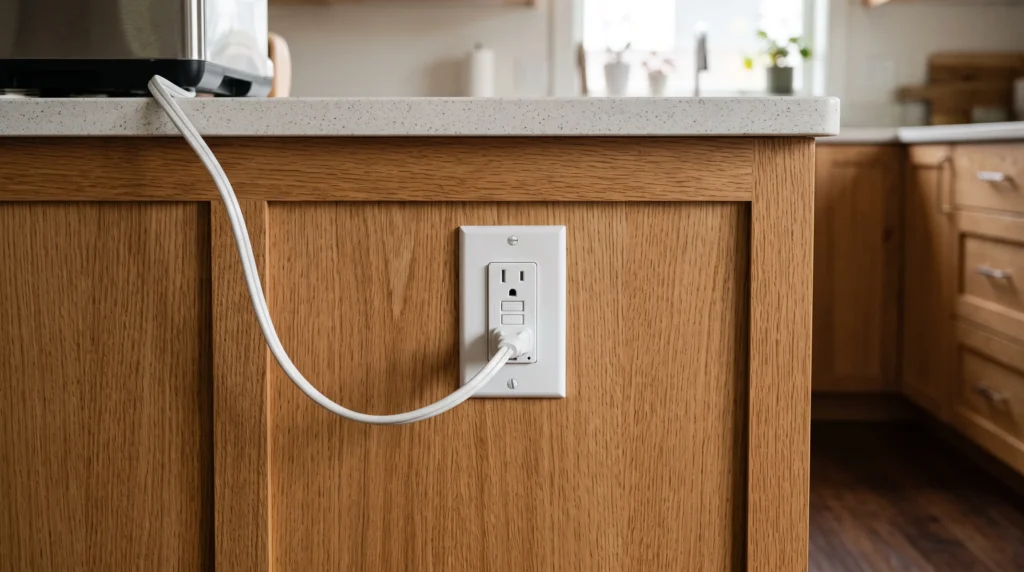
Electrical planning is one of the less glamorous parts of an island remodel, but it is much better to sort it out early.
Under the 2023 NEC, the old blanket requirement for a receptacle on a kitchen island or peninsula was removed. That does not mean every kitchen in every location follows exactly the same rule today. The NEC edition adopted by a local jurisdiction, along with local amendments, can change what is required.
So if you’re building an island, let the electrician determine what applies to the job rather than copying an outlet layout from another kitchen.
The answer can also change depending on whether the island contains a dishwasher, disposal, sink, cooktop, or other equipment.
For a new island, electrical planning should happen before the cabinet and countertop installation, not once the finished island is already sitting in the kitchen.
How Much Overhang Is Too Much?
This is where a pretty seating island can get surprisingly technical.
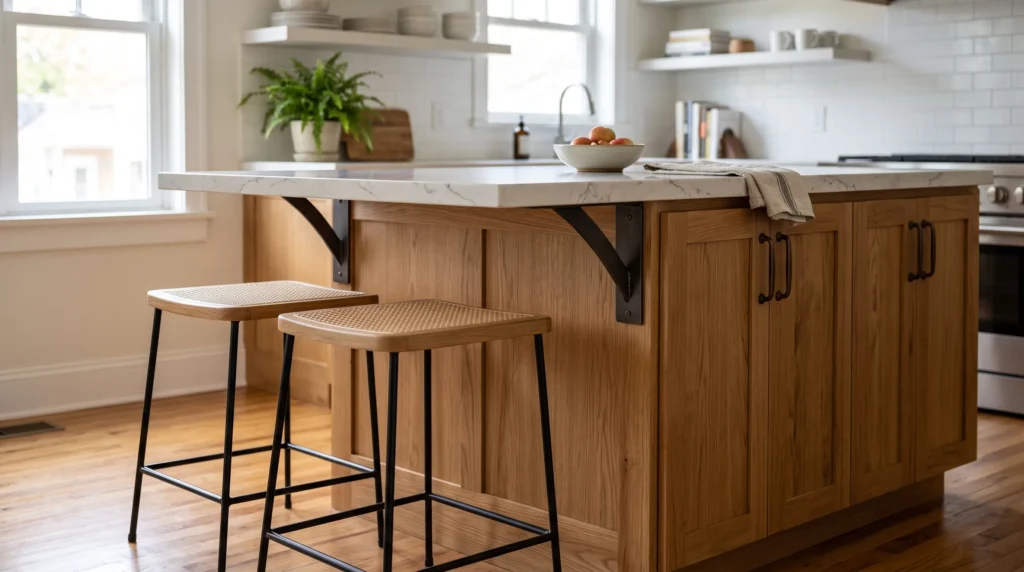
Countertop overhang puts leverage on the top and the cabinet below it. The amount that can safely remain unsupported depends on the material, thickness, cabinet construction, and the countertop manufacturer’s requirements.
For many 3cm stone countertops, roughly 10–12 inches is a useful planning point before additional support becomes necessary. But it is not a universal limit. Some quartz manufacturers allow less.
Once you are designing a larger seating overhang, ask the fabricator to specify the actual support system. That might mean hidden steel brackets, corbels, rods, or another engineered solution.
This matters even more with a long island. A six-foot seating run is a very different structural situation from a little 12-inch ledge.
Do not assume that a decorative corbel is automatically structural just because it looks strong.
If the Cooktop Is Going on the Island
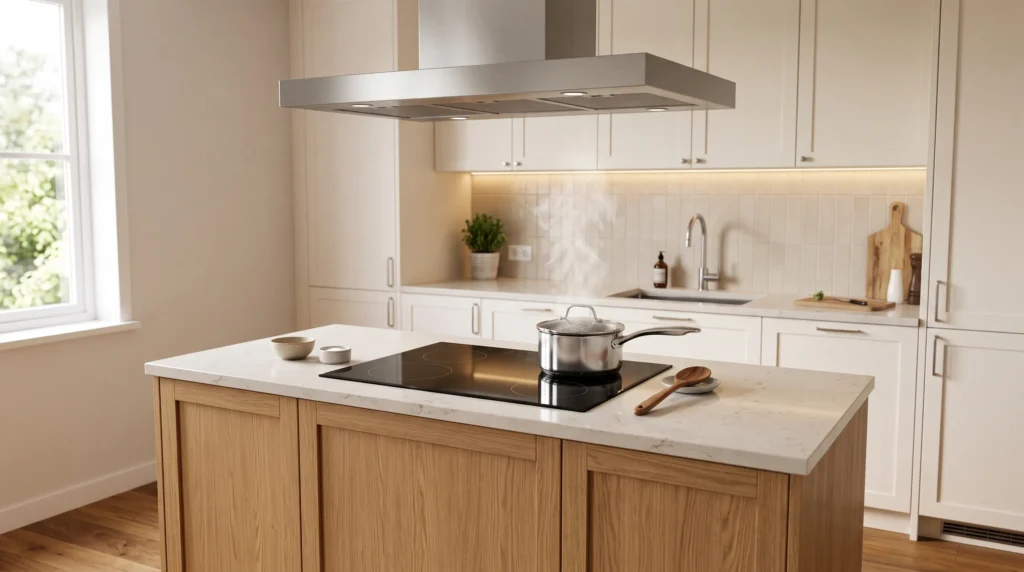
An island cooktop looks sleek, but ventilation becomes more important because there is no wall behind the cooking surface helping with capture.
HVI recommends 150 CFM per linear foot for island installations, compared with 100 CFM per linear foot for cooking surfaces against a wall. Professional-style appliances should be sized according to the appliance and hood manufacturer’s requirements rather than a generic formula alone.
A 30-inch cooking surface is 2.5 linear feet, so the HVI planning figure works out to about 375 CFM.
That number is a starting point, not the entire ventilation design. Hood type, ductwork, appliance output, and local mechanical requirements all matter.
Downdraft systems should also be checked against the manufacturer’s installation and performance requirements instead of being treated as interchangeable with an overhead hood.
Picking a Countertop for a Small Island
Because the island is usually the most visible part of the kitchen, the countertop choice can do a lot of the design work.
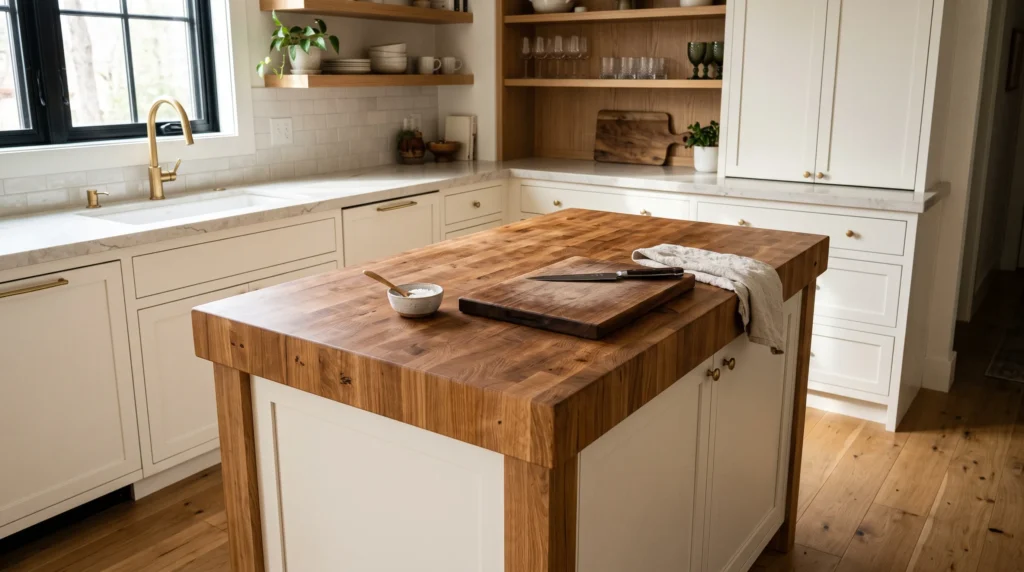
You don’t necessarily need to match the rest of the kitchen. A wood island top in an otherwise stone-heavy kitchen can look intentional. A contrasting quartz can make basic cabinetry feel much more finished.
Here are the rough planning ranges from the original cost comparison:
| Material | Approx. cost per sq. ft. | Durability | Maintenance |
| Laminate | $10–$40 | Moderate; edges can chip | Low |
| Butcher block | $35–$70 | Good when properly maintained | Regular oiling/care |
| Quartz | $50–$120 | Excellent for everyday use | Low; no sealing required |
| Granite | $70–$140 | Excellent | Moderate; sealing may be needed |
| Marble | $100–$190+ | More vulnerable to staining and etching | High |
| Stainless steel | $60–$100+ | Stain resistant; can dent | Low |
Actual prices vary by supplier, region, thickness, fabrication, finish, and installation.
15 Small Kitchen Island Ideas
1. Slim Prep Island
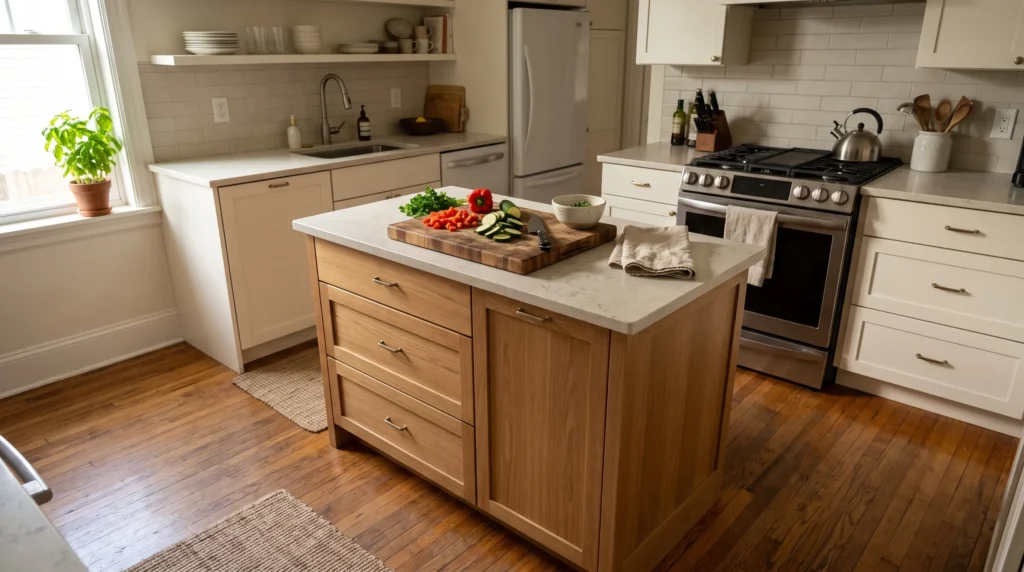
You don’t always need a deep island to make the kitchen more useful.
A 48-inch-long by 24-inch-deep island is enough to create a proper little work zone without taking over the middle of the kitchen. That extra surface can make a surprisingly big difference when you’re cooking. Suddenly there’s somewhere to chop vegetables, put the cutting board, set down a hot pan, or unload groceries without having to clear the dining table first.
The 24-inch depth is what makes this option so useful for smaller rooms. You are getting the function of a built-in island without adding a huge block of cabinetry. It works especially well when the kitchen has enough width for a comfortable work aisle but simply doesn’t have the room for one of those oversized islands you see in larger homes.
I would keep the cabinet design fairly simple here. Drawers are much more useful than filling the island with decorative details, especially when every inch of storage matters. A shallow drawer can hold utensils, while a deeper one can take pans or mixing bowls.
And I would resist the temptation to add seating just because there is technically enough room for a little overhang. A 24-inch-deep island is usually at its best as a prep surface. Trying to turn it into a dining area can make the whole thing feel cramped.
Depending on the cabinet construction and countertop, expect roughly $1,000–$3,000.
Before buying anything, tape a 48-by-24-inch rectangle onto the floor. If you can comfortably walk, open the refrigerator, and work around it, you are already much closer to knowing whether the idea will work.
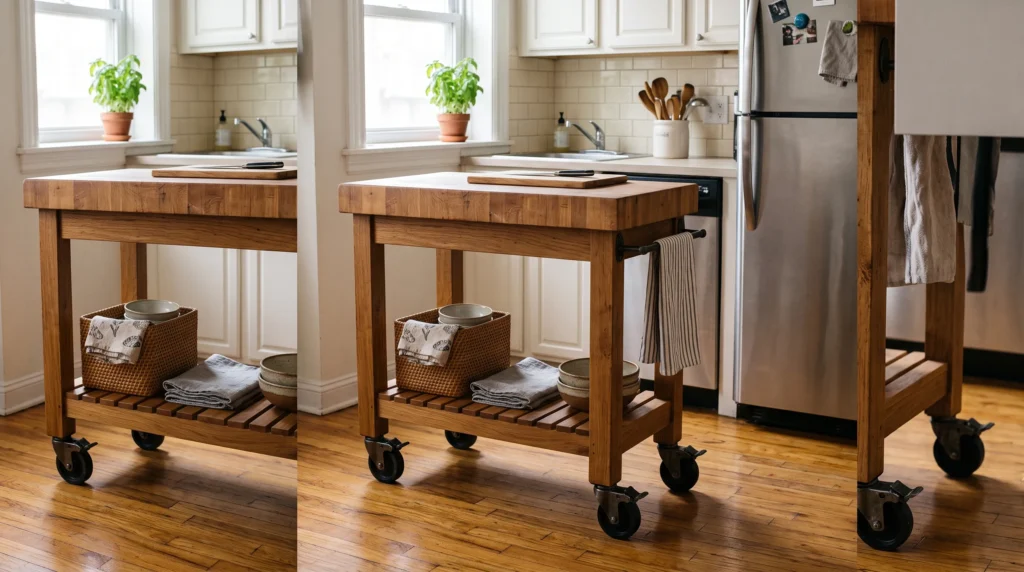
2. Rolling Butcher-Block Cart
There are kitchens where a fixed island would simply be too much.
A rolling cart gets around that problem. You can pull it toward the work area when you’re cooking, use it as a temporary serving station when people come over, and push it against the wall when you need the floor back.
A 30–36 inch long and 18–24 inch deep cart is usually enough to feel useful without becoming another obstacle in the room. The depth is particularly helpful in a tiny kitchen because it leaves more of the walking path open.
Pay attention to the casters. They are easy to overlook because the countertop gets all the attention, but a cart loaded with cast iron pans, bottles, and groceries gets heavy very quickly. Locking casters are worth having, and the combined weight rating should be appropriate for the finished cart rather than just the empty furniture.
The butcher-block top brings another consideration. If you’re planning to cut directly on it, use a finish intended for food-prep use and maintain the surface according to the manufacturer’s instructions. If the top has a protective coating that is not designed for direct cutting, treat it like a normal countertop and use a cutting board.
The usual price range is about $100–$900, which makes this the easiest idea on the list to try without committing to a renovation.
It is particularly handy in rental kitchens, very small apartments, or kitchens where the same floor space sometimes needs to serve two purposes.
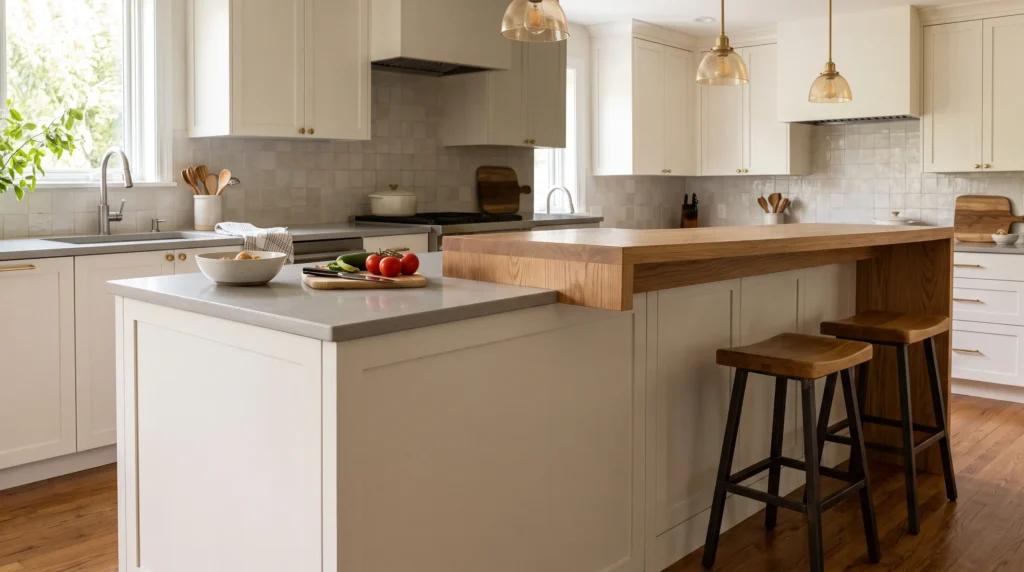
3. Two-Tier Breakfast Bar
A two-tier island solves a problem that comes up often in small kitchens: you want seating, but you don’t really want the seating to take over the prep space.
The basic idea is to keep the main countertop at your normal working height and raise another section for stools. That creates a subtle separation between the cooking side and the sitting side.
There is also a practical reason people like this arrangement. If the island faces an open living room, the raised section can hide a little of the everyday kitchen mess. You can leave a mixing bowl or a few groceries on the lower surface without feeling like everything is on display.
The raised ledge is still an overhang, though, so don’t treat it as purely decorative. The countertop fabricator should determine what kind of support is needed for the material and the amount of extension.
For seating, allow about 18 inches of knee space per person. The stool height needs to match the finished counter height too; otherwise even a beautiful breakfast bar can become uncomfortable after a few minutes.
Custom versions generally fall around $3,000–$7,000, depending on the cabinetry and countertop.
This is a particularly good solution when the kitchen needs to function as a casual breakfast spot but there isn’t enough room for a separate table.
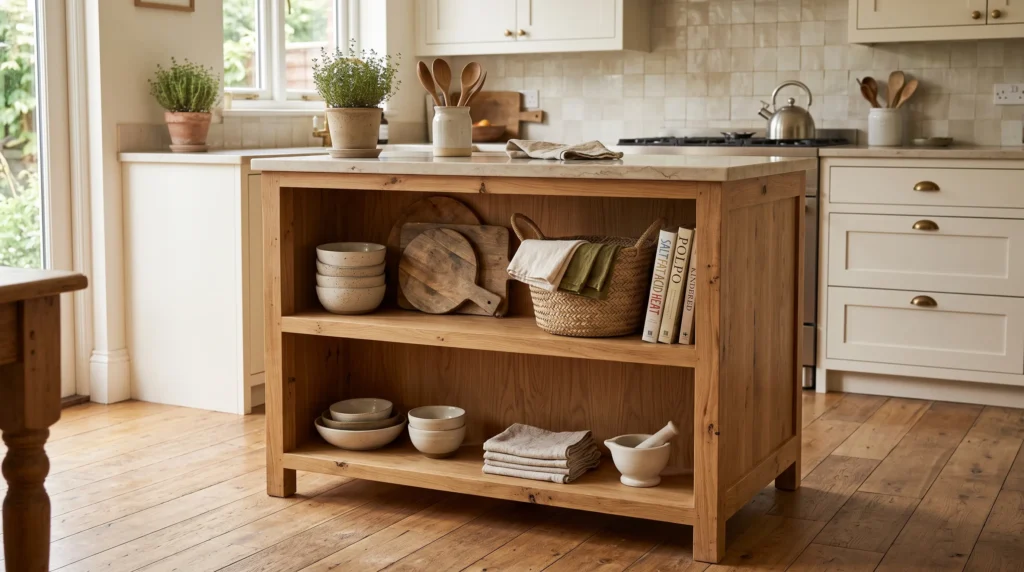
4. Open-Shelf Island
Open shelving is useful when a small island starts to feel visually heavy.
A solid row of cabinet doors can make a compact room look like it has another wall sitting in the middle of it. Replacing part of that closed storage with open shelves breaks things up and gives the island a little breathing room visually.
You can use the shelves for bowls, cutting boards, cookbooks, baskets, everyday plates, or a few pieces you actually enjoy looking at. Items you use regularly are especially good here because you won’t have to open a cabinet every time you need them.
The trick is not to turn the island into a dumping ground.
Open storage looks light when it is edited. It starts looking chaotic when every spare appliance, food packet, and random kitchen tool gets pushed onto the shelves. In a small kitchen, that visual clutter can make the entire room feel smaller.
The shelves also make the island read more like furniture, which can be a nice change from the standard block of lower cabinets.
This style works particularly well when the rest of the kitchen already has plenty of closed storage. If you are desperately short on storage overall, though, I would keep at least some enclosed cabinets in the island.
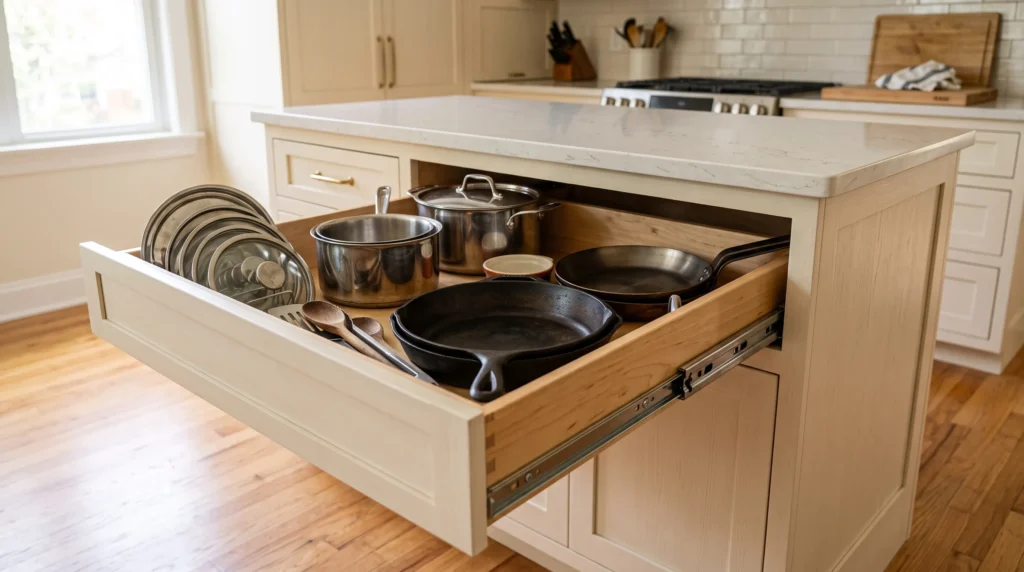
5. Deep-Drawer Storage Island
For some kitchens, the best island idea isn’t really about appearance at all. It’s about getting the pots out of that awkward cabinet where everything disappears into the back.
Deep drawers are much easier to use for cookware than traditional doors. Pull one open and you can see the whole stack of pans instead of kneeling down and reaching around whatever happens to be in front.
A shallow upper drawer can take utensils, measuring spoons, towels, or smaller tools. Deeper drawers can handle frying pans, Dutch ovens, mixing bowls, baking dishes, and other bulky things that are annoying to store on ordinary shelves.
There is a small detail worth spending money on here: the drawer hardware. Quality full-extension slides make a noticeable difference because the drawer can come all the way forward. That matters even more when the drawer is deep and heavily loaded.
If you’re storing cast iron, appliances, or other heavy cookware, make sure the hardware is rated for the load. A drawer that feels smooth when empty can behave very differently once it is packed with heavy pans.
This is the island I would choose for a kitchen where storage is the biggest problem. It may not have the wow factor of a waterfall edge, but you will probably appreciate it every single day.
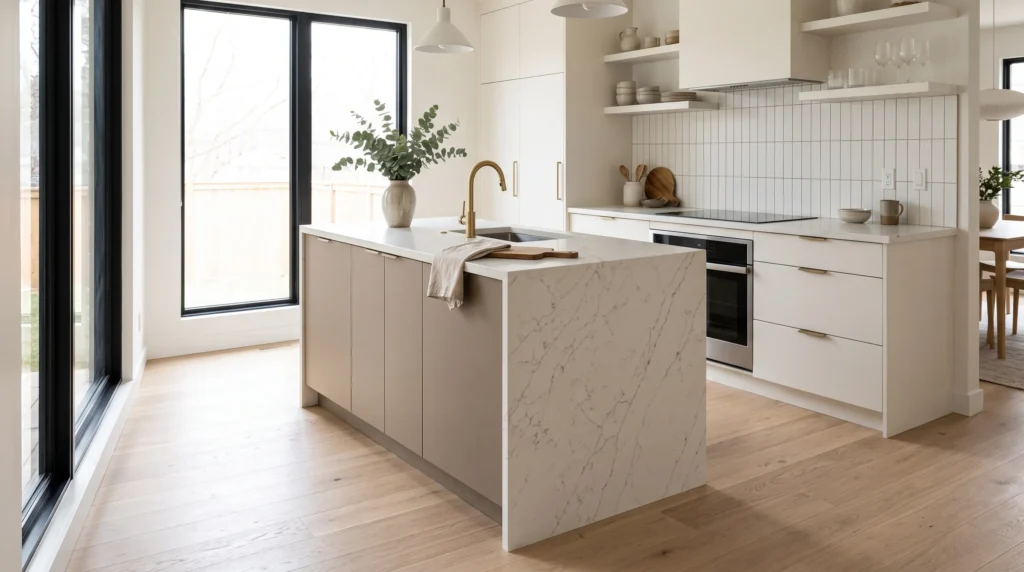
6. Waterfall Countertop Island
A waterfall edge can make a fairly ordinary island look custom almost immediately.
Instead of stopping the countertop at the front edge, the material continues down the side of the island. From the living room or dining area, the result looks much more like a finished piece of furniture than a standard cabinet box.
Quartz is a practical choice for this look because it is available in a wide range of patterns and is relatively low maintenance. The fabrication is more involved than a normal countertop, though. The mitered corner needs to be cut and joined carefully so the material reads as one continuous surface.
That is why this is not usually the place for a bargain countertop installation.
The side panel also makes chips or damage at the lower edge more noticeable, so the quality of the fabrication and installation matters. Marble can look gorgeous here, but the softer material can require extra care around exposed mitered corners.
For a standard-sized island, a waterfall treatment can push the cost into the $4,000-plus range, with marble and other premium materials going higher.
The look is expensive because, well, the fabrication often is.
If the island is visible from another room, however, that extra finish can have a bigger visual payoff than spending the same money on details that nobody really sees.
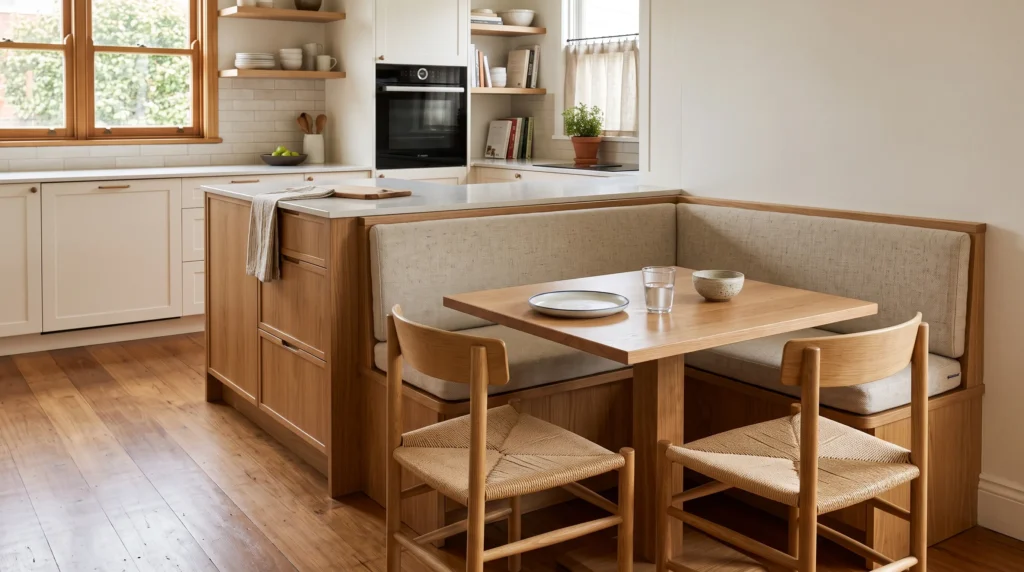
7. Built-In Dining Nook Extension
If there is no room for both an island and a dining table, combine them.
A built-in bench can extend from the island and create a compact eating area without introducing another piece of furniture into the kitchen. With a hinged or lift-up seat, the bench can even provide hidden storage for table linens, serving pieces, or less frequently used kitchen items.
The downside is that the island is no longer the only thing you need to measure.
You have to account for the depth of the bench, the person sitting on it, the table or countertop in front of them, and the path behind the diners. A design that works on paper can feel surprisingly tight once two people are actually sitting there.
A seating area may work with around 32 inches of clearance when nobody is walking behind the diners, but a real passage needs more room.
Custom carpentry can add roughly $1,500–$4,000 to the project, depending on how much of the seating is built in.
This is a nice option for an open-plan kitchen where a separate table would eat up too much floor space. It is less convincing in a very narrow kitchen, where the dining extension may simply replace one space problem with another.
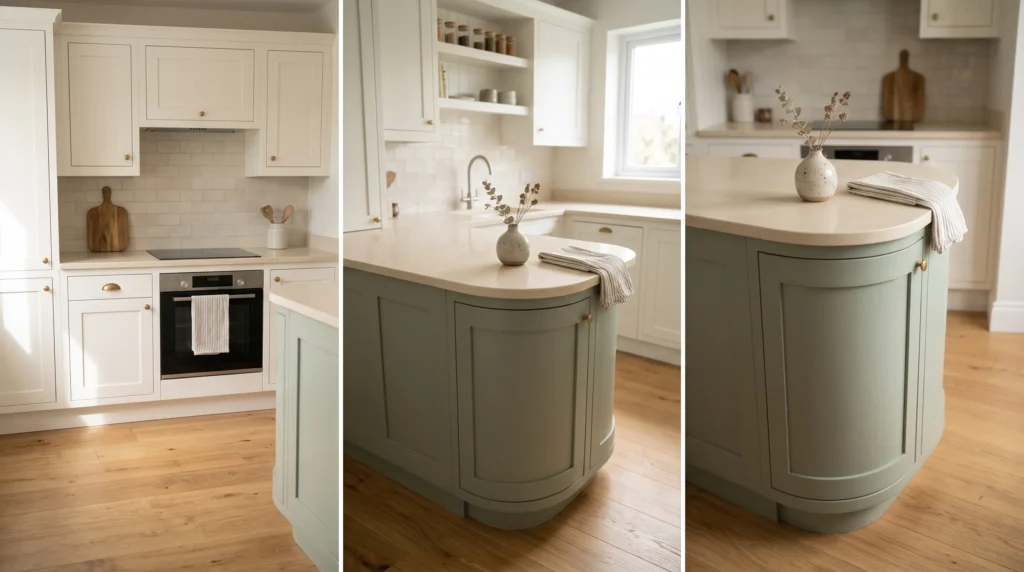
8. Curved or Radius-Edge Island
A curved island is not just a style trick.
In a tight kitchen, removing a sharp corner can make a busy walkway feel more comfortable. You are not bumping into a square edge every time you pass, and the room can feel a little softer without actually gaining any floor space.
A radius of around 6–12 inches is common in a softer, furniture-style design, although the practical limit depends on the cabinet construction and countertop material.
The countertop is where the custom work starts to show up. Stone, laminate, and wood do not all handle curves in the same way, and tighter curves may require different fabrication methods. Some stone fabricators will recommend a larger minimum radius depending on the material.
Curved fabrication can add roughly 10–20% to countertop costs compared with a straightforward straight edge, although the actual premium depends heavily on the shape.
The nice thing about this idea is that it changes the feel of the room without making the island larger. In a narrow kitchen, that can be more valuable than adding another few inches of counter.
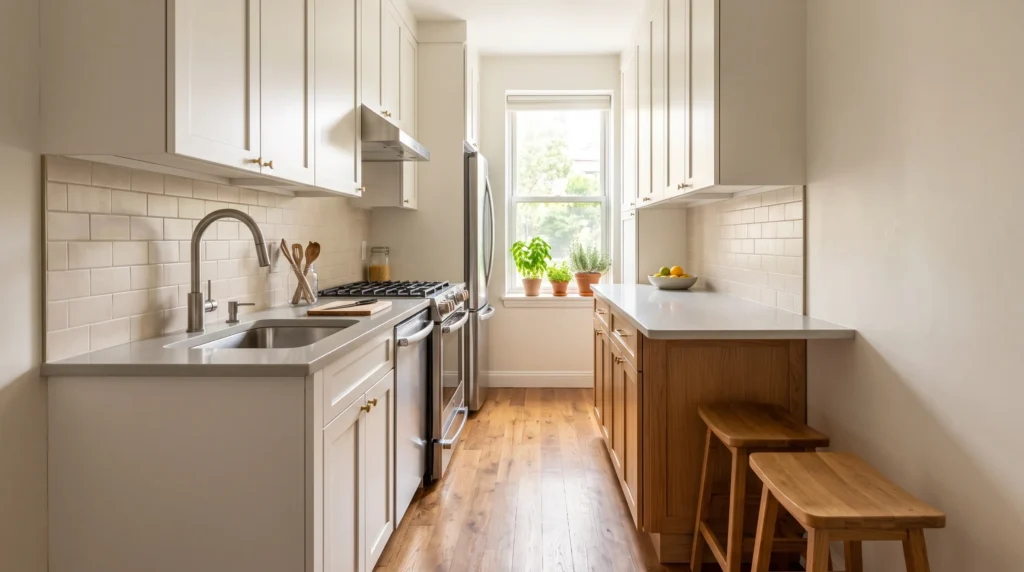
9. Narrow Peninsula
Sometimes the smartest small kitchen island idea is to stop trying to build an island.
A peninsula can give you much of the same functionality while staying connected to the existing wall or cabinetry. You still get a place to prep food, store cookware, or pull up a couple of stools, but you don’t have to maintain a walking aisle all the way around it.
That makes a huge difference in a narrow galley kitchen.
A typical peninsula may be around 24–30 inches deep, with the exact length determined by the available wall run. Because one end is attached, that side does not need the same open circulation space as a freestanding island.
The open side still needs comfortable clearance, particularly if people will sit there. And once you add an overhang, the countertop support requirements are similar to those of a freestanding island.
A peninsula can also be less expensive because one side does not need the same finished panels or access as a freestanding unit.
This is often the better answer when the kitchen is simply too narrow for a true island. There is no prize for having four walk-around sides if the result makes the room difficult to use.
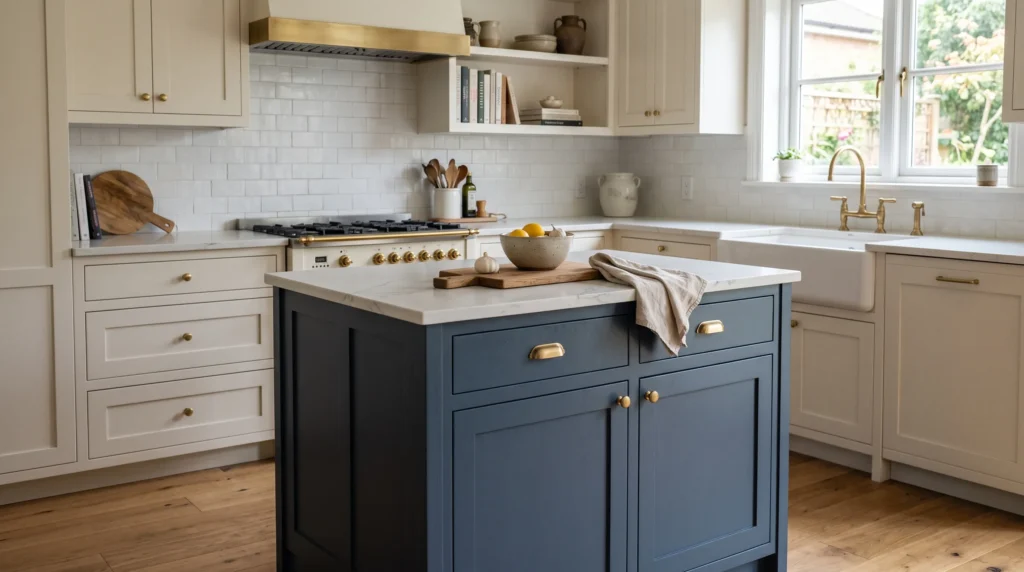
10. Painted Accent Island
Want a different island without rebuilding the kitchen?
Paint can do a lot.
A contrasting color such as sage, charcoal, navy, muted green, or a warm cream can make the island look like a separate piece of furniture. It gives you a focal point without changing the footprint, countertop, plumbing, or storage.
That makes it one of the easier upgrades to try when the existing island already works but looks a little bland.
Use a cabinet-grade finish rather than ordinary wall paint, particularly around corners, handles, drawer fronts, and other high-contact areas. A good surface preparation also matters; otherwise the new color can look uneven or start wearing much sooner than expected.
And because the island stays exactly where it is, there is no risk of discovering six months later that the new layout blocks the dishwasher.
This one is mostly about appearance, but sometimes appearance is exactly what the kitchen needs. If the layout is already good, there may be no reason to rebuild perfectly functional cabinetry just to make the room look fresher.
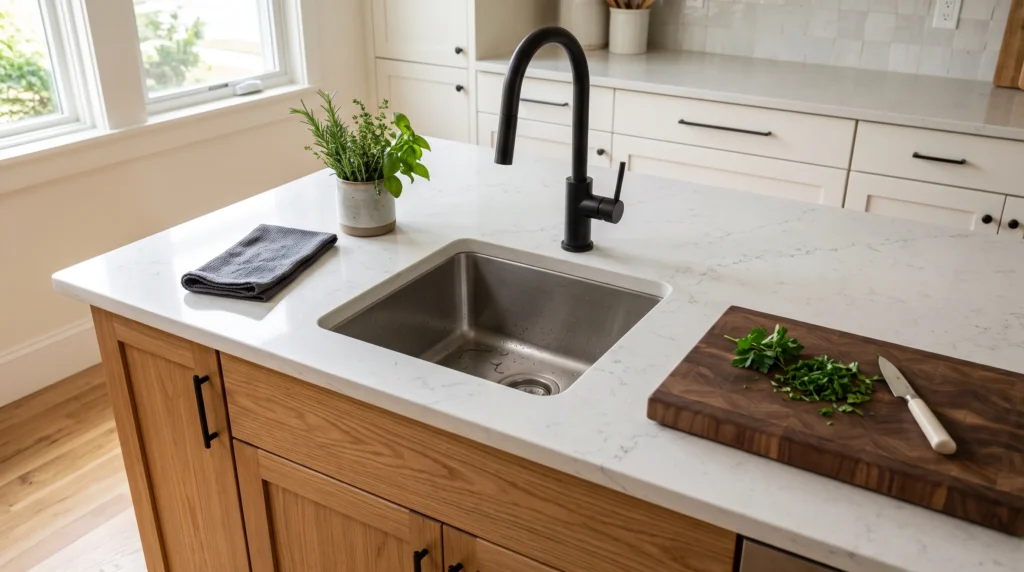
11. Compact Sink Station
A small sink can turn the island into a real work center.
A single-bowl sink around 15–18 inches wide takes up less countertop than a large farmhouse-style basin and leaves more room around it for chopping, setting down dishes, or preparing food.
The complicated part is underneath.
Water supply and drainage have to be planned before the countertop is installed. If there is a dishwasher nearby, check the door swing and the space where someone will stand while loading it. A sink that technically fits in the cabinet can still create an awkward work zone once the surrounding appliances are considered.
The countertop cutout matters too. Once you cut a large opening into the top, you no longer have the same uninterrupted span of material. The fabricator needs to account for the remaining material around the sink and any nearby unsupported overhang.
This is why a sink island makes much more sense during a full renovation than as a last-minute upgrade.
It can make the kitchen workflow better, but the plumbing and countertop work mean it is not a simple cosmetic change.
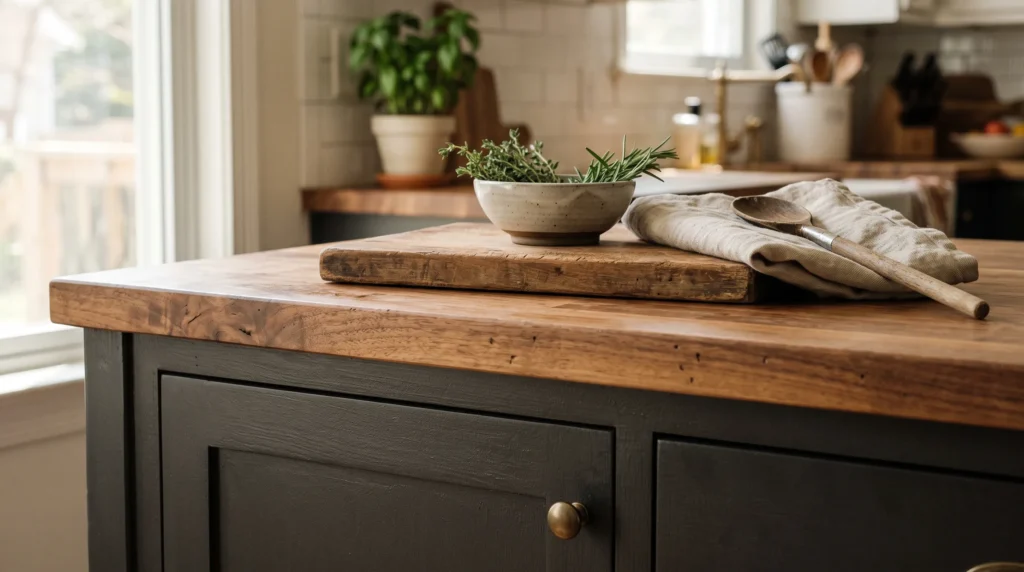
12. Butcher-Block Contrast Top
A butcher-block top on the island can warm up a kitchen that feels a little too hard or cold.
It works particularly well with painted cabinets, white kitchens, stainless-steel appliances, and gray stone. Instead of replacing every countertop, you can use wood only where you want the visual change.
That contrast is often enough.
You do need to accept a little more maintenance, though. Depending on the finish, the surface may need regular oiling, and standing water should not be allowed to sit there.
If the wood has a polyurethane-type protective finish, use a cutting board rather than cutting straight on the countertop. If it has a food-safe finish intended for direct food preparation, follow the care instructions for that specific product.
At about $35–$70 per square foot, butcher block also tends to sit in a more approachable price range than premium marble.
One other advantage is the character. Minor marks and changes over time can become part of the look rather than automatically making the island feel worn out.
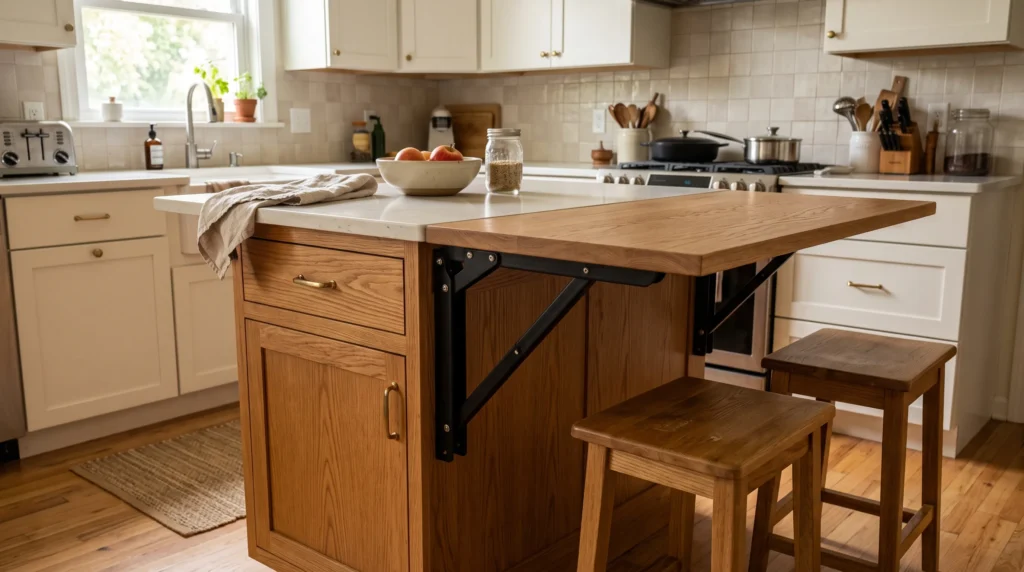
13. Drop-Leaf Extension Island
This is the island for people who need more countertop only when the kitchen is busy.
The leaf stays folded most of the time, keeping the everyday footprint small. Raise it when you need a little extra room for baking, serving, laying out food, or occasionally pulling up a stool.
A typical extension might add 12–18 inches, which does not sound like much until you are trying to roll out pastry or put dinner on the table for several people.
The support hardware matters more than it first appears. A large leaf that relies only on a hinge can sag over time, especially if it is repeatedly loaded with dishes, appliances, or someone leaning on the edge.
A folding leg or properly rated support bracket is a better solution for a larger extension.
It is a small detail, but this kind of island is all about details. When the support is right, the extension feels effortless. When it is wrong, you notice the sag every time you use it.
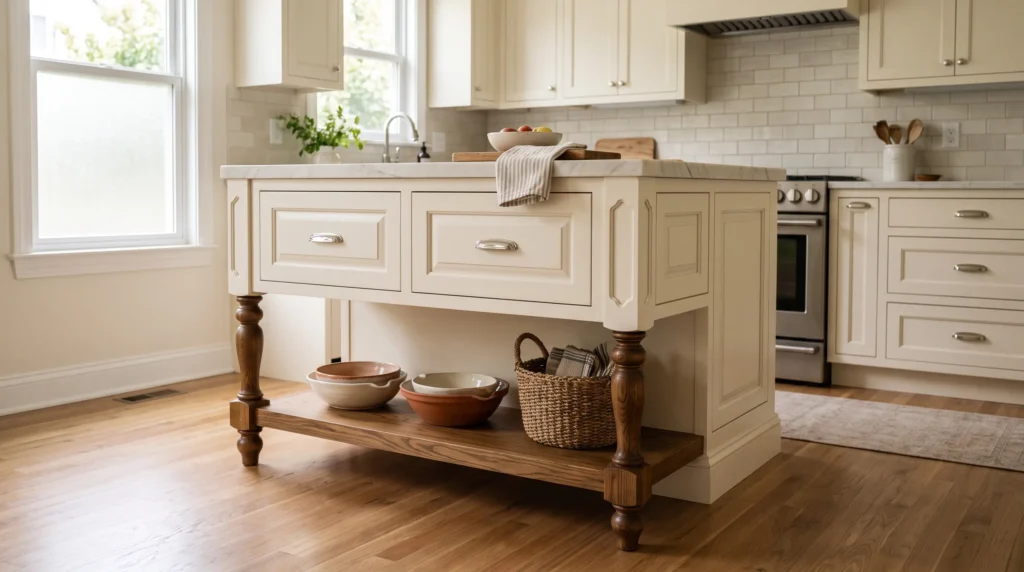
14. Furniture-Style Island
A furniture-style island can make a small kitchen feel less like a row of cabinets and more like a room with actual furniture in it.
Think exposed legs, open corners, turned details, decorative panels, or an island base that looks more like a freestanding console than a built-in box.
The footprint does not magically shrink, of course. What changes is how heavy the island looks from across the room. Opening up part of the base can give the eye somewhere to travel instead of stopping at a solid wall of cabinetry.
There is a trade-off. Open legs and decorative spaces take away some cabinet volume, and custom details generally cost more than standard cabinetry.
If you’re using a stone countertop, the base also needs to be designed to carry the weight of the finished top. Delicate-looking legs may be visually light, but they still have to do a structural job.
For cottage, traditional, transitional, and collected kitchen styles, though, the softer appearance can be worth the lost storage.
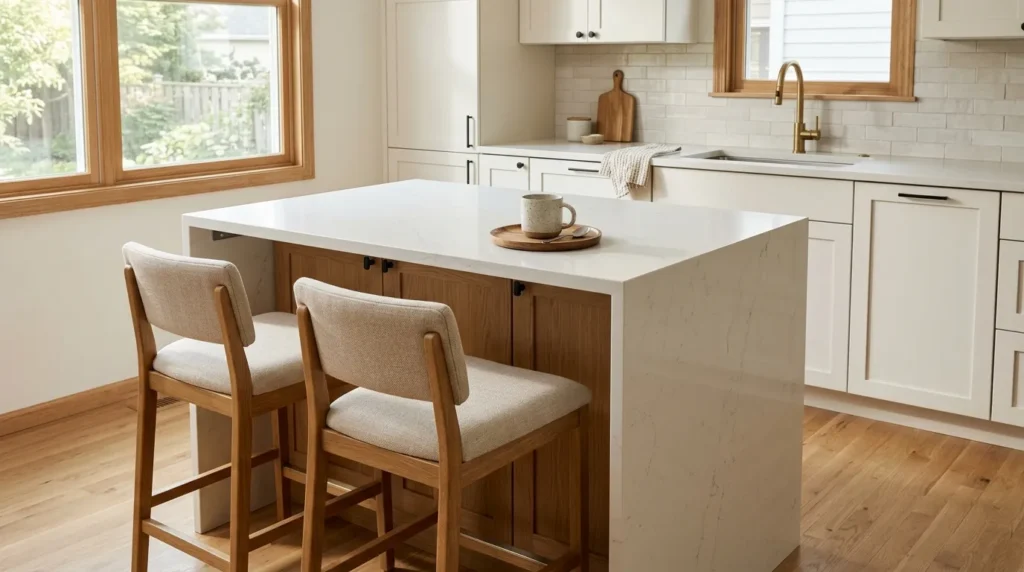
15. Minimal Waterfall Bar With Stool Seating
This is the one for the kitchen that wants a little bit of everything.
A 4-foot island can work as a compact seating bar for two, especially when the stools are positioned correctly and there is enough knee clearance underneath.
Add a waterfall side and the island becomes a design feature as well as a breakfast spot. It can take the place of a small dining table in a studio, one-wall kitchen, or open-plan space where there simply isn’t another place to put one.
The challenge is the overhang.
A 12–15 inch overhang can be beyond the unsupported limit for some quartz and granite installations. Rather than assuming a number from a generic chart, have the countertop fabricator determine the required support for the exact material and thickness.
You are also trading some cabinet depth or uninterrupted workspace for seating, so proportions matter. Two stools should not leave the working side feeling squeezed or force people to sit directly in the main traffic path.
Still, when a separate dining table is not realistic, this can be a very effective use of a small footprint. You get seating, prep space, and a strong visual feature without asking the room to accommodate three separate pieces of furniture.
How to Choose the Right Island
Start with the floor, not Pinterest.
Measure the kitchen. Mark the island out with painter’s tape. Put the stools where they would actually go. Open the fridge and dishwasher. Walk around the taped outline while someone else pretends to cook.
It sounds simple, but this is where you catch most of the problems.
If the kitchen is very tight, a rolling cart may give you more real-world usefulness than a permanent island. A peninsula can be the better choice when the room is too narrow for walk-around access. If storage is the main issue, put your money into drawers instead of decorative details.
And if you want seating, do not just measure the countertop. Measure the people sitting there.
For a sink or cooktop island, think about the services before the styling. Plumbing, electrical work, ventilation, countertop cutouts, and support all need to be planned before the finished surfaces go in.
The best small kitchen island is not the biggest one you can physically squeeze into the room.
It is the one that gives you just enough extra function without making the kitchen harder to use.
Sometimes that is a simple 4-foot prep island. Sometimes it is a rolling butcher-block cart. Sometimes the right answer is a peninsula that barely feels like an island at all.
Once the measurements work, the pretty part gets much easier.
Common Questions
What is the smallest useful kitchen island?
A lot of designers start around 4 feet long by 24 inches deep for a practical compact island.
But the island itself is not the deciding factor. If there is not enough room around it for the refrigerator, oven, dishwasher, and people to move comfortably, even a beautifully designed 4-foot island is too large for that kitchen.
Does a kitchen island need an electrical outlet?
Not automatically under the 2023 NEC.
The previous blanket receptacle requirement for islands and peninsulas was removed, but the code used by your local jurisdiction and any amendments can change what applies to your project.
An electrician should verify the current local requirements before wiring the island.
How far can a countertop overhang go without support?
There is no one number that works for every countertop.
Material thickness, countertop construction, cabinet design, and the manufacturer’s specifications all matter.
For many 3cm stone installations, roughly 10–12 inches is a useful planning range, but some manufacturers allow less and larger overhangs may require engineered support.
How much ventilation does an island cooktop need?
HVI recommends 150 CFM per linear foot for island cooking surfaces. That is higher than its general wall-installation guideline because the island does not have a wall behind it assisting with capture.
Always check the appliance and hood manufacturer’s requirements too, especially with professional-style cooking equipment.
Do small kitchen islands add value?
They can add appeal and improve how a kitchen works, but there is no guaranteed return based simply on adding an island.
A useful island that fits the room is a much better investment than a larger island that blocks doors or makes the kitchen frustrating to use.
Can I install a small island myself?
A rolling cart or some ready-to-assemble islands can be reasonable DIY projects.
Things become different when plumbing, electrical wiring, a cooktop, sink, stone fabrication, or structural countertop support enters the picture. Those parts need proper planning and should comply with the requirements that apply to the project.
Is butcher block or quartz better?
For low maintenance, quartz is the easier choice.
For warmth and a more natural, furniture-like appearance, butcher block has a lot going for it.
The right choice depends on how you use the island and how much maintenance you are comfortable with.
Is a waterfall countertop practical on a small island?
Yes, but it is more of a design investment than a budget one.
The extra material and fabrication make it more expensive than a standard edge, especially when the island is small enough that every custom cut is noticeable.





3 Comments