17 Small Kitchen Ideas That Look Custom and Chic
Think a small kitchen has to feel cramped, plain, or impossible to personalize? Think again. The right small kitchen ideas can make limited square footage feel more functional, organized, and intentionally designed.
The biggest improvements in a compact kitchen often come from decisions that have little to do with adding more decor. Better storage, thoughtful proportions, useful lighting, and an uncluttered layout can change how the entire room feels and functions. In this guide, you’ll find 17 practical ideas covering slim islands, full-height storage, layered lighting, hidden appliances, clever corners, and other space-conscious details. Each idea is designed to help you decide what could work in your own kitchen, whether you’re working with a narrow layout, a small apartment, or simply less space than you’d like.
Light-Toned Cabinetry
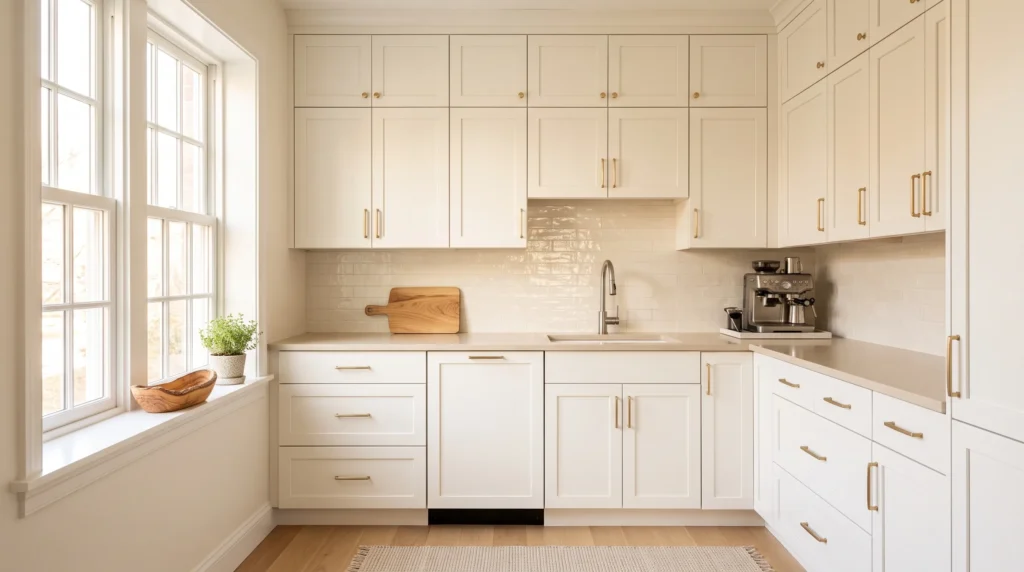
A narrow kitchen can look surprisingly roomy when cabinets, counters, and the walkway are treated as one cohesive composition. Light cabinetry paired with a compact island and simple hardware creates a tailored look without overwhelming the space. Run upper cabinets close to the ceiling to remove awkward gaps, and stick to one finish across the main storage pieces — mixing too many tones is what usually makes a small room feel busy.
This setup works especially well in apartments, townhouses, and older homes with irregular layouts. A narrow island or peninsula, paired with drawers instead of lower cabinets, keeps cookware within easy reach. Warm wood accents soften an all-white palette, and brushed metal pulls add a finished touch. Keep countertop appliances in one designated zone rather than scattered across the counter — a few open shelves for attractive dishware go a long way, but leaving most surfaces clear is what actually makes the room breathe.
Practical tip: Before choosing an all-white palette, look at how much natural light the kitchen receives throughout the day. In a darker kitchen, a warm white or soft beige can feel more welcoming than a stark, cool white.
Slim Kitchen Island
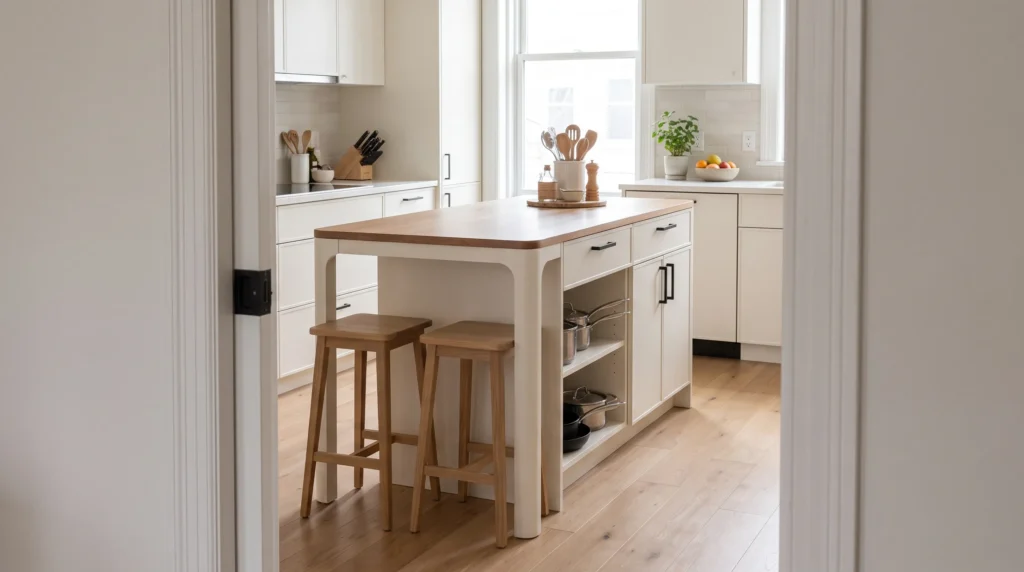
A narrow island that’s designed to earn its keep can be one of the highest-impact additions to a compact kitchen. It adds prep space, hidden storage, and casual seating for one or two people without blocking the main walkway. A simple rectangular shape with rounded edges works well in tight layouts, and repeating the cabinet finish gives it a built-in look rather than a bolted-on one. Scale matters more than size here — an island only works if it matches the room, not the largest footprint that technically fits.
Deep drawers can store pots, pans, cutting boards, or small appliances, while a shallow open shelf keeps cookbooks or serving pieces handy. A waterfall quartz edge gives a furniture-like finish, though a simple wood top creates a warmer, lighter feel. Push stools fully underneath when they’re not in use. Done well, one island can serve several purposes while keeping the surrounding floor open.
Practical tip: Before committing to a fixed island, mark its planned footprint on the floor with painter’s tape. Walk around it, open nearby cabinet and appliance doors, and check whether the remaining space still feels comfortable. This quick test can reveal a poor fit before you spend money on installation.
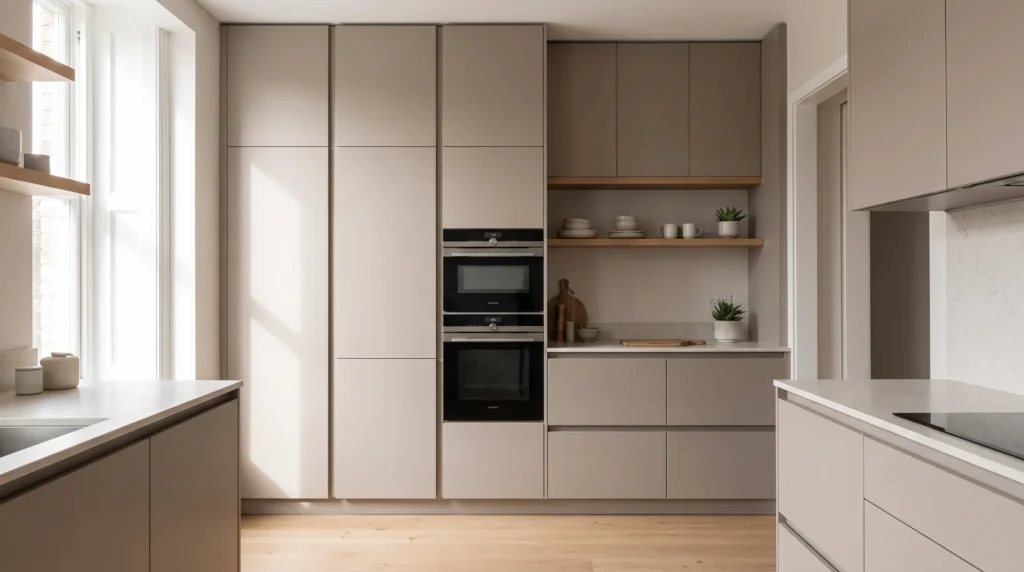
Floor-To-Ceiling Storage
Going vertical changes how much storage a kitchen seems to have. Full-height cabinets use wall space efficiently and give the room a clean, built-in appearance. Keep everyday dishes and glasses at eye level, and push seasonal or rarely used pieces to the top shelves. A narrow open shelf can break up a solid cabinet wall and create room for a few display pieces. Less counter clutter, more breathing room — that’s the real payoff of building up instead of out.
Practical tip: Before extending cabinets to the ceiling, check what you’ll actually store in the upper section. It works best for serving pieces, seasonal items, and appliances you rarely use. Keep everyday dishes and glassware within comfortable reach so the extra height adds storage without making daily routines harder.
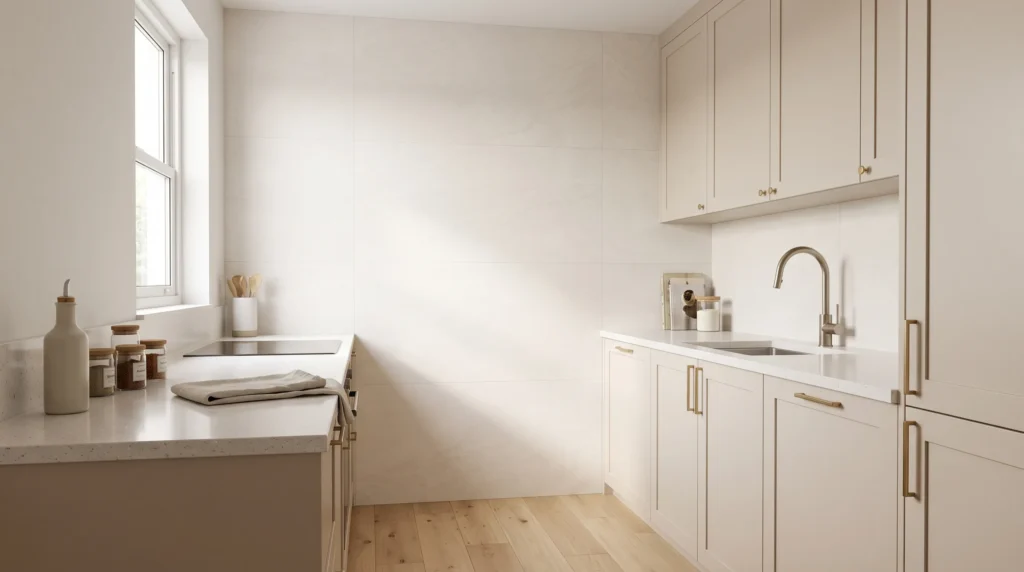
Full-Height Backsplash
Treating the backsplash as one continuous surface gives a compact kitchen a polished focal point without adding bulky furniture. Large-format tile means fewer grout lines, so the wall reads as calmer and more expansive. Soft white, warm beige, pale gray, or subtle stone patterns complement cabinetry rather than compete with it — simple materials tend to look more sophisticated in small rooms because they let the architecture and light do the work.
For daily use, porcelain, ceramic, and quartz all wipe clean easily and hold up to everyday cooking. Carrying the same material behind the cooktop and along the main counter creates continuity, and a slightly textured tile adds interest without making the room feel busy. Match the grout color close to the tile if you want the wall to visually recede.
Practical tip: A backsplash should look good but also survive everyday cooking. Porcelain, ceramic, and quartz are practical choices for areas that see regular splashes, while matching the grout closely to the tile can make a small kitchen look more continuous and less visually busy.
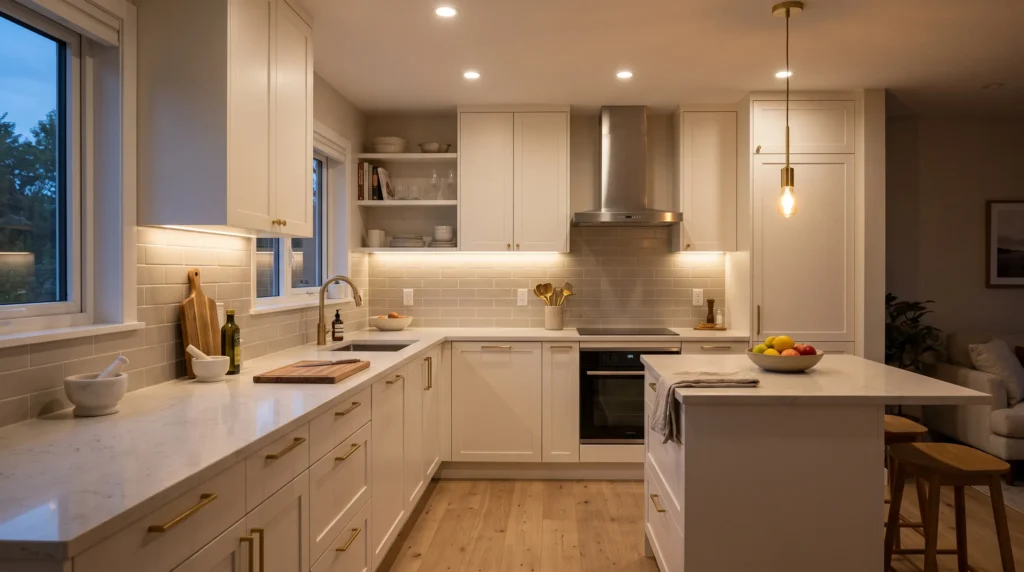
Layered Kitchen Lighting
Good lighting makes a compact kitchen feel more inviting, especially where natural light is limited. Combine ceiling fixtures, under-cabinet strips, and one decorative pendant to brighten different work zones without cluttering the room visually. Warm white bulbs keep the atmosphere comfortable, while brighter task lighting supports actual food prep. Place lights where shadows tend to form, particularly under upper cabinets — under-cabinet lighting is often the single most noticeable upgrade because it improves both nighttime use and the room’s sense of depth.
Keep fixtures visually simple so lighting supports the room rather than competing with it. A slim linear pendant can define a peninsula, while recessed or flush-mount fixtures preserve headroom in lower-ceiling rooms. Match finishes to existing hardware — brass, black, or brushed nickel — and avoid heavy curtains if the kitchen gets any daylight at all.
Design note: Think about lighting in zones rather than relying on one bright fixture. The prep area needs clear task light, while softer light around a dining nook or peninsula can make the kitchen feel more comfortable in the evening. Keeping these layers on separate controls gives you more flexibility throughout the day.
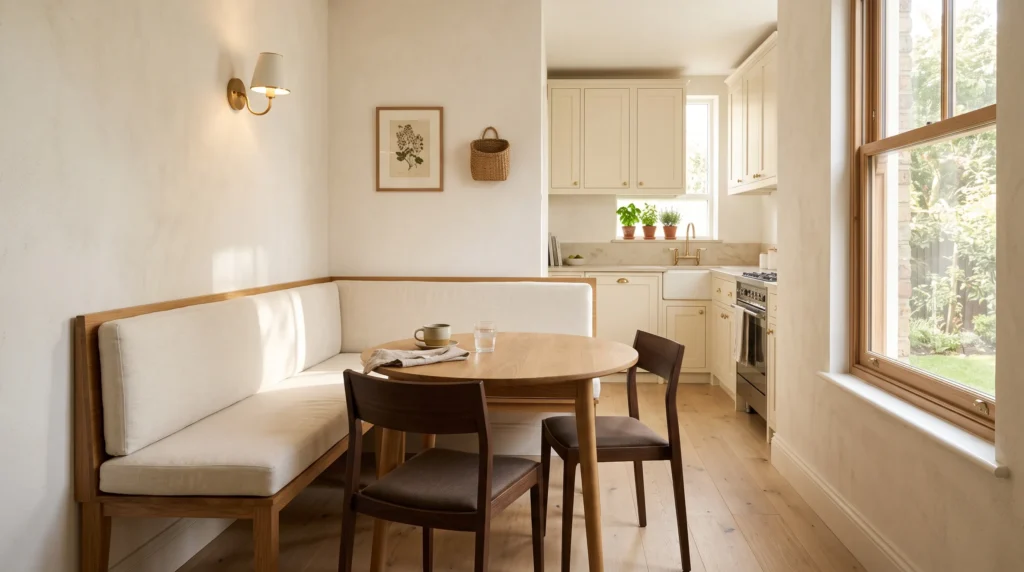
Built-In Breakfast Nook
An awkward corner can become one of the most-used parts of a compact kitchen with a built-in nook. Instead of a freestanding table in the middle of the room, a slim bench against the wall paired with a small round or rectangular table keeps the main walkway clear while creating a comfortable spot for coffee, quick meals, or homework. A fitted cushion in washable fabric adds comfort without adding bulk — this arrangement works particularly well in narrow layouts where every inch needs to pull double duty.
Repeat one or two materials already used elsewhere to tie the nook into the rest of the room: a light oak bench echoing wood flooring, or a small stone or laminate tabletop matching the counters. Narrow-profile chairs slide away easily when not needed, and a wall-mounted sconce provides focused light without eating into table space.
Best for: Narrow kitchens where a freestanding dining table would interfere with the main walkway. A wall-mounted bench or built-in seat can turn an otherwise awkward corner into useful dining space without taking over the room.
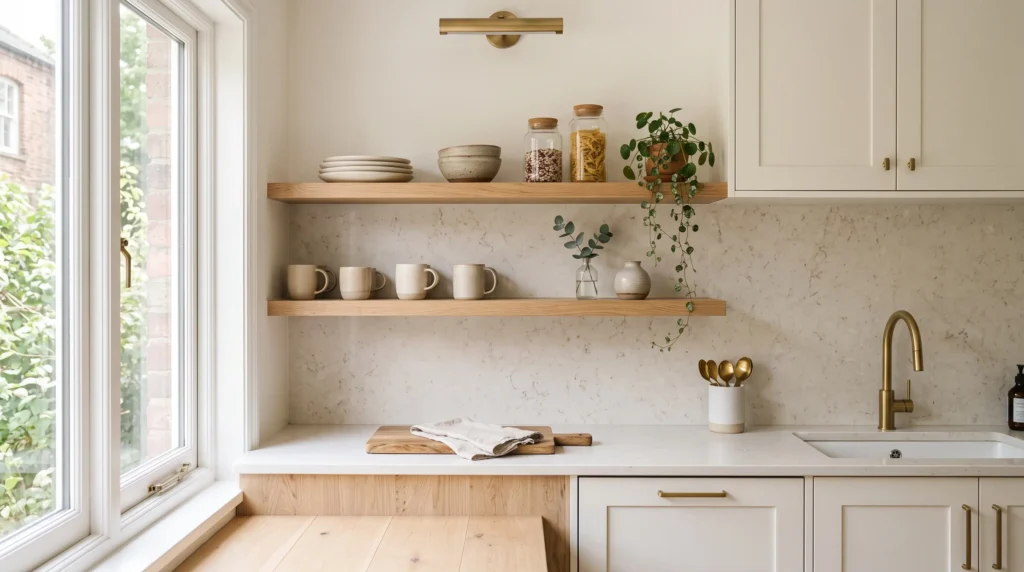
Open Shelving Display
Open shelving lightens a compact kitchen visually by replacing a solid wall of cabinetry with something more open. One or two sturdy shelves for dishes, mugs, glassware, or a few favorite pieces can work — but restraint matters, since too many objects quickly tips a small room from “styled” into “cluttered.” Natural wood shelves against white or warm neutral walls add texture while keeping the palette calm.
Keep the items you reach for most on the lower shelf, and save the top for lighter decorative pieces. Grouping similar colors together keeps even a functional display looking organized, and a small trailing plant or handmade ceramic adds personality without taking up much room. Secure shelves properly, and pick a depth that doesn’t crowd the work surface underneath.
A small detail that matters: Open shelves work best when they have some empty space around the items on display. Leaving part of each shelf visually open keeps the wall feeling lighter and makes the pieces you actually want to show stand out.
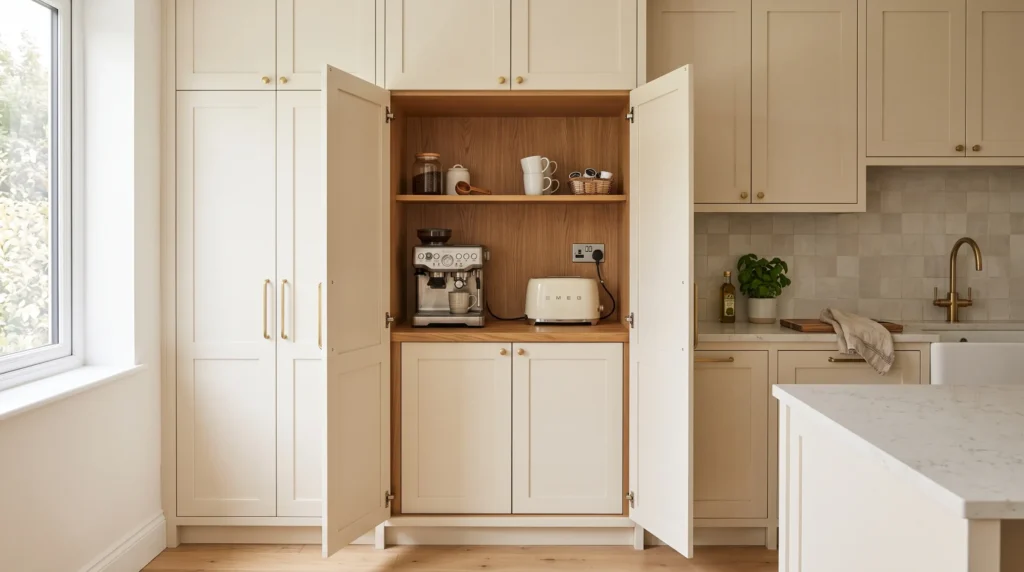
Hidden Appliance Station
Countertop appliances can quickly make a small kitchen feel crowded, even when the rest of the design is carefully planned. A hidden appliance station solves that problem by giving coffee makers, toasters, mixers, or blenders a dedicated home behind matching cabinet doors. Pocket, bifold, or lift-up doors allow the station to open fully without blocking nearby circulation. Adding electrical outlets inside means appliances can remain connected and ready to use. I’ve noticed that this kind of concealed storage makes the biggest visual difference in compact kitchens because it keeps the main counter looking clean throughout the day.
Plan the station around the appliances you actually use rather than creating oversized storage that wastes valuable cabinet space. A durable internal counter makes preparation easier, while adjustable shelving lets you accommodate different appliance heights. Keep frequently used items at comfortable working level and use upper storage for accessories or supplies. When the doors close, the entire area disappears into the cabinetry, creating a smooth uninterrupted wall. This practical feature can make an otherwise ordinary kitchen feel custom-built while giving everyday routines a dedicated, organized space that is easy to maintain.
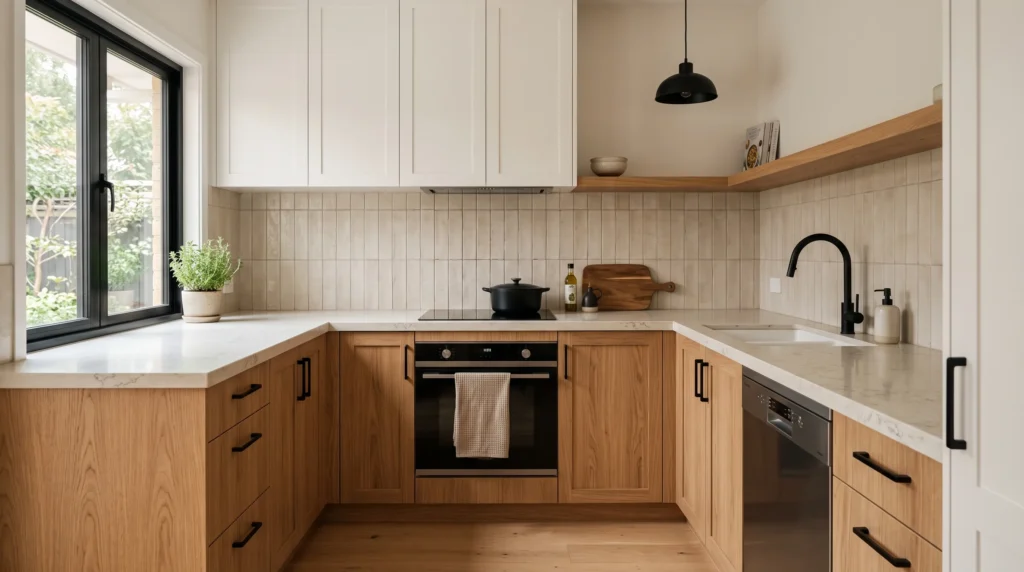
Mixed Material Accents
A small kitchen doesn’t need heavy decoration to look high-end — a few well-chosen materials, repeated with intention, can do the job. Pairing warm wood with painted cabinetry, pale stone, or subtle textured tile creates layers without visual noise, as long as there’s repetition and balance. Repeat one wood tone across cabinetry and shelving, then repeat one metal finish across hardware and lighting.
Start with a dominant finish — warm white cabinetry, for example — then bring in two supporting materials rather than combining everything at once. A wood accent adds warmth, a soft stone surface adds a clean durable finish, and textured backsplash tile adds depth without needing a bold pattern. This approach is especially useful for rental-friendly updates, since swapping hardware, shelving, or lighting alone can create a layered effect without replacing anything major.
Design note: Choose one dominant finish first, then build around it. Repeating the same wood tone, metal finish, or stone color in two or three places helps the different materials feel intentional rather than randomly mixed.
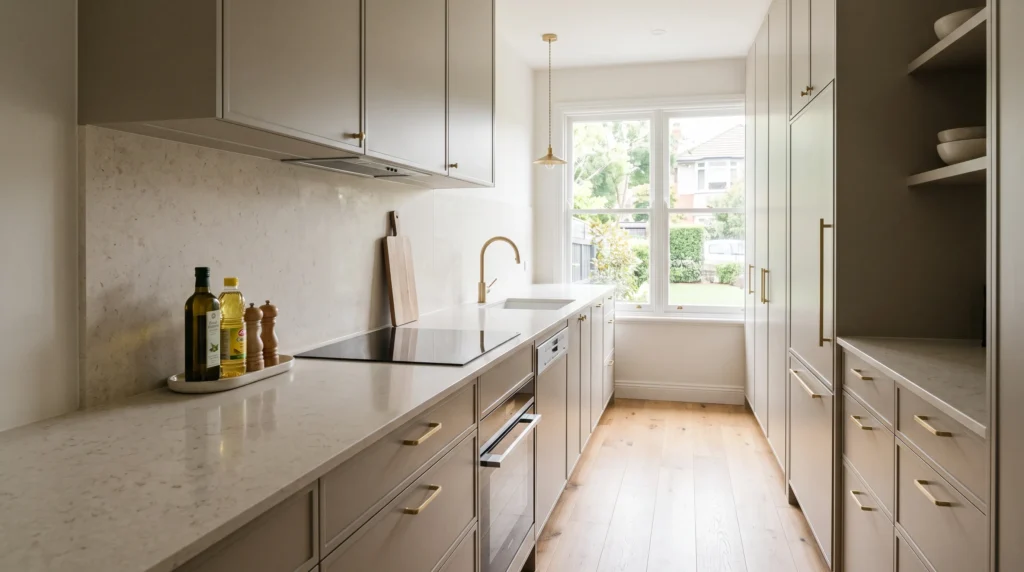
Streamlined Countertops
One long, uninterrupted counter surface can add more elegance to a compact kitchen than almost any other single change. It keeps the eye moving across the room, which reads as calmer and more spacious. Quartz or compact laminate in a soft neutral shade works well — the real trick is limiting what actually sits on it. Removing even two or three unnecessary appliances can noticeably change how large a small room feels.
The counter should still function as a working surface, not become permanent storage. A slim cutting board that slides away, a small oil tray, or a utensil rail keeps daily tools organized without spreading across the whole surface. Light colors reflect more available daylight, and subtle veining adds character without tipping into busy.
Worth remembering: A streamlined countertop doesn’t mean an empty kitchen. Keep the tools you use every day within easy reach, but give them a defined home so the remaining work surface stays open and useful.
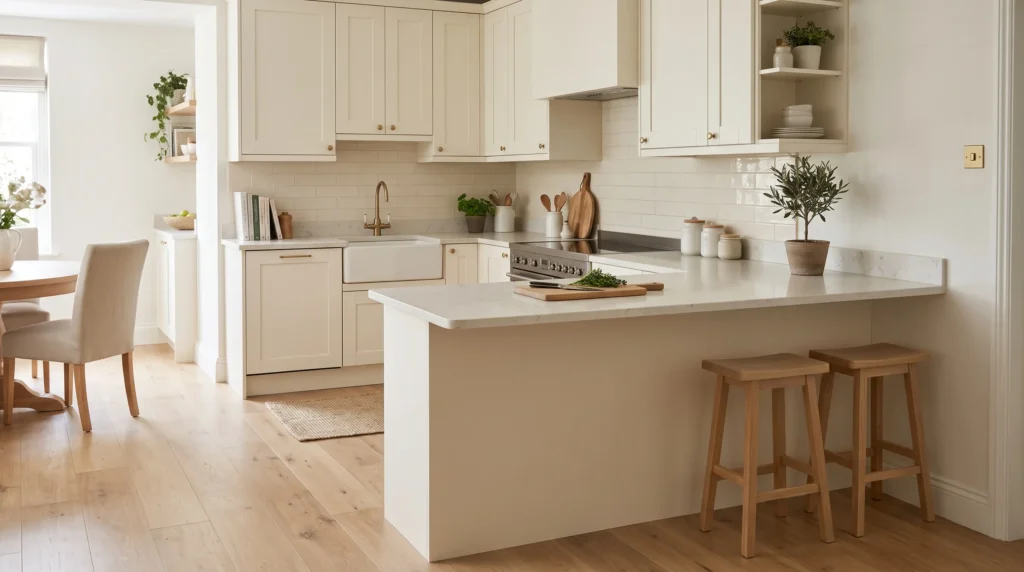
Slim Peninsula
Where both wall space and floor space are tight, a peninsula offers many of an island’s benefits without interrupting the room. It adds prep space, storage, and sometimes seating while staying attached to an existing wall or cabinet run. A depth that still leaves a comfortable walking path is the priority — the space underneath can then hold drawers, shelves, or stools. This works particularly well in galley and L-shaped layouts, where it naturally separates cooking from dining.
Keeping the peninsula aligned with existing cabinetry makes it read as original architecture rather than an add-on. A waterfall edge polishes the end, and backless stools that slide fully underneath keep the footprint minimal when they’re not in use.
Best suited to: Galley and L-shaped kitchens where an island would leave too little room on both sides. Because a peninsula stays attached to the existing cabinetry, it can provide extra prep space without requiring a separate walkway around it.
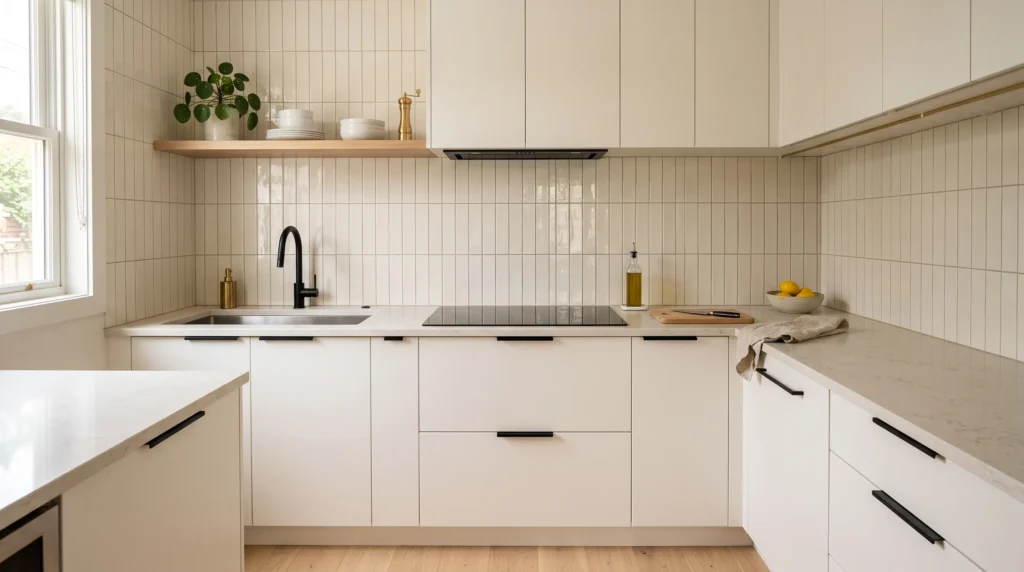
Vertical Tile Layout
Details that draw the eye upward help small kitchens read as taller than they are. Narrow rectangular tile installed vertically stretches a standard-height backsplash, making the wall feel more elegant without any construction changes. A soft neutral color with matching grout keeps the look seamless, or a slightly glossy finish reflects more available light. This works especially well behind a range or sink, where the backsplash becomes a quiet focal point.
Keep everything else simple so the pattern has room to work — flat-front cabinets, slim hardware, and clear counters let the vertical lines read as architecture rather than decoration. Elongated handmade-style tile softens the look; consistent porcelain pieces sharpen it. Either pairs well with brass or black accents.
Design note: The vertical pattern has the most impact when the rest of the wall stays relatively quiet. Simple cabinetry, restrained hardware, and a limited color palette allow the tile to create height without making the backsplash feel overly busy.
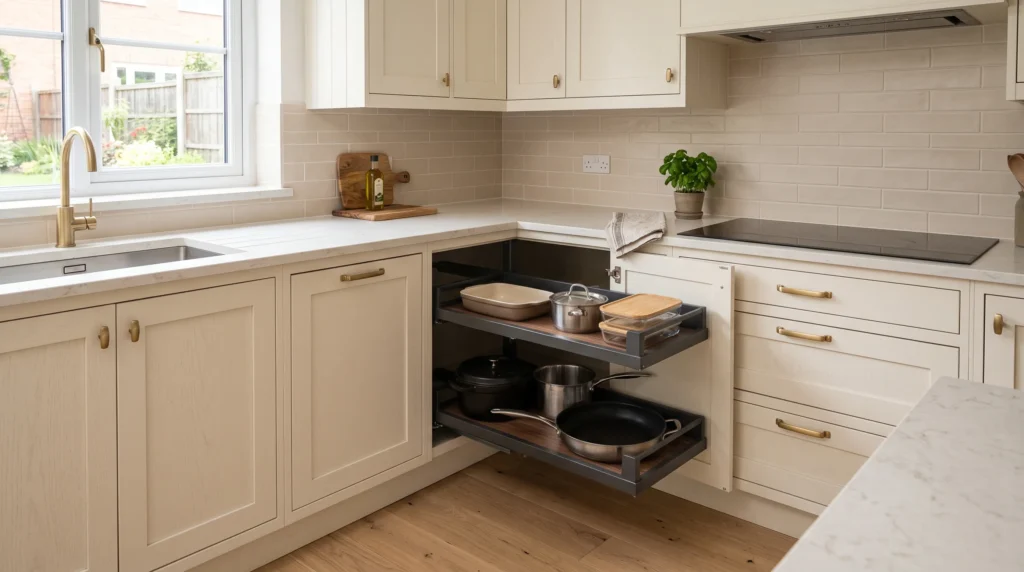
Corner Cabinet Storage
Deep corner cabinets are often the most wasted storage in a kitchen — until pull-out shelves, drawers, or rotating organizers bring cookware directly toward you instead of forcing you to dig. Matching the doors to surrounding cabinetry keeps the installation visually seamless. Accessible corner storage matters more than it sounds like it should, since it’s usually what stops everything from getting piled into the easiest-to-reach cabinets instead.
Choose storage accessories based on what you’re actually storing rather than adding every available mechanism. Pull-out trays suit pots and pans; wider drawers suit mixing bowls or food containers. Keep heavier items low and everyday pieces close to the main prep area.
A useful rule: Match the storage mechanism to the contents. Pull-out trays are convenient for heavier cookware, while drawers are generally easier for bowls, containers, and smaller everyday items. The best organizer is the one that makes the contents easier to reach—not simply the most complicated accessory available.
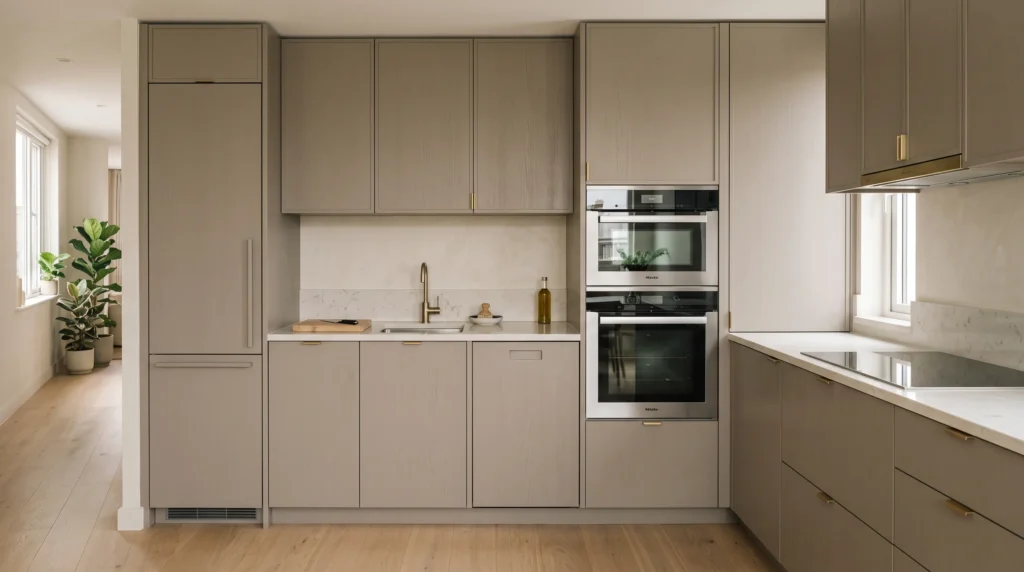
Integrated Appliances
Panel-ready appliances give a compact kitchen the look of custom cabinetry, because large functional pieces visually disappear into the design. A panel-ready dishwasher or refrigerator shares the same finish as the cabinetry, and a built-in oven keeps bulky equipment off the counter — the result is longer, uninterrupted lines across the room. Hiding even one or two large appliances can noticeably calm down the whole space.
Placement matters as much as style: keep the refrigerator easy to reach from the entry point, position the oven near the main prep area, and avoid spots where an open appliance door blocks a narrow walkway. Integration costs more, so it’s worth prioritizing the one or two appliances that create the biggest visual impact rather than doing all of them at once.
Worth considering: You don’t have to integrate every appliance to achieve a custom look. Hiding one visually dominant appliance, such as a dishwasher or refrigerator, can be enough to create cleaner cabinet lines while keeping the renovation more manageable.
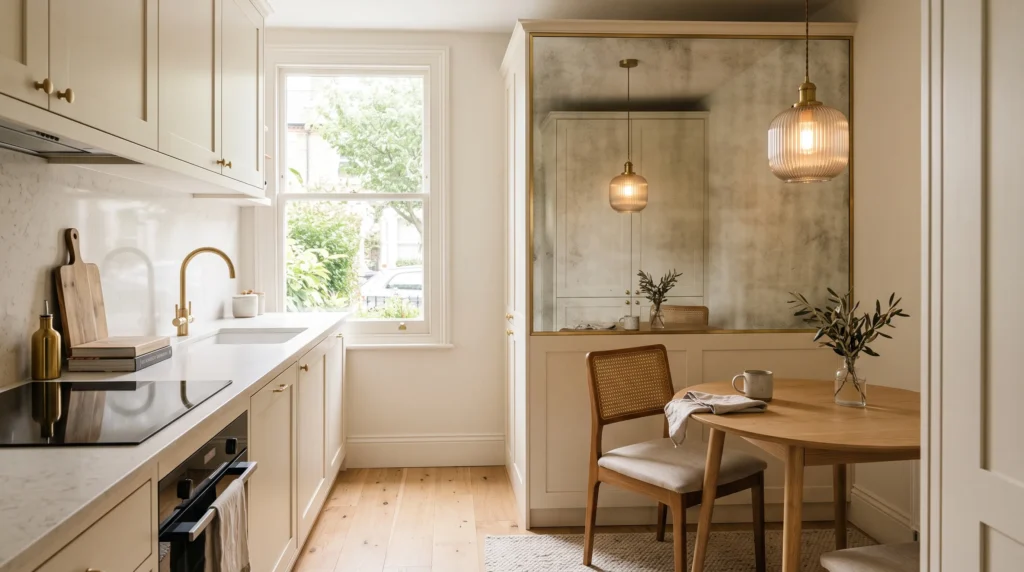
Mirrored Accent Wall
A reflective surface, placed carefully, can make a compact kitchen feel deeper without changing its footprint. Rather than covering every wall, use a mirrored accent behind a dining nook, along a short side wall, or somewhere away from the main cooking splash zone. The reflection bounces daylight through the room and visually extends the cabinetry. A lightly smoked or antique finish softens the effect compared to a fully reflective mirror — and works best when it reflects something worth seeing, like a window or a well-styled cabinet run.
Keep the surrounding palette restrained so the mirror reads as an architectural feature, not another competing pattern. Avoid placing it directly behind areas prone to grease or food splashes unless the material is specifically easy to clean
What makes it work: A mirror is most effective when it reflects something useful or attractive, such as a window, natural light, or a well-styled part of the kitchen. If it mainly reflects clutter, the same feature can make the room feel busier instead of larger.
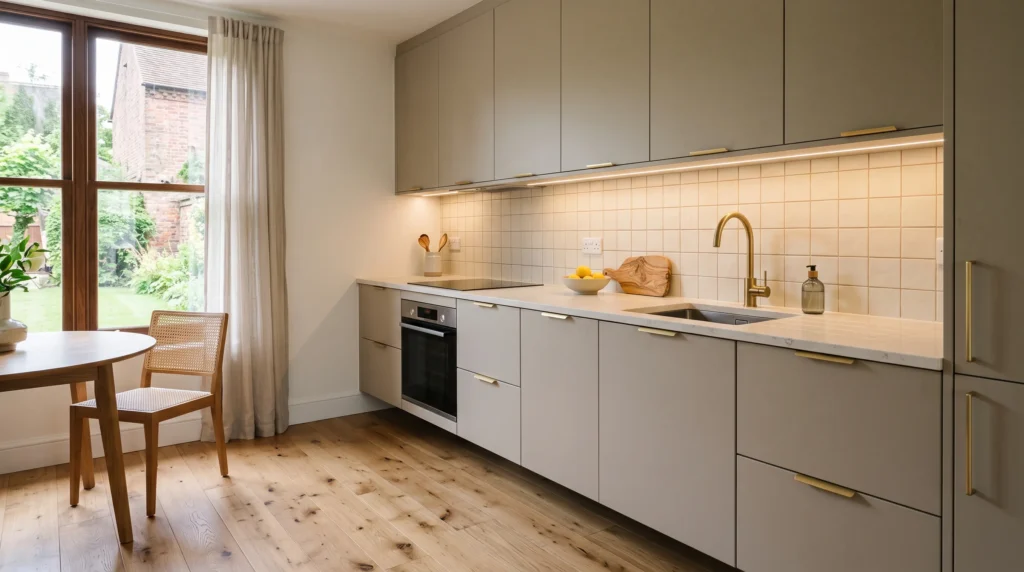
Floating Base Cabinets
Leaving a visible gap beneath base cabinets makes a compact kitchen feel less crowded, since more flooring stays exposed and creates a continuous visual line. This suits modern and transitional interiors particularly well. Flat-panel doors and a calm finish keep the raised effect subtle rather than gimmicky — and the extra floor visibility can make a real difference in kitchens with limited walking space or darker cabinetry.
The gap underneath should stay practical: high enough to clean easily, with flooring that continues naturally beneath the cabinets. A discreet lighting strip adds a soft evening glow, though it’s optional. Because the cabinetry carries less visual weight, you can introduce a richer wood tone or deeper neutral without the room feeling heavy.
Keep it practical: The open space underneath should be easy to clean and should work with the flooring already in the room. This look is best when the gap feels intentional rather than like unfinished cabinetry.
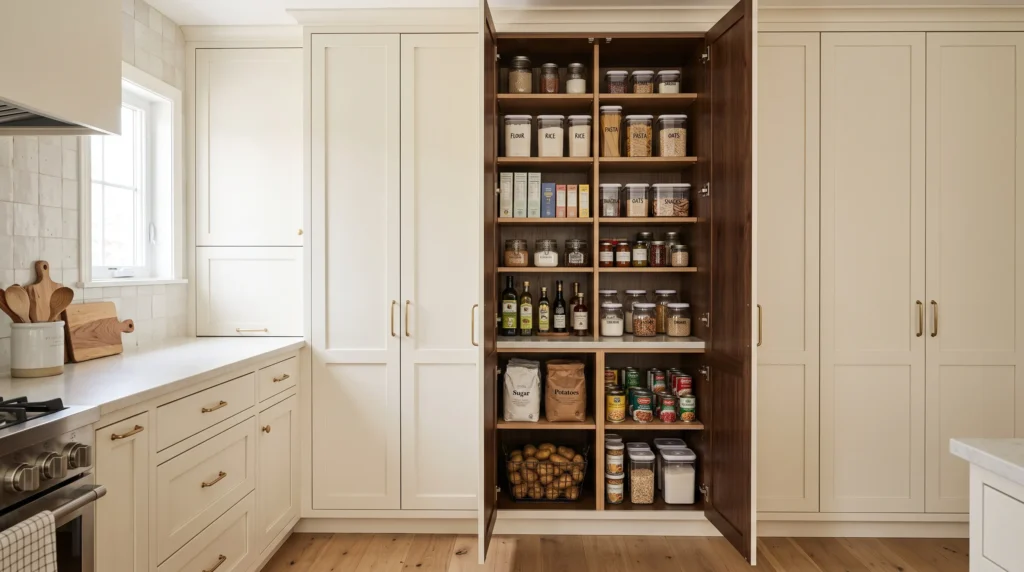
Hidden Pantry Wall
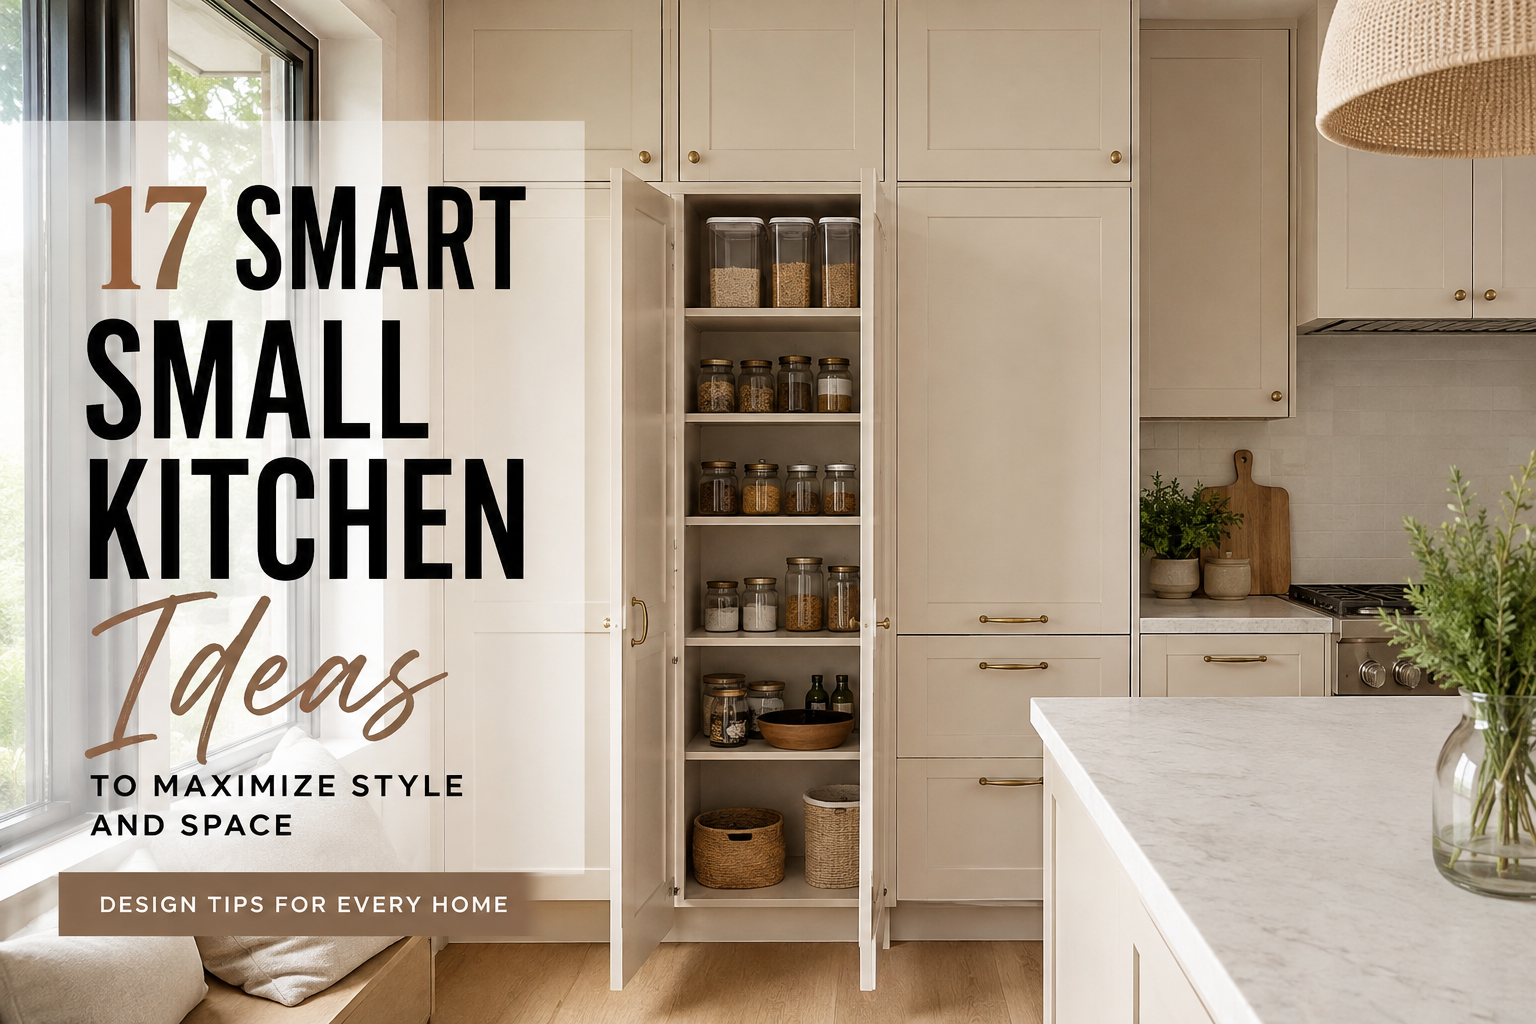
A hidden pantry wall can give a compact kitchen an unusually clean appearance while adding a surprising amount of usable storage. Instead of spreading food containers, cans, and small supplies across several cabinets, dedicate one full-height section to pantry organization. Matching the exterior doors to the surrounding cabinetry keeps the storage visually quiet, almost like a built-in wall feature. This arrangement is particularly helpful in smaller homes where separate pantry space is unavailable. I’ve noticed that consolidating food storage also makes daily cooking easier because ingredients are grouped together instead of being scattered throughout the room.
Inside the pantry, adjustable shelves allow the storage to evolve as your routines change. Keep everyday ingredients between waist and eye level, reserve lower shelves for heavier items, and use upper sections for backup supplies. Clear containers can improve visibility, while simple labels make frequently used ingredients quicker to locate. Choose doors that open fully without interfering with nearby walkways, especially in narrow kitchens. When closed, the pantry disappears into the cabinetry and leaves the room looking calm and cohesive. It is a practical storage solution that supports organization while reinforcing a custom, professionally planned appearance.
Conclusion
A small kitchen can feel completely different with a few thoughtful design changes. The right storage, lighting, materials, and layout can create more openness while making the room feel polished and personal. A well-planned Small Kitchen Idea does not need to be expensive or complicated; even one smart update can improve both style and everyday function. I’ve seen how small changes like clearer counters, better vertical storage, or a slim seating area can transform a space. Save this post on Pinterest for your next refresh, try the ideas that fit your home, and share it with someone who needs more from a small kitchen.
How can I make my small kitchen feel bigger?
Start with what you see first: the cabinets, walls, and countertops. Light colors usually help because they reflect more light, but you don’t need an all-white kitchen. Keeping the counters mostly clear can make an even bigger difference. If you have unused wall space, consider taking cabinets higher or adding a couple of shelves. I’ve noticed that small kitchens often feel cramped because too many everyday things are left out, not simply because the room is small.
What is the best storage solution for a small kitchen?
Look for storage that uses awkward or unused spaces. A tall pantry cabinet, pull-out corner shelves, deep drawers, or a cabinet above the refrigerator can all be useful. I’d start by looking at what you already own before buying new organizers. If you rarely use something, it doesn’t need prime cabinet space. Keep the things you reach for every day between waist and eye level. This makes cooking easier and stops you from digging through crowded cabinets every time you need something.
Can I put an island in a very small kitchen?
Yes, but only if there is enough room to move around it comfortably. Measure the space before buying anything and check that cabinet, refrigerator, oven, and dishwasher doors can open without hitting the island. If a standard island makes the room feel squeezed, try a narrow island with drawers or a small peninsula attached to the cabinets. You can also use a slim movable cart if you want flexibility. Honestly, having a little more floor space is often more useful than squeezing in an island that is too large.
How can I make a small kitchen look more expensive?
You don’t need to replace everything. Start with the details that are easiest to notice, such as cabinet handles, lighting, backsplash, and countertop clutter. Choose finishes that work together instead of mixing too many colors and materials. A simple brass or black handle, warm lighting, and a clean countertop can change the overall look surprisingly quickly. If you have a little more budget, adding a full-height backsplash or better cabinetry can create a stronger custom feel. The goal is not to make the kitchen look expensive—it’s to make every detail look intentional.