18 Kitchen Lighting Ideas for a Brighter, More Beautiful Space
The right lighting can make an ordinary kitchen feel completely different. ✨
A few smart changes can brighten dark corners, make food prep easier, and give your kitchen that polished look you keep saving on Pinterest.
Kitchen lighting ideas can help you create a space that feels both beautiful and practical, whether you’re updating a spacious open-plan kitchen or working with a small room. From statement pendants and recessed lights to under-cabinet LEDs and warm ambient layers, the right combination can transform how the entire space looks and functions. Below you’ll find ideas for different layouts, ceiling heights, styles, and everyday needs — along with the practical details that actually matter when you’re choosing fixtures.
After redoing lighting in more than one kitchen (my own included), I can tell you the biggest transformation almost never comes from one bright ceiling fixture. It comes from layering three or four simple light sources that each do a different job. Read through these ideas, note which ones fit your home, and save the rest for later.
Discover 18 kitchen lighting ideas — from island pendants to under-cabinet LEDs — with practical tips on color temperature, CRI, and layered lighting.
Quick reference: color temperature & CRI at a glance
| Setting | Best for | Feel |
|---|---|---|
| 2700K | Farmhouse lanterns, warm ambient glow, dining areas | Cozy, warm, relaxed |
| 3000K | Islands, pendants, general-purpose kitchens | Balanced, welcoming |
| 4000K+ | Strictly modern/monochrome kitchens (used sparingly) | Crisp, clinical |
| CRI 90+ | Under-cabinet, task lighting, prep areas | True-to-life color rendering |
| Ambient / Task / Accent | Whole-kitchen layering | Depth instead of flat brightness |
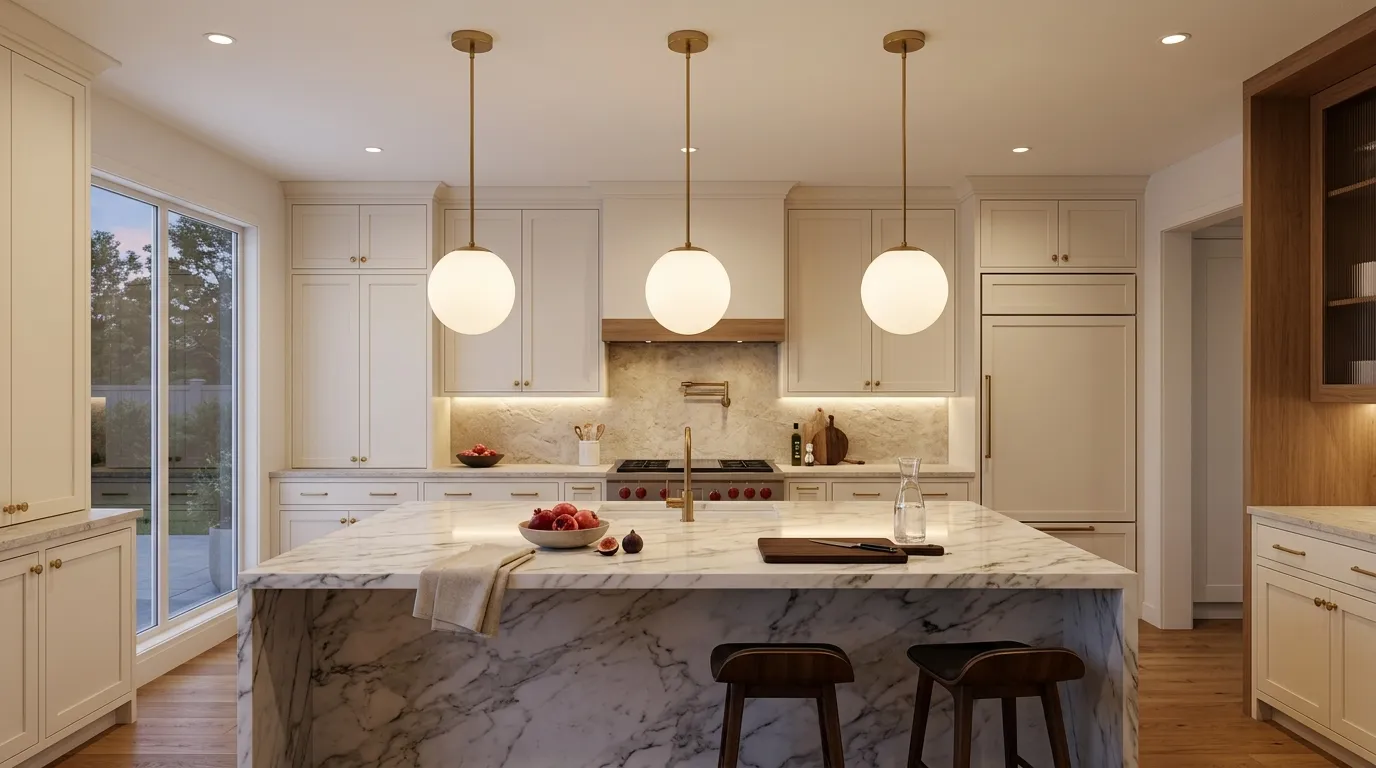
Kitchen Island Pendants
If there’s one upgrade that changes how a kitchen island feels, it’s pendant lighting. Two or three fixtures hung at a consistent height turn a plain countertop into the visual anchor of the whole room — the thing your eye goes to the moment you walk in. The trick most people get wrong is scale: pendants that are too small look like an afterthought, and ones that are too large block sightlines across the island. A general rule that’s worked well for me is keeping the total width of the pendants to roughly a third of the island’s length, with even spacing between them.
Glass and opal shades are popular for a reason — they let light spread outward instead of just pooling directly below the fixture, which keeps the kitchen feeling open rather than shadowy. Matte brass and black metal versions do the opposite; they act more like jewelry for the room, adding contrast against white or cream cabinetry. Either way, put them on a dimmer.
You want full brightness while you’re chopping vegetables and something much softer once the wine is poured and people are leaning on the counter talking. Warm white bulbs, somewhere around 2700K to 3000K, tend to flatter marble, wood, and skin tones far better than a cooler, bluish light. One more thing worth checking before you buy: leave enough clearance between the pendant and the countertop so nobody’s ducking around it to reach the sink.
Bullet takeaways:
- Creates a clear focal point above the island
- Adds focused light for cooking, serving, and prep
- Matching pendants create rhythm across longer islands
- Dimmable bulbs make the setup more flexible
- Glass or opal shades keep the look visually light
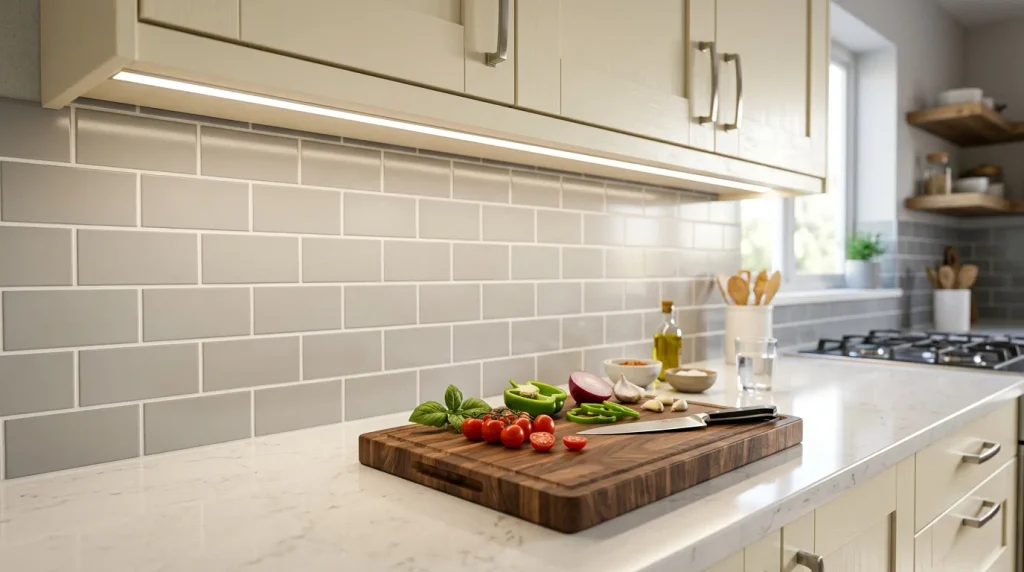
Under-Cabinet LEDs
This is the upgrade nobody notices until it’s missing. Under-cabinet lighting puts light exactly where you’re actually working — the strip of counter between the stove and the sink — instead of relying on a ceiling fixture that’s often several feet away and gets blocked by your own body while you cook. Anyone with dark countertops knows the problem: overhead light alone leaves a shadow right where the knife is.
Slim LED strips tucked behind the front lip of the upper cabinets are the cleanest solution, but they only look good if the diffuser is concealed. A bare strip with visible dots of light along a countertop looks more like a construction site than a finished kitchen, so spend the extra few dollars on a proper aluminum channel with a frosted cover. Puck lights are the other common option and work fine for smaller runs, though they tend to create pools of brightness with darker gaps between them rather than one even line.
Color matters as much as placement here. A warm-neutral white with a CRI (color rendering index) of 90 or higher will show ingredients and finishes in something close to their true color — genuinely useful when you’re checking if chicken is fully cooked or matching paint samples. Wire these on a separate switch from your main ceiling lights. Once you’ve lived with a kitchen that has independent under-cabinet lighting, going back to a single overhead switch feels like a step backward.
Bullet takeaways:
- Brightens countertops where everyday tasks happen
- Reduces shadows created by overhead fixtures
- Makes darker worktops easier to use
- Adds a subtle evening glow beneath cabinets
- Concealed diffusers create a cleaner finish
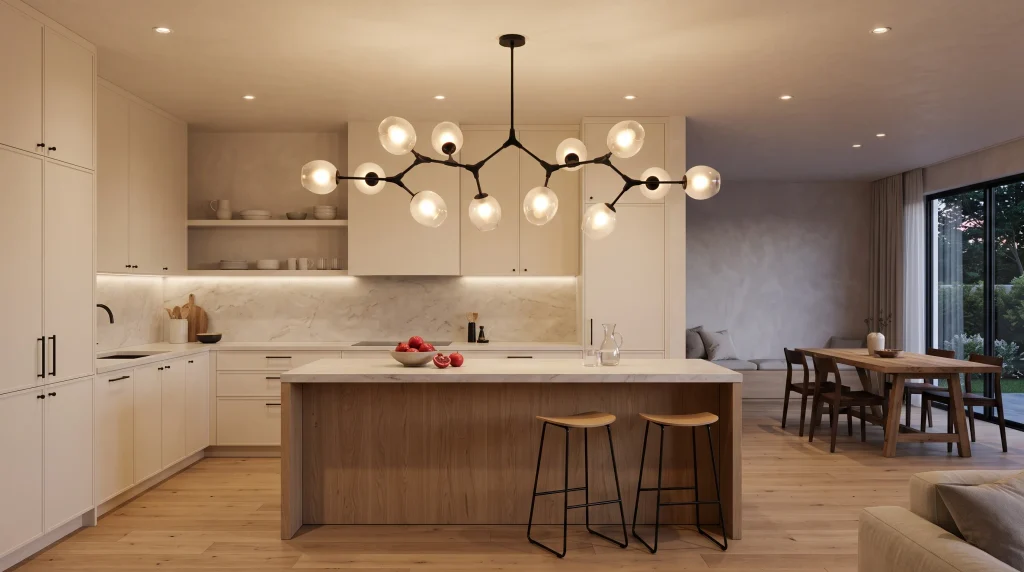
Sculptural Ceiling Fixtures
Every kitchen benefits from having one thing that isn’t strictly functional — a fixture chosen because it looks good, not just because it lights something. That’s what a sculptural ceiling piece does. Think a branching metal chandelier, an oversized cluster of glass globes, or a single dramatic curved form suspended over the island. It gives the room a bit of personality that recessed downlights and standard pendants simply can’t.
The catch is that a statement fixture only reads as intentional if everything around it stays quiet. If your cabinetry is already busy — patterned tile, bold color, ornate hardware — a sculptural light competes rather than complements.
Neutral cabinets, natural wood tones, and simple stone counters give the fixture room to actually be the star. This matters even more in open-plan homes, where the kitchen doesn’t have walls separating it from the living or dining area. A striking ceiling piece does the job walls used to do: it tells you, visually, “this is the kitchen zone.”
Don’t let the drama fool you into thinking it’s your only light source, though. Most sculptural fixtures are meant to be looked at more than relied on for task lighting, so pair them with recessed lights or under-cabinet strips underneath. Walk around the island and check how the fixture looks from the dining table, the hallway, and the front door before you commit — these pieces are visible from a lot of angles, and what looks great head-on can look odd from the side.
Bullet takeaways:
- Creates a memorable focal point without adding clutter
- Works beautifully above islands or open kitchen zones
- Adds personality to otherwise simple cabinetry
- Helps visually define kitchens in open-plan homes
- A dimmer makes dramatic fixtures more versatile
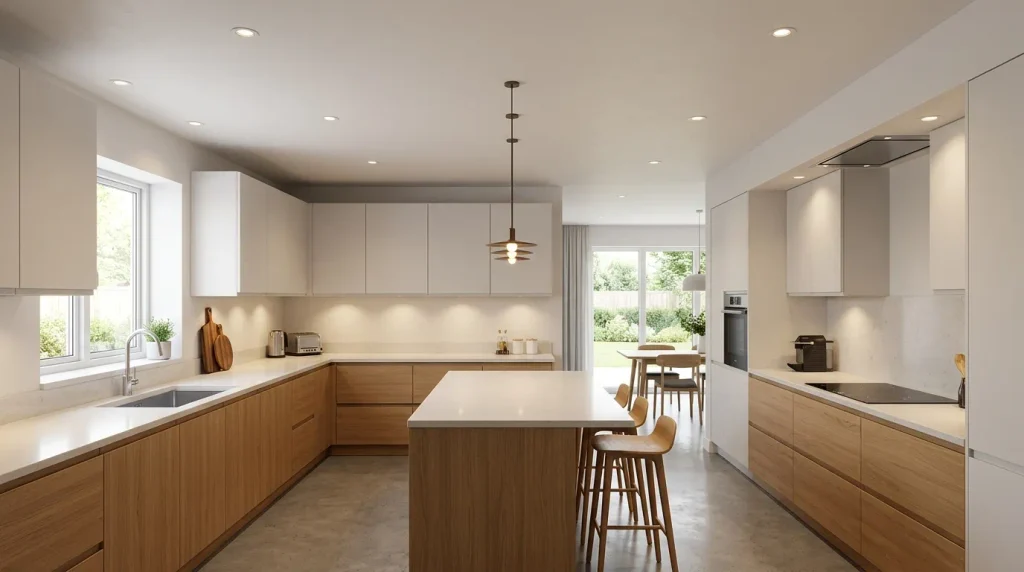
Recessed Ceiling Lights
Recessed lighting is the workhorse of kitchen design — not glamorous, but dependable, and it keeps the ceiling looking clean since there’s nothing hanging down to visually clutter the space. The mistake most people make is treating it like wallpaper: evenly spacing fixtures in a grid across the entire ceiling regardless of what’s underneath. A better approach is placing them over the actual work zones — the sink, the stove, the main prep counter, the walkway — so the light lands where you need it rather than where it’s easiest to install.
Spacing matters more than quantity. I’ve seen kitchens with a dozen closely packed downlights that still feel harsh and flat, and others with half as many, positioned thoughtfully, that feel brighter and more comfortable. If your kitchen leans modern with streamlined cabinetry, slim LED recessed fixtures with a low profile disappear into the ceiling almost completely, which keeps the architectural lines clean.
Recessed lighting works best as your ambient base layer rather than your only layer. Add pendants over the island or sconces near a shelf, and the recessed lights stop trying to do every job at once. For low ceilings specifically, this fixture type is close to essential, since it provides real brightness without eating into headroom the way a hanging light would. Choose a warm white temperature if your kitchen has wood, cream, or earthy tones, and put the whole run on a dimmer — the difference between “cleaning the oven” brightness and “Sunday morning coffee” brightness should be one switch away, not a whole different set of lights.
Bullet takeaways:
- Keeps the ceiling visually clean and uncluttered
- Provides even illumination across larger kitchen areas
- Works especially well with layered lighting
- Helps brighten corners that pendants may miss
- Dimmable fixtures make brightness easier to control
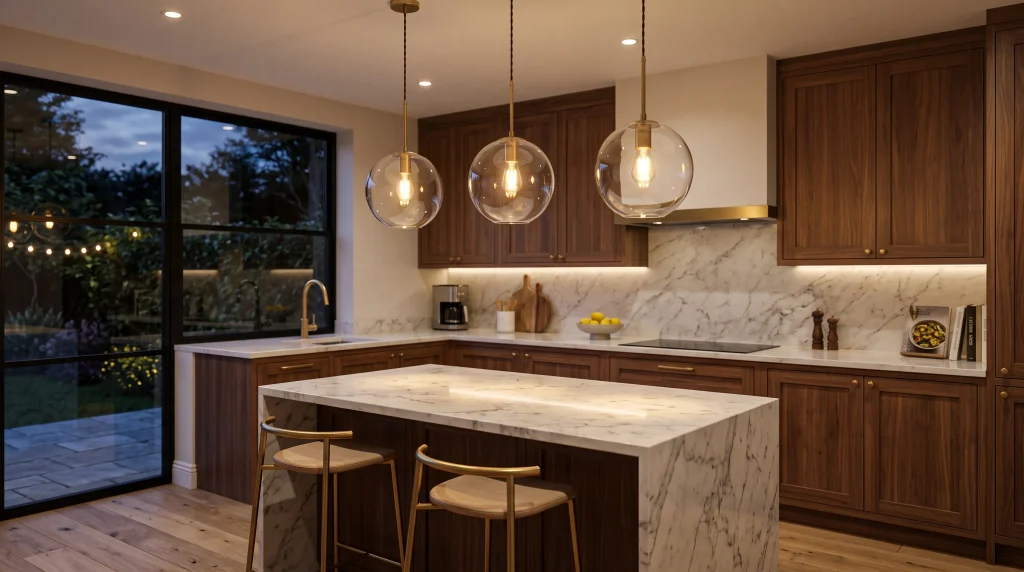
Glass Globe Pendants
There’s a reason glass globe pendants show up in almost every “timeless kitchen” mood board — the rounded shape softens a room that’s otherwise full of straight lines and hard surfaces. Rectangular islands, square cabinet doors, flat stone counters — a globe pendant is the one curved element breaking all that geometry up, and it does it without needing a single extra accessory.
Clear glass lets the most light through and gives the kitchen an airy, open feel, but you will see the bulb, so choose one you don’t mind looking at directly — a vintage-style filament bulb, for instance, actually becomes part of the decoration. Frosted or opal glass hides the bulb and gives a gentler, more diffused glow that a lot of people prefer for evening use, since it’s easier on the eyes than a visible point of light at counter height.
Sizing three globes over a standard island is usually about right; smaller kitchens with a compact island often look better with just two, spaced further apart so the fixtures don’t crowd each other visually. Pair them with brushed brass hardware for a classic-meets-modern combination, or matte black fittings if you want something crisper and more contemporary. Either way, this is a style that benefits from restraint elsewhere in the kitchen — let the cabinetry stay simple and let the pendants provide the visual interest. Add a dimmer, and the same fixtures that light up food prep in the afternoon can drop to a warm, low glow once dinner’s on the table.
Bullet takeaways:
- Softens kitchens with rounded, transparent forms
- Spreads light gently across islands and counters
- Adds vintage-inspired character without looking heavy
- Works beautifully with brass or black hardware
- Opal glass can reduce harsh bulb glare
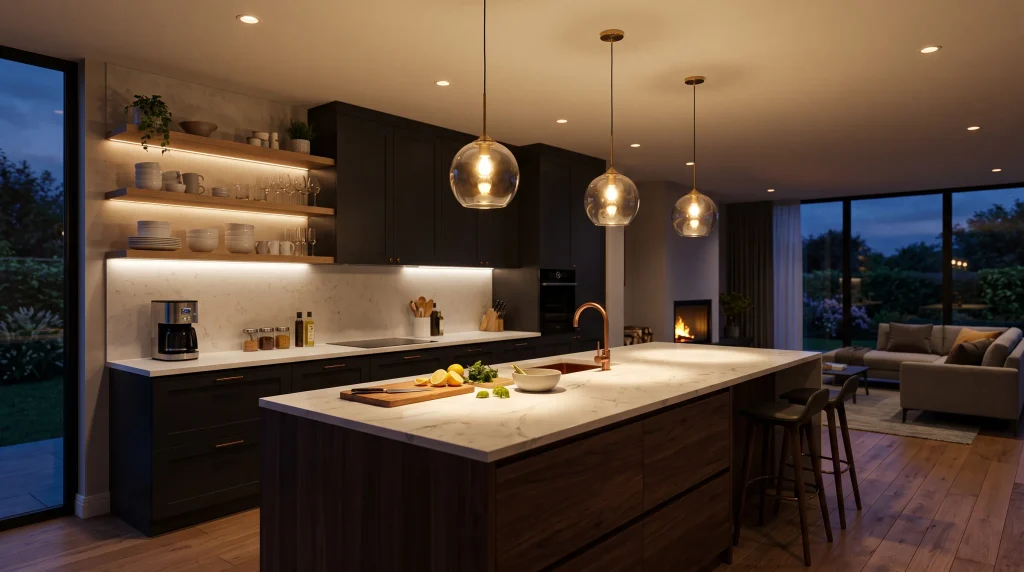
Layered Lighting Zones
If you only take one idea from this whole list, make it this one: stop expecting a single ceiling fixture to handle everything. A kitchen realistically needs three kinds of light doing three different jobs — ambient light for general visibility, task light over the areas where you actually work, and accent light that highlights something worth looking at, like open shelving or a nice backsplash. Kitchens that feel “off” in a way you can’t quite pinpoint are often missing one of these three layers entirely.
Start by mapping out how you use the room. The island probably needs a pendant for task lighting. The countertop under the upper cabinets needs an LED strip. T
he dining end of an island might benefit from a softer wall sconce instead of anything overhead. Recessed lights can quietly cover the walkways and general floor space in between, without trying to be the star of the show anywhere. None of these layers has to be expensive or elaborate — what makes the difference is that each one is on its own switch.
Separate controls are what actually make layering useful day to day, rather than just look nice in photos. Bright task lighting in the morning while you make breakfast, dimmed ambient light in the evening while the kitchen doubles as a hangout space — that flexibility only works if you’re not flipping one switch for the whole room. In open-plan homes especially, being able to keep the kitchen bright for cooking while the adjoining living room stays dim is the kind of small detail that makes a big difference to how livable the space feels.
Bullet takeaways:
- Gives every part of the kitchen a clear lighting purpose
- Combines practical brightness with decorative warmth
- Makes large kitchens easier to illuminate evenly
- Prevents one fixture from carrying the entire room
- Separate switches provide greater everyday flexibility
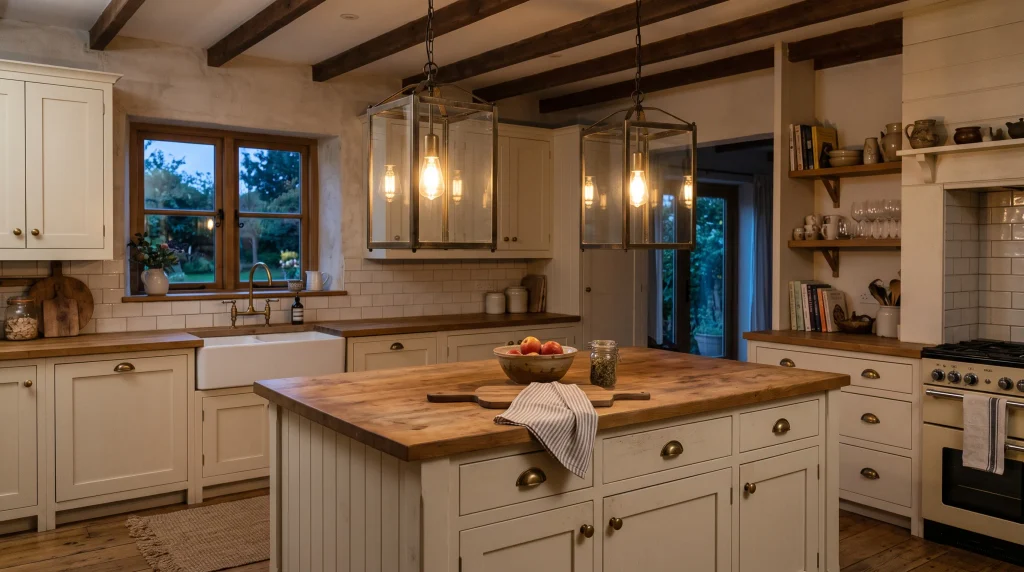
Farmhouse Lantern Pendants
Lantern-style pendants are one of the easiest ways to add character to a kitchen that already leans farmhouse, cottage, or transitional in style. Their boxy, structured frames read as slightly vintage without looking like a costume — they work because they echo the kind of hardware you’d find in an old barn or a converted country house, just cleaned up for a modern kitchen.
The material choice changes the whole mood. Aged brass feels collected and warm, like it’s been there for years, which suits a kitchen with painted shaker cabinets and butcher-block counters. Matte black is a sharper, more contemporary take on the same shape and pairs well if the rest of the room has darker hardware or black-framed windows. Clear glass panels inside the frame keep the fixture from feeling too heavy, letting light spread outward instead of getting trapped inside a solid shade.
Scale is where farmhouse lighting most often goes wrong. A single oversized lantern can dominate a small island, while two medium-sized ones spread further apart usually look more balanced and, honestly, more expensive.
Stick to warm bulbs in the 2700K to 3000K range — anything cooler undercuts the whole vintage feeling you’re going for and can make cream-colored cabinets look slightly grey instead of warm. If the island doubles as a spot for homework or casual dining, a dimmer switch is worth the extra cost; farmhouse lanterns look best glowing softly in the evening, not blasting full brightness during a family dinner.
Bullet takeaways:
- Adds warmth and character above a central island
- Complements wood, painted cabinetry, and vintage finishes
- Open frames keep the fixture from feeling bulky
- Works well with warm white LED bulbs
- Aged brass or matte black creates easy contrast
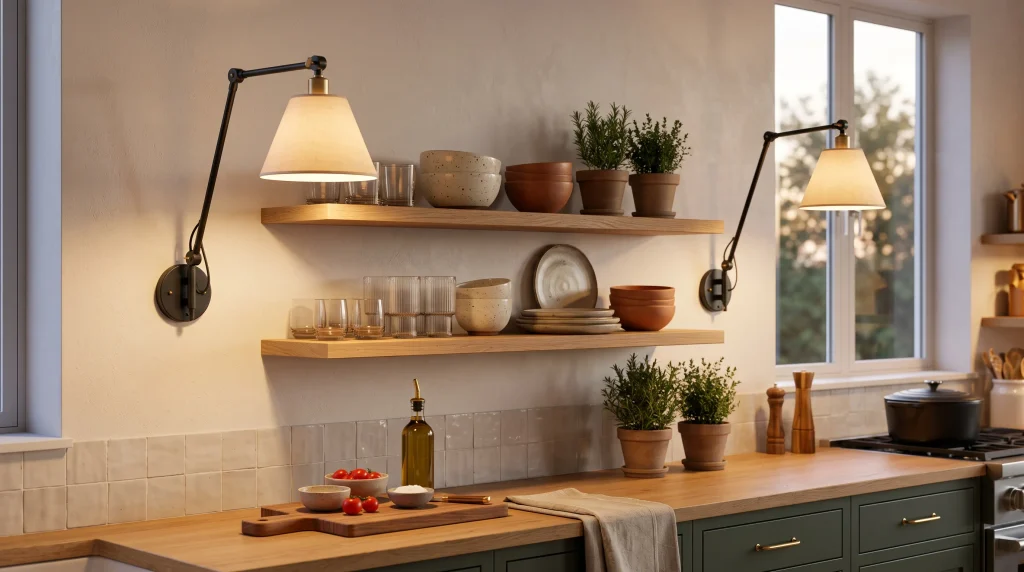
Swing-Arm Wall Sconces
Swing-arm sconces solve a problem that ceiling fixtures genuinely can’t: they let you point light exactly where you want it, on demand. Mounted beside open shelving, next to a reading nook, or flanking a range hood, the adjustable arm means you’re not locked into one fixed angle the way you are with a pendant or recessed light.
They’re particularly useful in kitchens with open shelving or an exposed wall that otherwise sits in shadow, since those areas rarely get enough attention from overhead lighting. A pair mounted symmetrically on either side of a hood or a run of shelves instantly makes that wall look finished, almost like it was designed around the fixtures rather than the other way round. Matte black tends to stand out nicely against pale tile backsplashes, while aged brass blends in more softly next to natural wood.
Installation height is worth getting right before you drill anything. Mount them too low and you’ll get glare at eye level every time you walk past; too high and the swing arm loses its usefulness because you can’t easily adjust it.
Check that the arm has room to move without hitting a cabinet door or shelf edge when fully extended. Pair swing-arm sconces with under-cabinet lighting for a genuinely useful combination — one lights the wall, the other lights the counter, and together they cover a section of the kitchen that a single ceiling fixture would otherwise leave patchy. Dimmable versions are worth the small price difference; a sconce at full brightness during dinner prep can be dropped right down once the meal’s actually on the table.
Bullet takeaways:
- Brings adjustable light directly beside work areas
- Fills empty wall space with useful decoration
- Works beautifully beside shelves or range hoods
- Flexible arms help redirect light when needed
- Adds a tailored, designer-inspired finishing detail
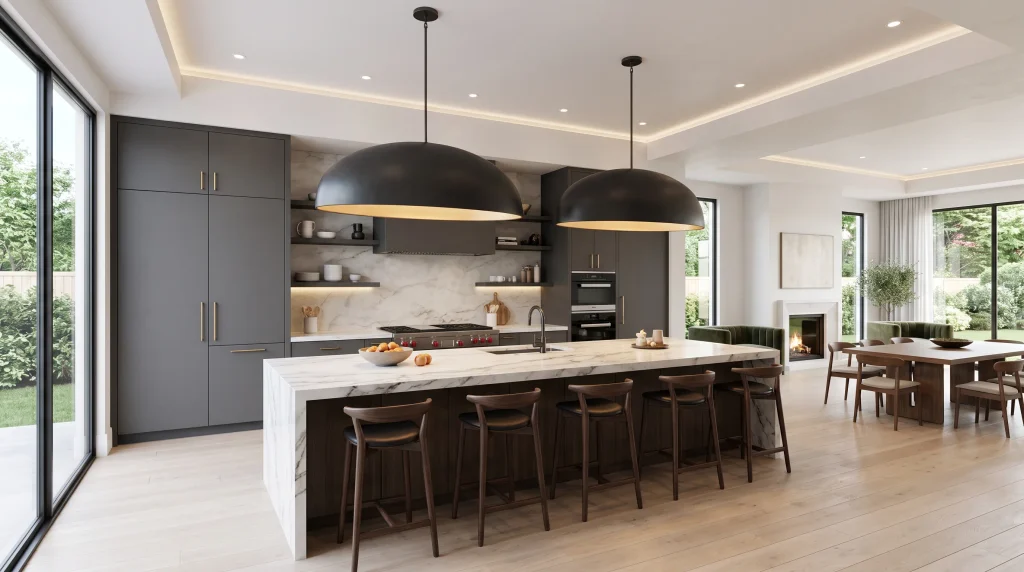
Oversized Island Pendants
In a large kitchen, small pendants can end up looking lost — like they’re trying to fill a job that’s simply too big for them. That’s where oversized pendants come in. One or two substantial fixtures, whether an elongated dome or a bold sculptural metal shape, can anchor a long island far more effectively than five small ones scattered along its length.
The reason this works so well in open-plan homes is that a large kitchen often shares visual space with a living or dining area, and an oversized pendant gives the eye something to land on that marks the kitchen as its own zone. The rest of the room needs to stay relatively restrained for this to work — if the cabinetry, backsplash, and countertop are all competing for attention too, the oversized fixture just adds to the noise instead of anchoring it.
Before buying, measure the island’s width and the ceiling height together, not separately. A pendant that would look perfect in a photo can end up blocking the view across the counter in your actual kitchen if the proportions are off. Standing at the entrance to the kitchen and imagining the sightline is a useful gut check.
Because these fixtures are large, they’re also intense at full brightness, so a dimmer isn’t optional here — it’s close to essential. Combine the pendant with recessed or under-cabinet lighting elsewhere in the room so the drama stays contained to the island while the rest of the kitchen remains evenly, comfortably lit.
Bullet takeaways:
- Creates an immediate focal point over a large island
- Gives spacious kitchens stronger visual scale
- Adds sculptural personality without extra accessories
- Works especially well above long countertops
- Helps connect the kitchen with adjoining living spaces
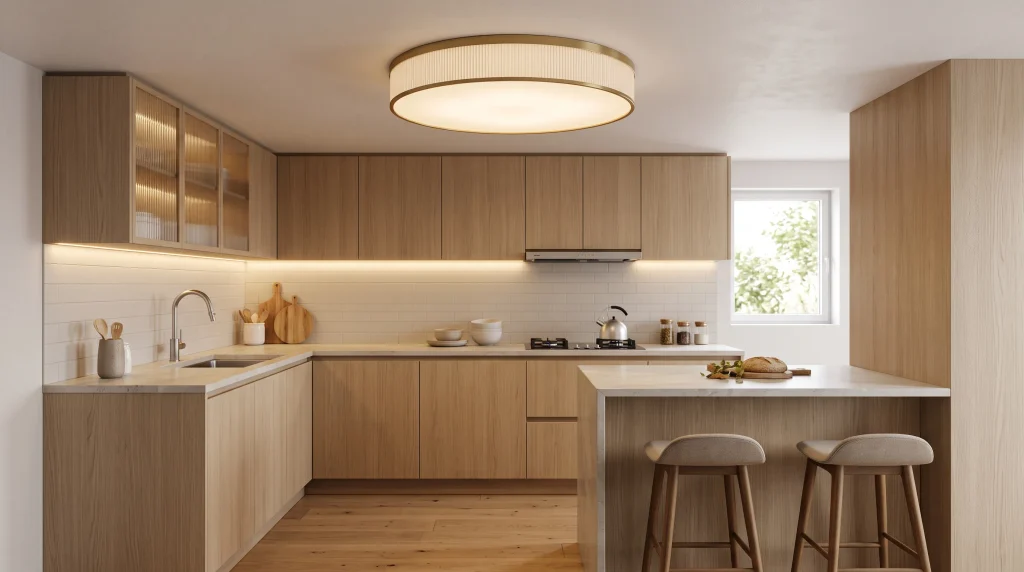
Low-Ceiling Flush Mounts
Anyone working with a low kitchen ceiling knows the frustration of falling in love with a pendant online, only to realize it would sit at head height in real life. Flush-mount fixtures solve this by hugging the ceiling instead of hanging down, which keeps the vertical space open and the room from feeling compressed.
The key to making a flush mount look intentional rather than like a builder-grade afterthought is the diffuser. A wide, even diffuser spreads light broadly across the room instead of creating one hot, obvious circle directly beneath the fixture. Simple circular or softly geometric shapes tend to age better than anything overly ornate, and they sit comfortably alongside contemporary cabinetry without drawing too much attention to themselves.
Don’t assume “flush mount” has to mean plain. Ribbed glass, brushed metal finishes, and linen-textured diffusers all exist in this category and can look genuinely considered rather than purely functional. If the kitchen has an island, resist the urge to make the single ceiling fixture do all the work — add under-cabinet lighting for the actual prep areas instead, since a flush mount alone usually can’t provide enough focused brightness for detailed tasks.
Keeping the color temperature consistent between the flush mount and any secondary lighting matters more here than in taller kitchens, since everything sits closer together visually. A dimmer switch is another easy upgrade, especially if the kitchen opens directly onto a dining or living space where the mood needs to shift throughout the evening.
Bullet takeaways:
- Keeps valuable vertical space visually open
- Provides broad overhead illumination without hanging fixtures
- Works especially well in compact kitchens
- Slim profiles complement modern cabinetry
- Useful when pendant clearance is limited
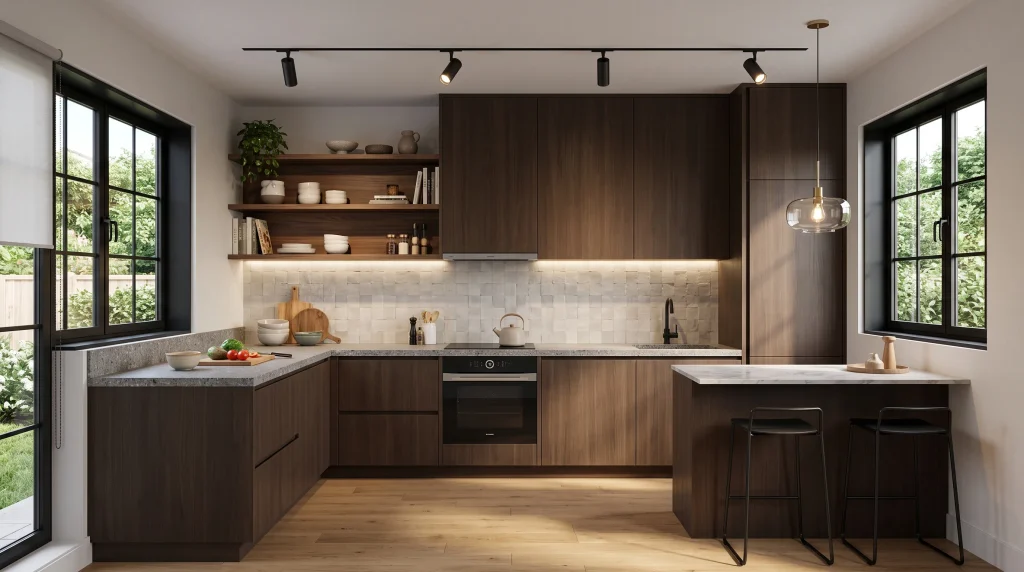
Track Lighting
Track lighting gets an unfair reputation as dated, mostly because of how it looked in the 1990s. Modern versions — slim black rails with adjustable LED heads — are actually one of the more flexible options available, especially for kitchens with unusual layouts where a standard grid of recessed lights doesn’t quite fit.
What makes track lighting genuinely useful is that each head can be aimed independently. Point one toward the countertop, another toward open shelving, and a third toward a piece of art or a decorative backsplash detail, all from a single ceiling connection instead of running separate wiring for each. This adaptability is particularly handy if you tend to rearrange furniture or change how you use different parts of the kitchen over time — repositioning a track head takes seconds, unlike a fixed recessed light.
For the cleanest look, align the track with the room’s main architectural lines — parallel to the island or along the run of upper cabinets — rather than at an angle that fights the layout. Space the heads so their beams overlap slightly without creating an overly bright, flattened effect.
A high CRI rating matters more here than you might expect, since track lighting is often aimed directly at food-prep surfaces where accurate color rendering makes ingredients and finishes look their best. Pair the track with under-cabinet strips for actual counter work, and consider a single pendant over the island if you still want a decorative focal point — track lighting handles flexibility and direction, but it’s not usually the fixture that gives a kitchen personality on its own.
Bullet takeaways:
- Directs illumination toward specific kitchen work zones
- Adapts easily when furniture or layouts change
- Useful for kitchens with unusual ceiling layouts
- Highlights counters, shelves, and decorative features
- Provides flexibility without multiple ceiling boxes
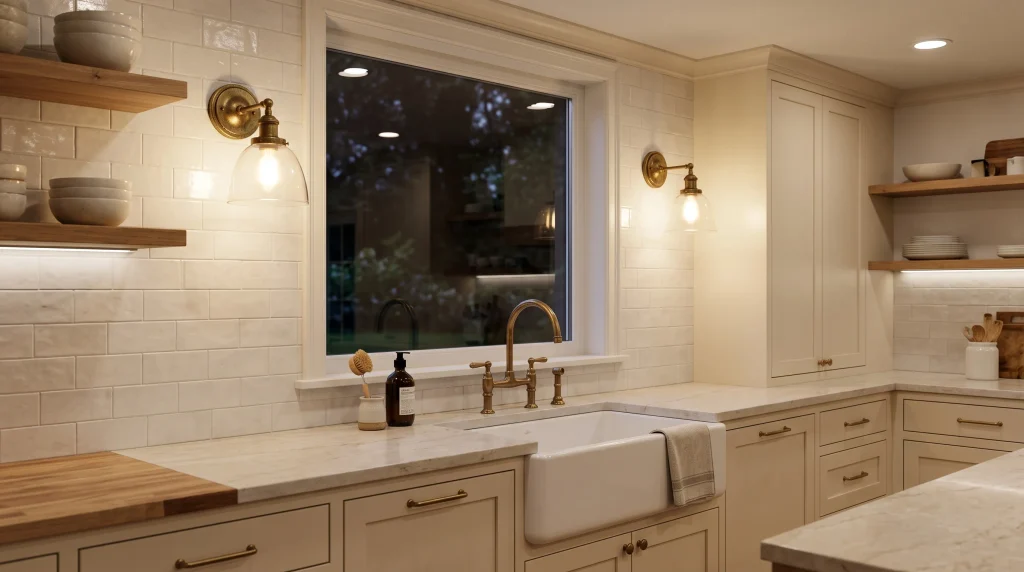
Kitchen Wall Sconces
Wall sconces bring light down to eye level, which changes the character of a kitchen in a way ceiling fixtures never quite manage. A pair flanking a window above the sink, or a single sconce beside open shelving, adds a warmth and depth that purely overhead lighting can feel flat without.
Placement is really about finding the spots ceiling lights tend to miss or underserve — beside a farmhouse sink, next to a breakfast nook, on either side of a range hood. Because sconces sit at a different height than everything else in the room, they create genuine visual layering rather than just adding more brightness at the same level as the recessed lights. Material choice should generally echo something already in the kitchen: aged brass sconces next to brass cabinet pulls, black metal beside black window frames, ceramic or ribbed glass in a more cottage-style space.
The shade matters more than people expect. A frosted shade softens the glow nicely against hard surfaces like tile or stone, while an exposed bulb gives a more decorative, slightly industrial effect that suits certain styles better than others.
Before installing, double-check that a sconce won’t interfere with a cabinet door swing or shelf bracket — a surprisingly common mistake that only becomes obvious once the fixture is already on the wall. Sconces are at their best in the evening, providing a welcoming glow without needing every ceiling light switched on, which is exactly why pairing them with dimmable overhead fixtures and under-cabinet LEDs makes the whole kitchen feel far more adaptable across cooking, dining, and quiet nights in.
Bullet takeaways:
- Adds decorative light at eye level
- Softens hard cabinetry and stone surfaces
- Works beautifully beside sinks and open shelves
- Creates depth on otherwise flat walls
- Can provide gentle evening accent illumination
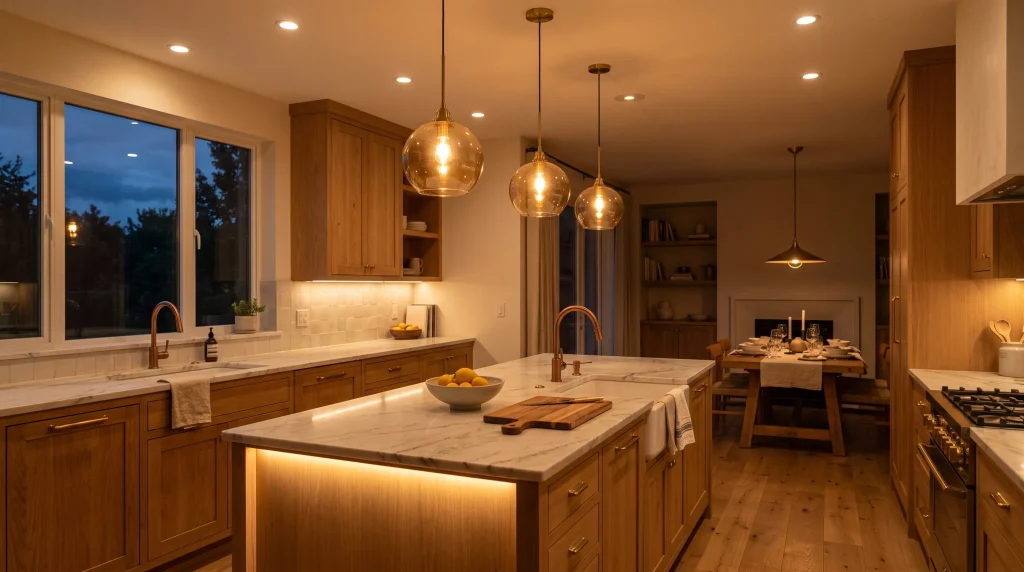
Warm Ambient Glow
There’s a specific moment most people notice this: the sun goes down, the overhead lights flick on, and the kitchen suddenly feels colder and more clinical than it did an hour earlier in natural daylight. That shift is almost always about color temperature, not brightness. Bulbs in the 2700K to 3000K range mimic the warmth of early evening sunlight and tend to feel far more comfortable against wood, cream cabinetry, and warm stone than anything cooler.
The goal isn’t to dim the kitchen down until you can barely see — it’s to remove the harsh, slightly blue-white edge that cooler bulbs bring, especially once it’s dark outside and there’s no natural light left to balance things out. A softly diffused mix of ceiling lights, pendants, and concealed under-cabinet strips generally achieves this better than one bright central fixture trying to do everything on its own.
Consistency across your fixtures is more important than most people realize. Mixing a warm 2700K pendant with a cooler 4000K recessed light creates a visibly disjointed effect — like two different rooms pretending to be one.
Keep the whole palette within a similar range, and put the ambient layer on its own dimmer, separate from task lighting, so recessed fixtures can stay bright during cleanup and then fade into the background once dinner starts. Under-cabinet LEDs at a lower setting add a gentle countertop glow that works particularly well after dark, and a warmer pendant over the island rounds out the effect without anyone needing to think about it consciously — it just feels right.
Bullet takeaways:
- Creates a relaxed atmosphere after sunset
- Makes neutral cabinetry feel softer and more inviting
- Helps balance brighter task-focused fixtures
- Works beautifully with natural wood and stone
- Dimming allows easy transitions throughout the day
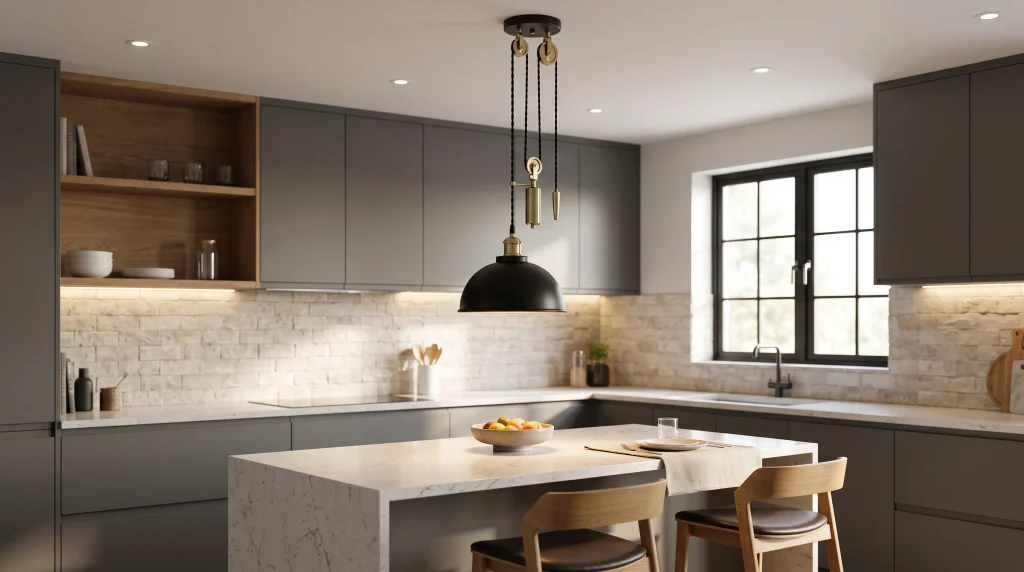
Rise-and-Fall Fixtures
An island that has to be a workspace at 5pm and a dinner table at 7pm needs lighting flexible enough to keep up, and that’s exactly the gap rise-and-fall fixtures fill. The adjustable suspension lets the whole fixture move up or down — lower for concentrated task lighting while you’re actively cooking, higher when you want clear sightlines across the island during a meal or when people are gathered around it talking.
What makes these fixtures interesting is that the mechanism itself becomes part of the design rather than something you hide. A visible cord or cable system, paired with a simple shade, can look genuinely sculptural in a contemporary kitchen with clean cabinetry — it’s function turned into a visual feature, which is rarer than you’d think in kitchen lighting.
The decision of how much to actually adjust the height day to day comes down to how the island gets used. If it’s mainly a prep surface, most people end up leaving the light lower most of the time for that concentrated brightness. If it doubles as a casual dining spot, raising it even a few inches noticeably improves how easy it is to see and talk to people across the table.
Warm white LEDs keep the mood comfortable regardless of height, and a dimmer adds a second layer of control on top of the physical adjustment. Rise-and-fall fixtures work best paired with discreet recessed lighting and under-cabinet strips elsewhere in the kitchen — that way the ceiling doesn’t get crowded with multiple statement pieces competing for attention, and the adjustable fixture gets to be the one flexible, functional centerpiece.
Bullet takeaways:
- Adds adjustable height above multifunctional islands
- Works well for cooking and dining situations
- Creates a distinctive architectural feature
- Lets light move closer when focused brightness is needed
- Can become a striking focal point in modern kitchens
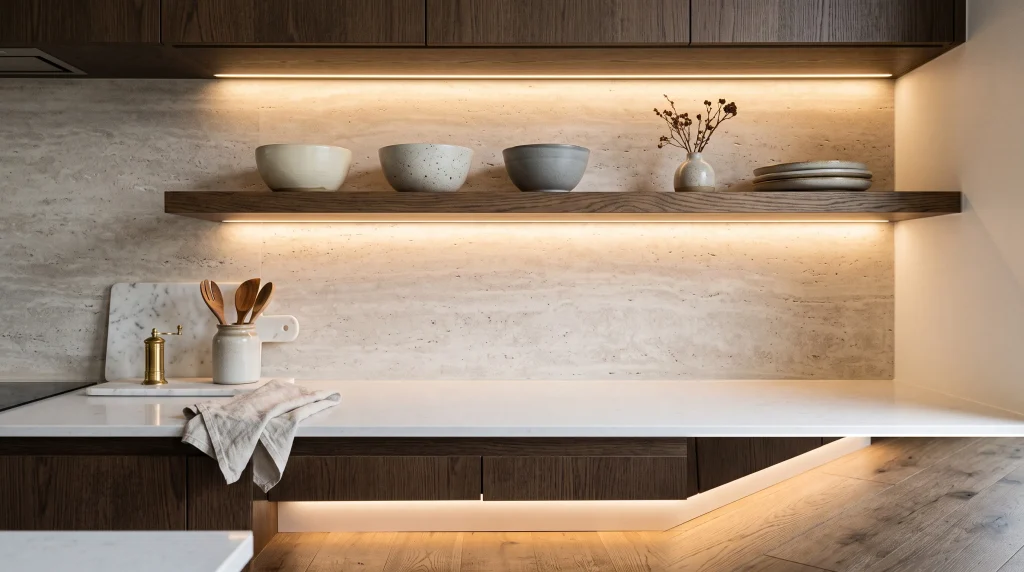
LED Strip Details
Once you’ve used LED strip lighting somewhere it’s properly hidden — inside an aluminum channel, tucked behind a lip of cabinetry — it’s hard to go back to visible puck lights or a single overhead fixture trying to cover an entire counter. Strips create one continuous line of light rather than a series of bright spots with dim gaps between them, which is what actually makes a kitchen feel evenly and cleanly lit.
Cabinets and shelves aren’t the only places this works. Toe-kicks along the base of cabinetry, the underside of a floating shelf, or the top of upper cabinets near the ceiling can all take a strip and turn an otherwise ignored architectural detail into something that looks deliberately designed, especially once it’s dark outside.
The installation quality genuinely makes or breaks how this looks. A cheap strip stuck directly under a cabinet edge, uncovered, tends to show individual LED points rather than one smooth line — it ends up looking unfinished rather than sleek. Spend a bit more on a proper channel with a frosted diffuser, and the difference is immediately obvious.
For actual work areas like the main counter, go with a high-CRI option so ingredients and finishes read true to color; for purely decorative spots like above cabinets or beneath open shelves, a lower brightness setting is usually enough to create a nice ambient glow without overpowering the room. Keep the color temperature matched to your other fixtures, and if the strip has dimming capability, use it — full brightness under a cabinet is rarely necessary once the sun’s gone down.
Bullet takeaways:
- Adds continuous light beneath shelves and cabinets
- Creates a clean, contemporary visual line
- Helps illuminate narrow or difficult areas
- Can highlight architectural details after dark
- Dimmable strips provide subtle decorative control
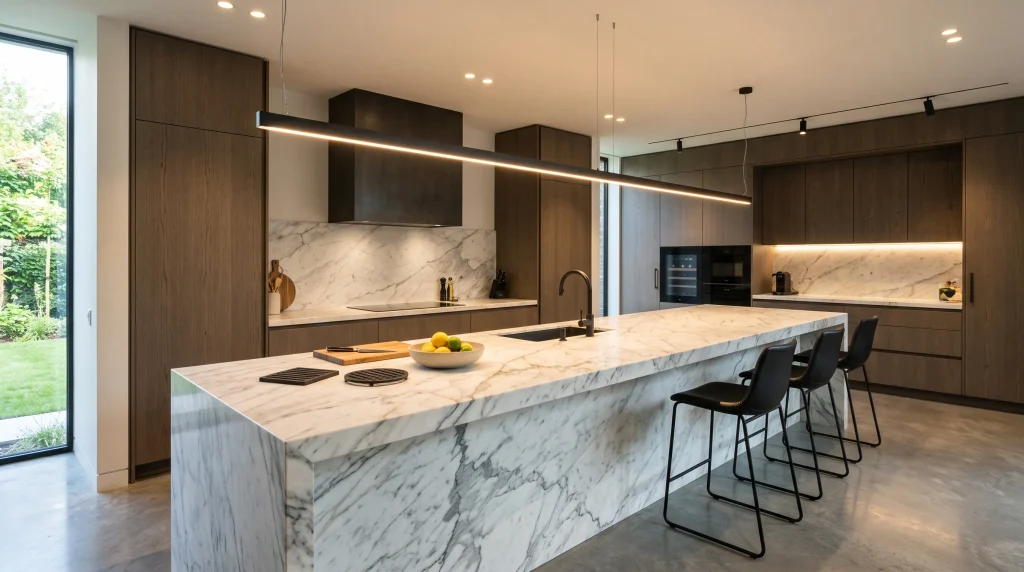
Linear Island Lighting
Long islands present a specific problem: a single centered pendant leaves the ends dim, while a row of matching pendants can start to feel repetitive if the island is unusually long. Linear fixtures solve this neatly by delivering one continuous run of light that follows the island’s proportions from end to end, rather than trying to break the space up into separate pools of brightness.
This style tends to suit modern and transitional kitchens especially well, largely because it echoes the straight lines already present in slab cabinet doors, rectangular counters, and minimal hardware. Rather than adding a decorative shape that contrasts with the kitchen’s geometry, a linear fixture reinforces it — the whole thing reads as more architectural, almost like it was built into the ceiling rather than added afterward.
Getting the proportions right matters more with linear fixtures than with almost any other pendant style. Too short, and the light looks disconnected from the island, floating awkwardly over just the middle section. Too long, and it can visually overwhelm the room, especially in a kitchen with lower ceilings. Centering it over both the working section and any seating area at the island usually gives the best balance, with enough clearance underneath for people to move around comfortably.
Slim black profiles create a crisp, graphic contrast against a white ceiling, while brass or bronze tones warm the whole look up. Round it out with under-cabinet lighting for actual counter tasks and recessed fixtures for general ambient brightness, and put the linear fixture on a dimmer so it can shift from practical daytime lighting to a softer glow once the kitchen becomes part of an evening gathering.
Bullet takeaways:
- Creates even illumination across long islands
- Visually follows the island’s horizontal proportions
- Reduces the need for multiple separate pendants
- Works beautifully in modern and transitional kitchens
- Adds a clean architectural element overhead
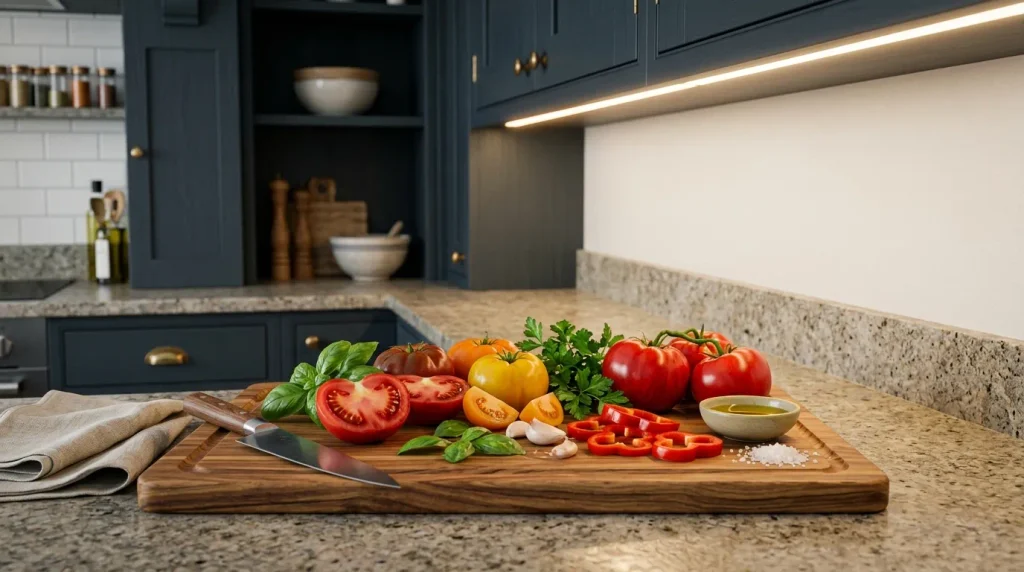
Color-Accurate LEDs
Most people shopping for kitchen lighting focus entirely on brightness and completely skip past CRI, or color rendering index — which is a shame, because it’s arguably more important. CRI measures how accurately a light source shows colors compared with natural daylight, on a scale up to 100. A bulb can be plenty bright and still make your countertops, cabinetry, and even the food you’re prepping look slightly off — a little grey, a little washed out — if its CRI is low.
For areas where you’re actually preparing food, aim for a CRI of 90 or above wherever it’s practical, particularly for under-cabinet and other task lighting. It’s a small spec buried in the product description that’s easy to overlook while comparing prices, but it has a real, visible effect on how fresh vegetables, cuts of meat, and finished countertops actually look day to day. Once you’ve cooked under a high-CRI light, going back to a cheap, low-CRI bulb is noticeably worse in a way that’s hard to unsee.
Color temperature is the other half of this equation, and the two get confused often. Around 2700K creates a warmer, cozier atmosphere, while 3000K sits at a comfortable middle ground that works in most kitchens. Cooler temperatures, closer to 4000K or above, can look crisp and clinical — fine in some ultra-modern spaces, but usually a mismatch with warm wood tones or cream cabinetry. Keep bulbs reasonably consistent across connected lighting zones; nothing gives away mismatched lighting faster than one fixture running noticeably warmer or cooler than the one right next to it.
Bullet takeaways:
- Makes food and countertop colors appear more natural
- Improves visibility during detailed preparation tasks
- Helps stone, wood, and painted finishes look authentic
- High CRI bulbs are especially useful near worktops
- Consistent color prevents a mismatched lighting effect
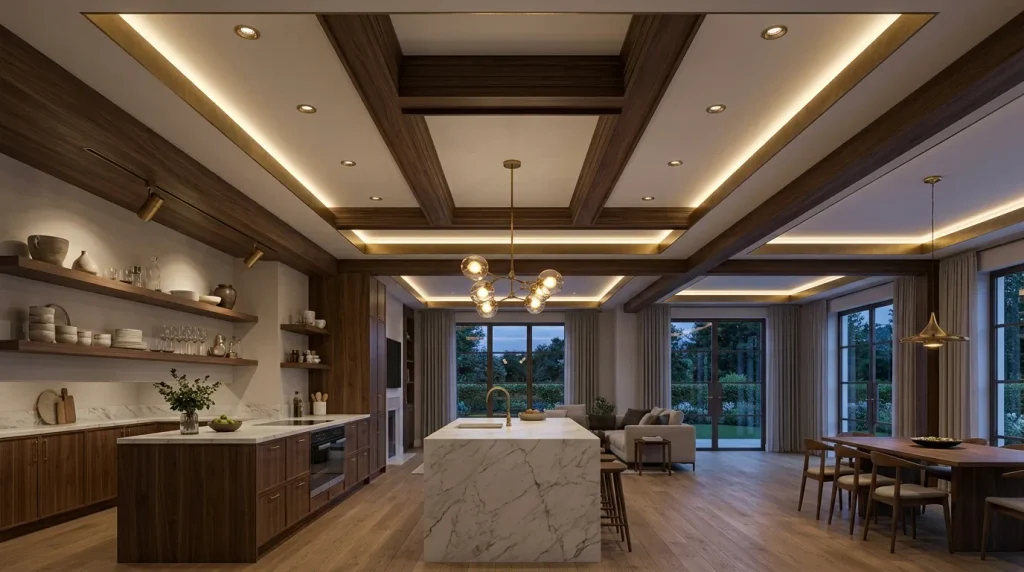
Decorative Ceiling Layers
Large kitchens have a specific challenge that smaller ones don’t: a single fixture, however well chosen, often isn’t enough to make the whole room feel considered. That’s where decorative ceiling layering comes in — combining recessed lights, a distinctive pendant, and maybe a few small directional accents, each doing a slightly different visual job rather than one fixture trying to cover the entire ceiling on its own.
This approach is especially useful in open-plan kitchens, where there are no walls to signal where the kitchen ends and the living or dining space begins. A sculptural pendant over the island, combined with recessed lights around the perimeter, effectively draws an invisible boundary using light alone — you know you’ve walked into the kitchen zone without needing a single wall to tell you so.
The key to pulling this off well is restraint in the variety of finishes and shapes you use. A collection of unrelated statement pieces — one brass, one black, one glass, all in different styles — tends to look chaotic rather than curated. Pick a shared material or finish and let that tie the different fixtures together, even if their shapes vary.
Use the more decorative pieces where they’ll actually be noticed — over an island, near a architectural feature like a beam or open shelving — rather than scattering them evenly for the sake of symmetry. Separate switches and dimmers for each layer make the whole scheme genuinely useful rather than just photogenic, letting you shift from a fully lit kitchen for cooking to a softer, more intimate setup for an evening in without changing a single fixture.
Bullet takeaways:
- Adds personality without depending on one statement fixture
- Helps large kitchens avoid flat, uniform illumination
- Highlights architectural features and decorative surfaces
- Creates depth between ceiling and countertop lighting
- Works especially well in open-plan spaces
Frequently Asked Questions
What is the best lighting for a kitchen?
There isn’t one single “best” fixture — the most reliable results come from layering ambient, task, and accent lighting rather than relying on one source. Warm white LEDs with a CRI of 90 or higher are generally the safest choice for both comfort and accurate color.
How many lumens does a kitchen need?
There’s no single exact number, since the right amount depends on room size, ceiling height, how much natural light the room gets, fixture placement, and even how reflective your countertops and cabinets are. As a rough starting point, many designers work with roughly 30–40 foot-candles for general ambient lighting and 70–80 foot-candles over dedicated task areas like the stove, sink, and prep counters — but treat these as a starting range to fine-tune, not a formula that gives an exact answer. If you’re unsure, it’s worth testing fixtures before committing, or asking your electrician or lighting supplier to help calculate output based on your actual room.
Should kitchen lighting be warm or cool white?
Warm white (2700K–3000K) tends to suit most kitchens, especially those with wood, cream, or stone finishes, because it feels inviting rather than clinical. Cooler temperatures can work in strictly modern, monochrome kitchens, but they’re a much less forgiving choice.
What type of lighting is best over a kitchen island?
Pendants are the most common choice, but the right style depends on the island’s length and the kitchen’s overall look — two or three matching pendants, one oversized fixture, or a single linear light are all valid options depending on scale.
How many lights should be in a kitchen?
This depends far more on layout than on room size — it’s better to think in terms of covering ambient, task, and accent needs than hitting a specific fixture count. A well-planned kitchen with fewer, well-placed lights often outperforms one with many lights scattered without purpose.
Conclusion
Great kitchen lighting does more than brighten a room — it changes how the space feels, functions, and looks throughout the day. From practical under-cabinet LEDs to statement pendants, layered lighting can make cooking easier while adding warmth, personality, and visual balance. These kitchen lighting ideas give you plenty of ways to refresh your space without a full renovation. Start with whichever area feels too dark or unfinished right now, and build outward from there — small lighting changes have a way of transforming a kitchen far more than their cost would suggest. Save this post for later, try the idea that fits your space best, and pass it along to anyone planning their own kitchen update.