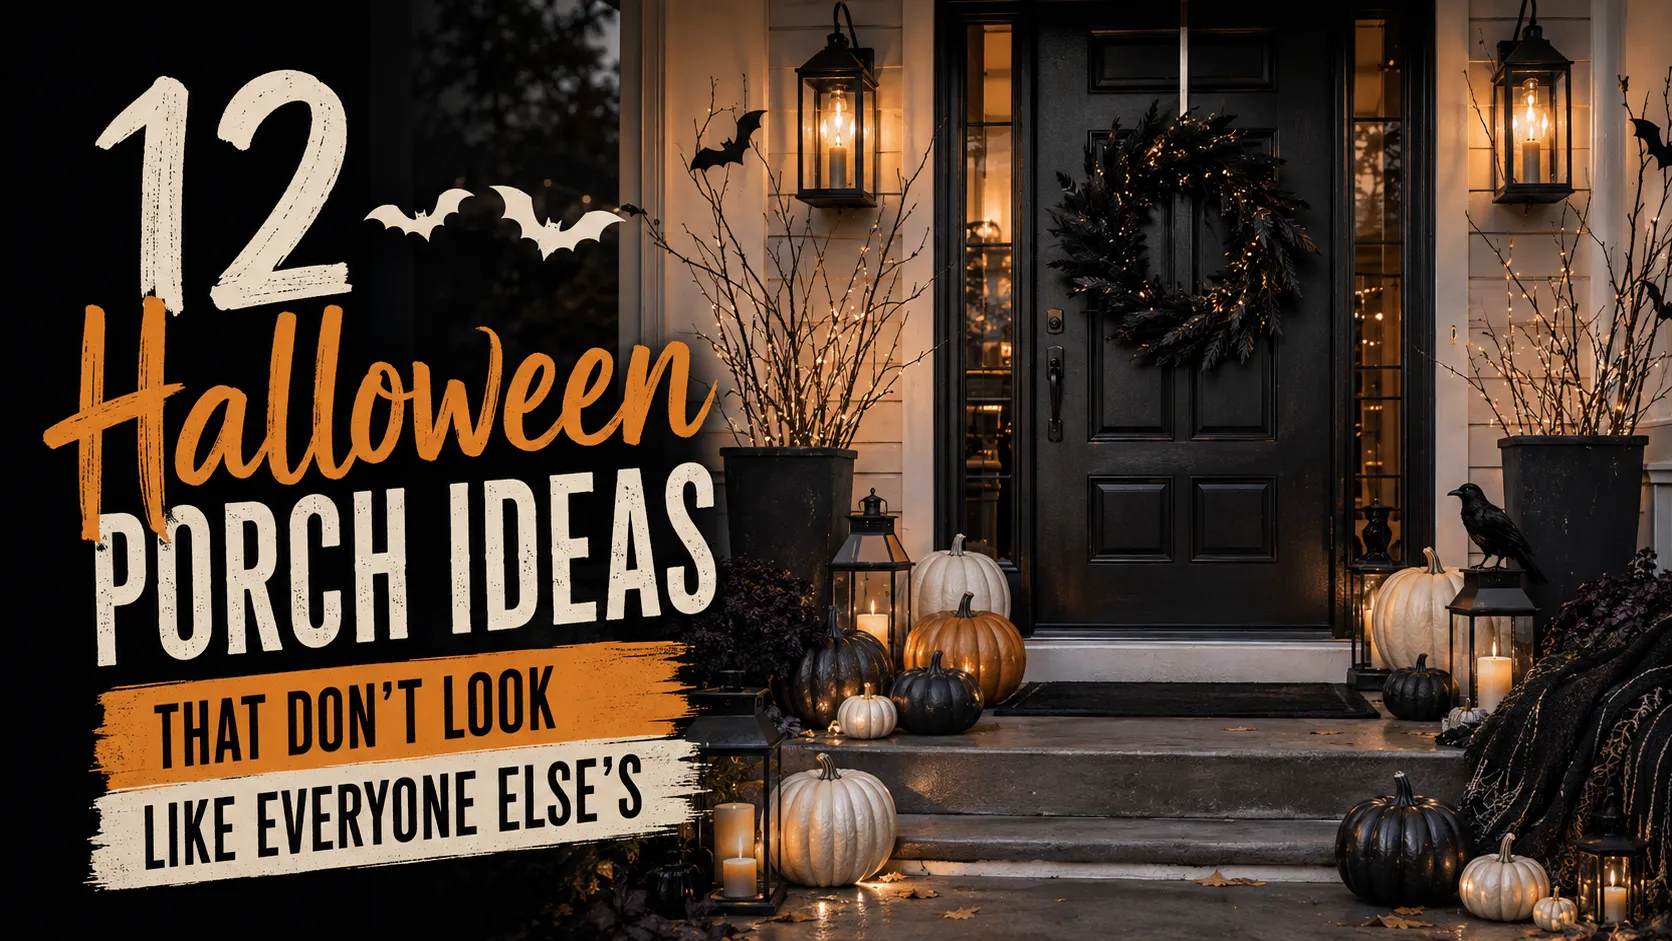
12 Halloween Porch Ideas That Don’t Look Like Everyone Else’s
I’ve tried enough Halloween Porch Ideas to know that more pumpkins don’t automatically make a better porch. Every October, my street turns into a mini decorating competition, and I’ve learned that the entrances that actually stop people mid-walk are usually the simplest ones. Two or three good decisions, done well, can look much better than a pile of random Halloween-aisle finds.
Two houses down, someone does an insane wall-to-wall setup every year, and somehow it reads less impressive than my neighbor Rina’s porch, which has maybe four things on it total. That’s the approach behind the ideas below: simple combinations, useful layouts, and a few details that make a porch feel intentional instead of overcrowded.
Below are 12 porch styles I’ve tested, borrowed, or straight-up copied off porches I walked past. Pick the one that matches your house instead of trying to do all of them at once, which is a trap I fell into my first year with this stuff.
1. Classic Black and Orange
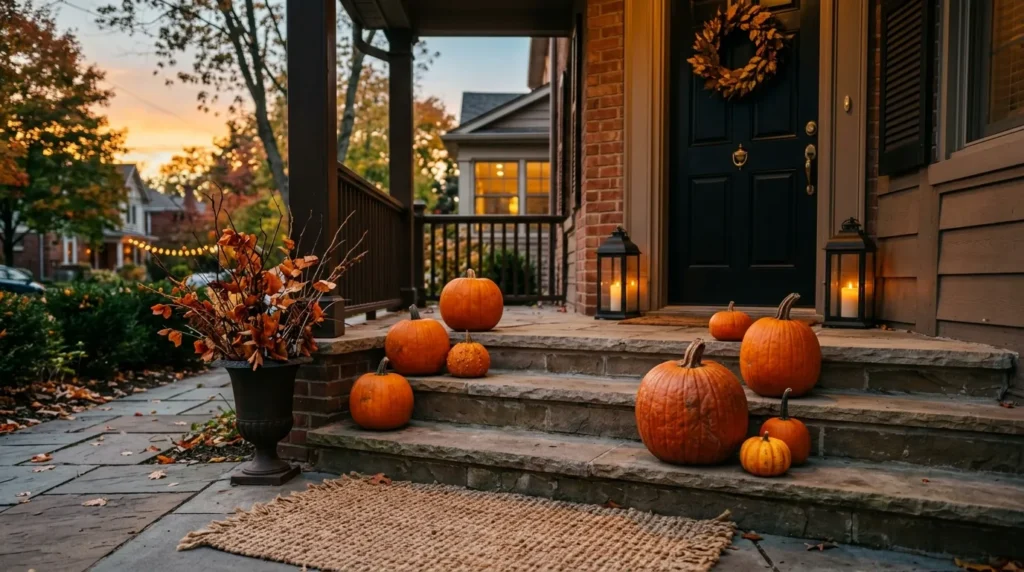
The one everyone recognizes for a reason, and honestly the one I keep coming back to because it’s the hardest to get wrong. A black door, a scatter of orange pumpkins in different sizes, and a textured doormat is genuinely all it takes to make a porch look finished.
What you’ll need:
- 5–7 pumpkins in at least three different sizes (mix real and faux if budget matters — the smaller ones are the first to go soft, so I switched those to faux years ago)
- One black or dark planter
- Dried branches or autumn stems for the planter
- A textured jute or coir doormat
- 2 lanterns with warm-toned bulbs or candles
How to lay it out:
- Place the biggest pumpkin at the very bottom step, slightly off-center — dead-center reads too formal
- Add medium pumpkins beside the door on both sides, uneven numbers (3 and 2, not 2 and 2)
- Line the smallest pumpkins along the threshold edge
- Set the planter beside the steps for height, not blocking the walkway
- Add lanterns after dark to soften the black-and-orange contrast, which can look harsh under stark daylight but warms up beautifully once the sun goes down
Mistake I made the first time: buying pumpkins all roughly the same size. It looked like a display shelf, not a porch. Variation in height is what makes the eye move naturally instead of landing flat.
Day versus night: this style genuinely looks like two different displays depending on the light. In daylight, the orange dominates and reads as bright and traditional. After sunset, with the lanterns lit, the black elements pull forward and the whole thing feels moodier and more dramatic.
Making it your own: if pure black-and-orange feels too matched for your taste, swap one of the pumpkin colors for deep burgundy or charcoal gray. It keeps the same bones but softens the contrast a little.
Budget note: this is one of the cheaper styles on the list — a dollar-store haul of small pumpkins plus 2–3 statement-size ones from a nursery usually runs under $40.
2. Glowing Doorway Lanterns
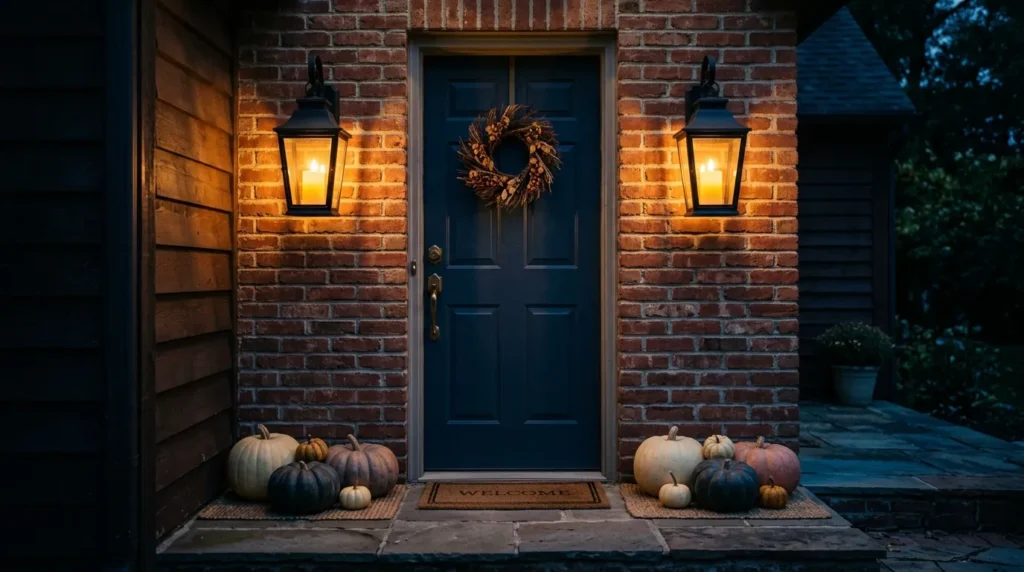
This style is about lighting doing almost all the work, which makes it a good option if you’re short on time but still want the porch to feel considered rather than bare.
What you’ll need:
- 2 matching lanterns (black metal frames photograph the best against most siding colors)
- Battery-operated flameless candles — worth spending a little more here, since flickering LED versions look far more convincing than static ones
- 4–6 pumpkins in muted tones: cream, charcoal, dusty orange
- Optional: a small weatherproof wreath
Setup steps:
- Position lanterns symmetrically, one on each side of the door, at roughly eye level or a little below
- Group pumpkins low, near the base of each lantern, so the eye reads “tall light, low pumpkin” as a repeating shape on both sides
- Skip white or daylight-toned bulbs entirely — they flatten the black lantern frames
- If the porch has a bare wall between the lanterns and the door, that’s where a small wreath earns its place
Why this works on small porches specifically: symmetry reads as “intentional” even with very few objects. I’ve used this exact setup on a 4-foot-wide porch and it still photographed well.
Sizing the lanterns to your porch: on a narrow entry, keep lanterns under about 12 inches tall so they don’t crowd the doorway; on a deeper porch, size up to 16–18 inches.
Variations worth trying: swap the black metal lanterns for aged bronze or copper if your door hardware already leans warm-metal.
Maintenance: battery life varies a lot by brand and how often the candles are on — check them once a week rather than assuming they’ll last the whole month.
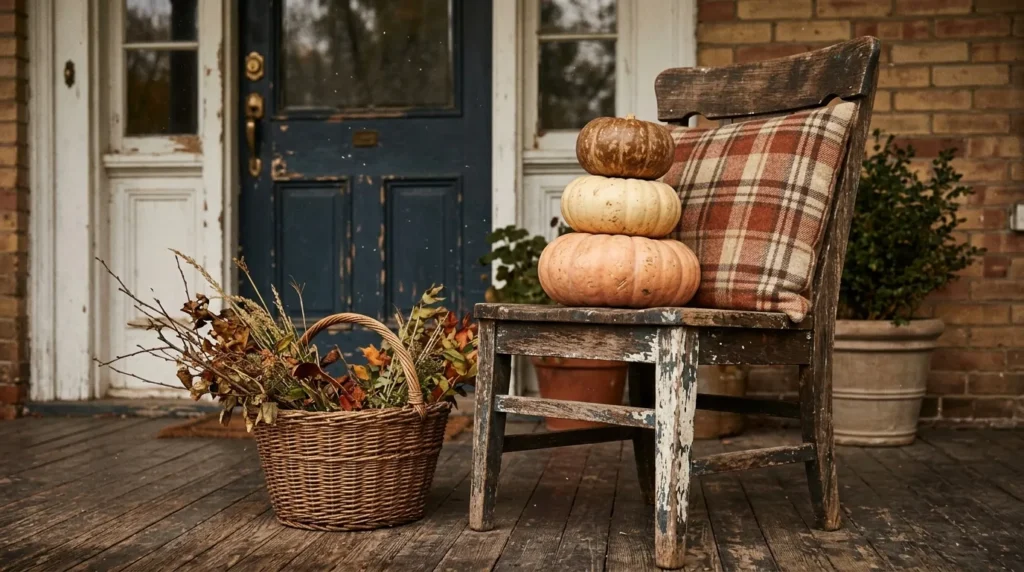
3. Vintage Pumpkin Corner
Best suited to older homes with real architectural character — the worn textures echo the house instead of fighting it. This is also the easiest style to build almost entirely from things you already own or can thrift for under $20.
What you’ll need:
- An old wooden chair (a thrift store find is genuinely better here than a new one — the wear is the point)
- 2–3 pumpkins in faded orange, warm cream, or deep brown
- A woven basket
- Dried branches or faux fall leaves
- A faded plaid cushion or neutral throw (optional but adds a lot)
How to build it:
- Place the chair beside the doorway, angled slightly rather than facing straight out
- Stack two or three pumpkins directly on the seat — this is the detail that makes the corner read as a “scene” instead of just furniture with decor near it
- Set the basket of branches on the floor beside the chair, not directly under it
- Drape the cushion or throw over the chair back if you’re using one
Common mistake: centering the chair display in the middle of the porch. It should sit to one side with the main walkway left completely open.
Finding the right chair: look for visible wear — chipped paint, worn wood grain, a slightly uneven leg — not damage that makes it unsafe to hold weight.
Regional variation: in warmer, drier climates this display can stay almost as-is through November. In wetter regions, treat the wood with an outdoor sealant first, or treat it as decorative-only.
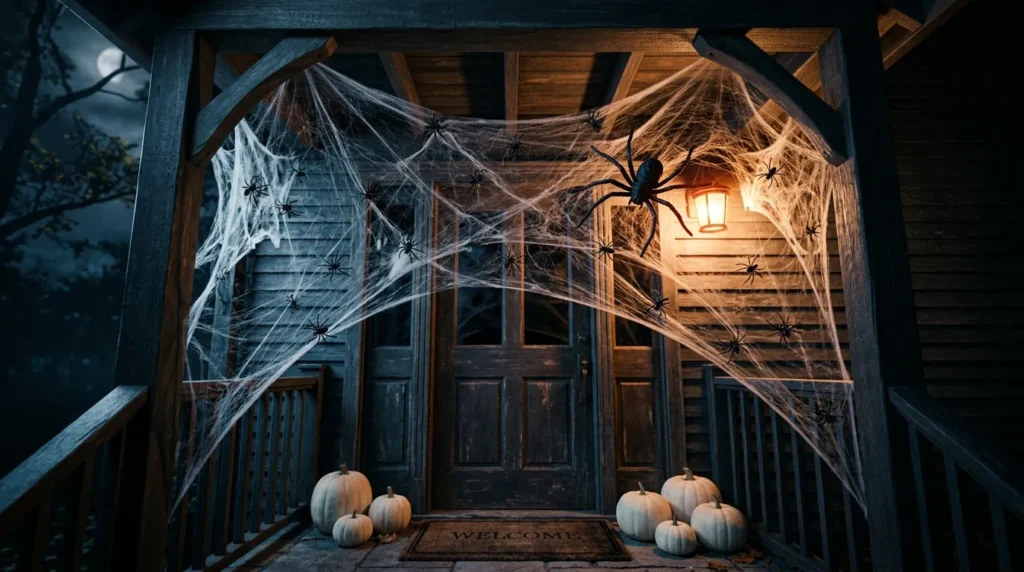
4. Oversized Spiderweb Entry
Good for narrow porches that need vertical interest instead of more floor clutter.
What you’ll need:
- Stretchable faux spiderweb material (the kind sold in bags, not the pre-shaped mesh — it’s easier to make irregular)
- 2–4 black plastic spiders in varying sizes
- Removable outdoor adhesive hooks
- 2–3 white pumpkins
- A dark-toned doormat
Steps:
- Stretch the webbing loosely across the upper door frame, pulling it thin in places and letting it bunch in others — perfectly even webbing is the biggest tell that a display was rushed
- Anchor corners with removable hooks so painted trim isn’t damaged
- Place the largest spider off-center as the focal point, then scatter 1–2 smaller ones nearby
- Keep the base minimal — white pumpkins and a dark mat are enough
Mistake to avoid: stretching the web perfectly symmetrical and tight — it ends up looking like packaging material.
Weather note: if your porch catches wind, go for heavier “stretch cotton” webbing rather than thin nylon, which tears in exposed locations.
Kid-and-pet consideration: keep the web at least a foot above head height for the shortest expected visitor.
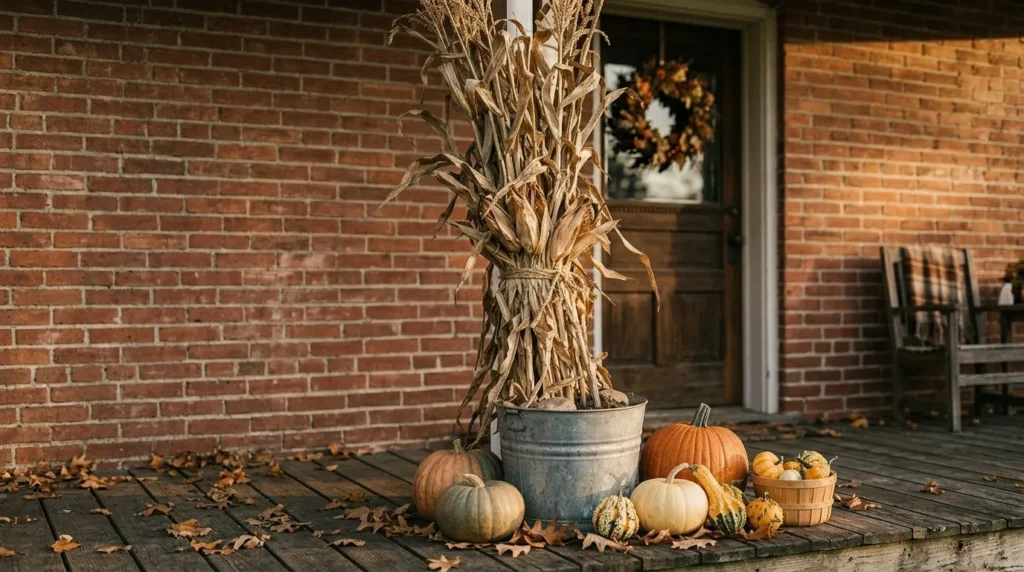
5. Dried Cornstalk Display
If your house has a brick, stone, or wood exterior, this palette blends in rather than fighting it.
What you’ll need:
- 3–4 dried cornstalks or a wheat bundle
- Galvanized bucket or a sturdy, weighted container
- 4–5 pumpkins and gourds in mixed sizes
- Twine to bundle the stalks
Layout steps:
- Bundle the cornstalks with twine and set them upright in the weighted container on one side of the door
- Place a lower pumpkin cluster on the opposite side
- Tuck 1–2 smaller gourds at the base of the stalk bundle
- Add soft lighting nearby, since dried materials don’t reflect light the way glossy faux pumpkins do
Mistake I’ve seen most often: using a container too light for the stalks — an unweighted bucket topples in real wind. Sand or gravel in the bottom fixes this cheaply.
Sourcing tip: farm stands and pumpkin patches often sell cornstalk bundles for less than garden centers, and fresher.
Seasonal bonus: this is one of the few styles that transitions straight into Thanksgiving decor without changing anything.
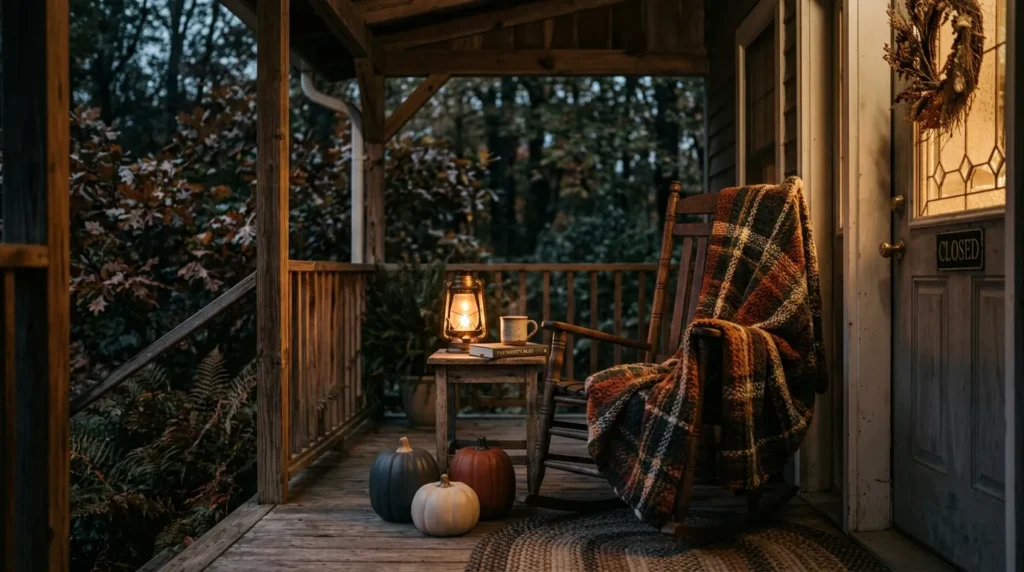
6. Cozy Haunted Nook
This is the style for people who actually use their porch, not just decorate it for the street to see.
What you’ll need:
- A rocking chair or accent chair
- A chunky plaid or knit throw blanket
- A small side table
- One lantern with a flameless candle
- 3–4 matte ceramic or faux pumpkins in charcoal, rust, and cream
Setup:
- Set the chair slightly off-center, angled toward the door rather than the street
- Drape the throw over one arm so it looks used, not staged
- Place the side table within reach of the chair, and set the lantern on it
- Group pumpkins on the floor near the chair legs
What keeps this from looking like leftover furniture with pumpkins nearby: limiting yourself to one furniture piece and a tight three-color palette.
Cushion and throw upkeep: outdoor-rated fabric is worth it here — indoor-only fabric shows moisture damage within a couple of weeks on an uncovered porch.
Practical note: if you’ll actually sit out here in the evenings, skip real candles and go flameless.
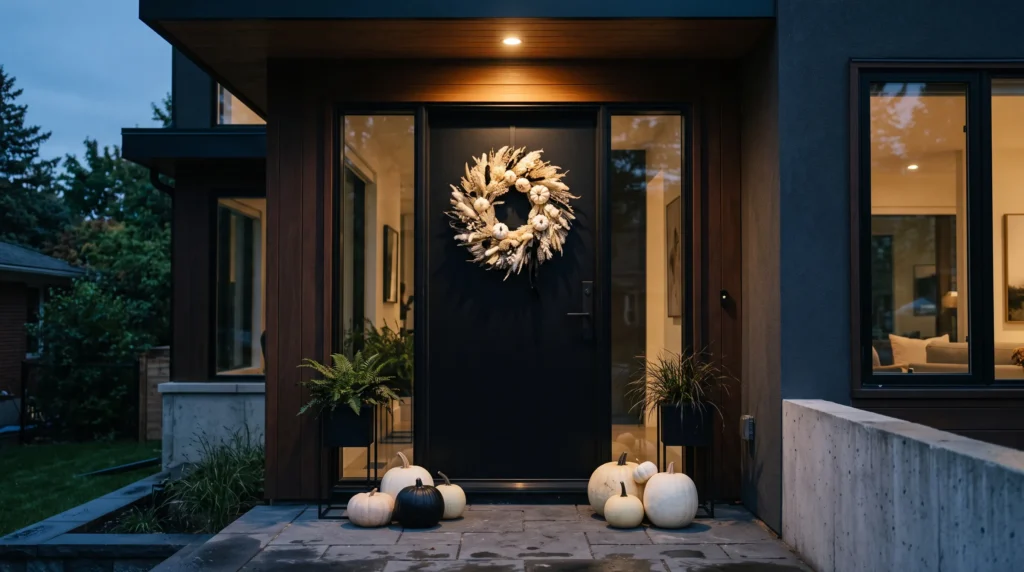
7. Black and White Wreath
The most “modern house” friendly option on this list — a black door, an ivory or white wreath, and a controlled pumpkin cluster underneath.
What you’ll need:
- A wreath in white, ivory, or pale neutral tones
- 3–4 pumpkins in a mix of white, cream, and one black accent
- A wreath hanger that won’t mark the door
- Optional: 2 narrow planters if floor space is tight
How to hang and arrange it:
- Hang the wreath at a comfortable eye level
- Group the pumpkins in a loose, uneven cluster directly beneath the wreath
- If your porch is narrow, skip floor pumpkins and use narrow wall-mounted planters instead
- Add one warm light source nearby after dark; without it, white and black tones can look flat under daylight bulbs
Mistake to avoid: choosing a wreath with too much bright orange or green in it — the appeal here is restraint.
Matching to your exterior: against gray or white siding, keep the wreath closer to true white. Against brick, go ivory or slightly cream-toned.
Cost-conscious version: a plain grapevine wreath spray-painted white, with faux cotton stems hot-glued on, gets most of the designer-wreath look for a fraction of the price.
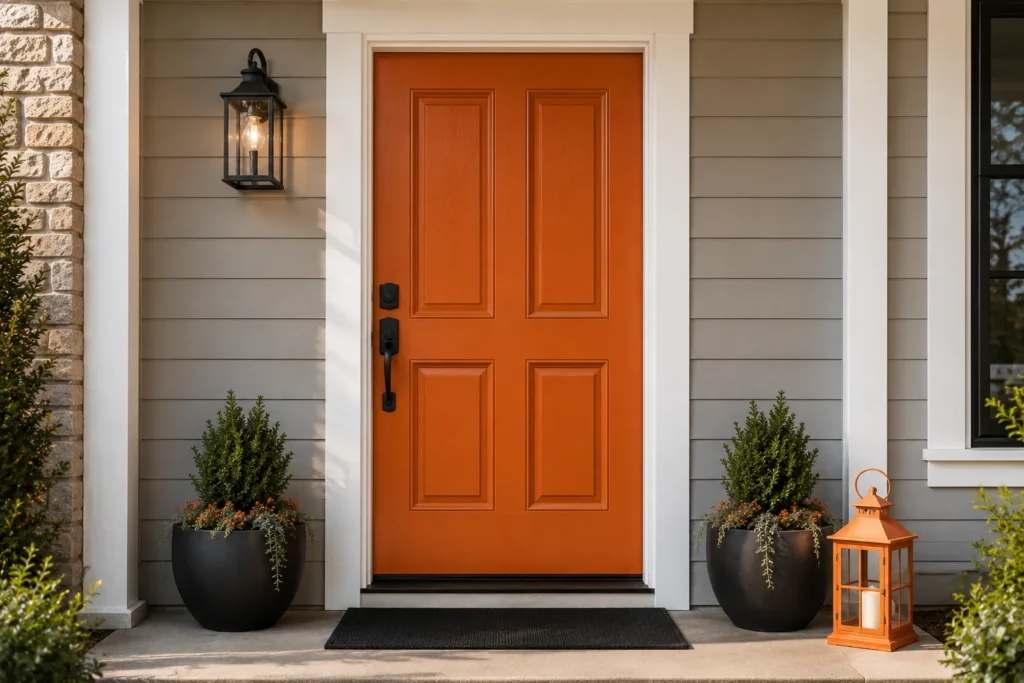
8. Bold Painted Door
Sometimes one big decision beats twenty small ones.
What you’ll need (permanent option):
- Exterior door paint in your chosen color, plus primer if going from a lighter shade
- Painter’s tape for trim and hardware
What you’ll need (rental-friendly option):
- A removable, outdoor-rated door cover or decal designed to peel off without damaging paint
Steps:
- If painting, mask the trim first and keep it a lighter, contrasting shade
- Add one simple black mat — patterned mats compete with a bold door color
- Place two small matching planters on either side, kept low
- Repeat the door’s color once elsewhere — a lantern or planter in the same shade ties the entrance together
Choosing between charcoal, black, and muted orange: charcoal is the safest if you’re unsure. True black gives the strongest contrast on light siding. Muted orange is the boldest and works best against a fairly neutral exterior.
Longevity note: check your paint product’s label for coat count and cure time before handling — plan this a few days ahead of Halloween, not the weekend before. Keep a sample of the original color on hand if you’ll repaint back afterward.
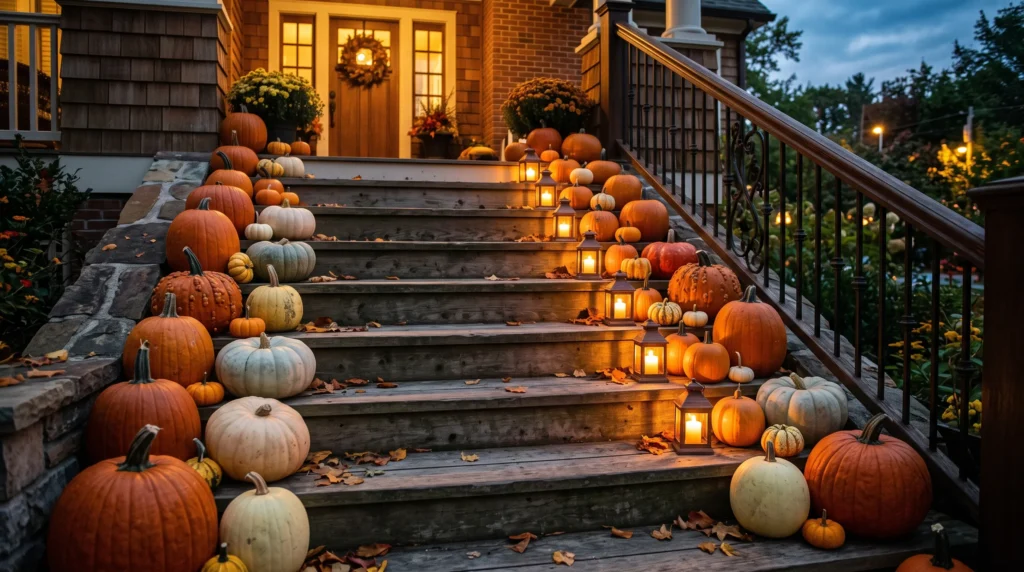
9. Pumpkin Stair Cascade
For porches with actual front steps, this turns the staircase itself into the decoration.
What you’ll need:
- 6–8 pumpkins and gourds in a graduated size range
- A mix of orange, cream, and pale green for variation
- 2–3 small lanterns
Layout:
- Place the largest pumpkins on the bottom step
- Use progressively smaller pumpkins as you move up each step
- Keep every pumpkin toward the sides of the step — the middle needs to stay clear for foot traffic
- Tuck a lantern between clusters every other step
Safety note that matters more than it sounds: unstable or round pumpkins near step edges are a genuine trip hazard, especially for trick-or-treaters in costumes with limited visibility. Flat-bottomed faux pumpkins are worth using on stairs specifically.
Adjusting for step count: on a short 2–3 step entry, use fewer, larger pumpkins per step. On a longer staircase, skip a step entirely every other level.
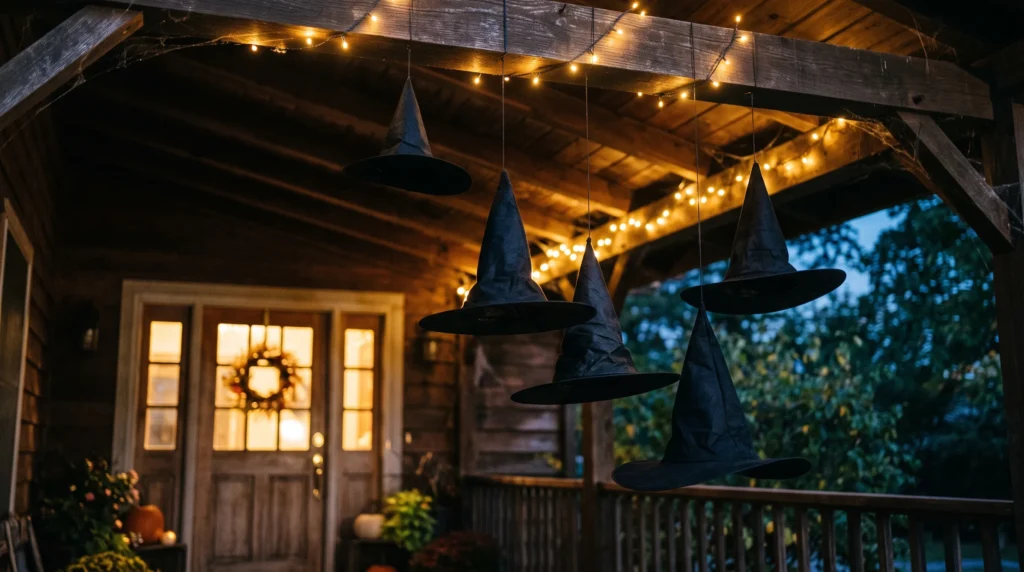
10. Witch Hat Hanging
The easiest fix for a porch that feels bare but has no floor space left to give.
What you’ll need:
- 3–5 black witch hats of varying sizes
- Clear outdoor-rated fishing line or thin weatherproof cord
- Ceiling hooks rated for outdoor use
- Warm string lights
Steps:
- Attach hooks to the porch ceiling at staggered points
- Hang each hat at a slightly different length so they appear to float at different heights
- Leave visible gaps between hats — bunching them together loses the “floating” illusion
- String warm lights along the same overhead area
Where this fails: on porches with low ceilings, hats hung at head height become an obstacle. If your ceiling is under about 7 feet, use fewer hats and keep them close to the door frame.
Why it’s a strong renter option: everything here uses hooks and line rather than paint, nails, or adhesive — it comes down cleanly in November.
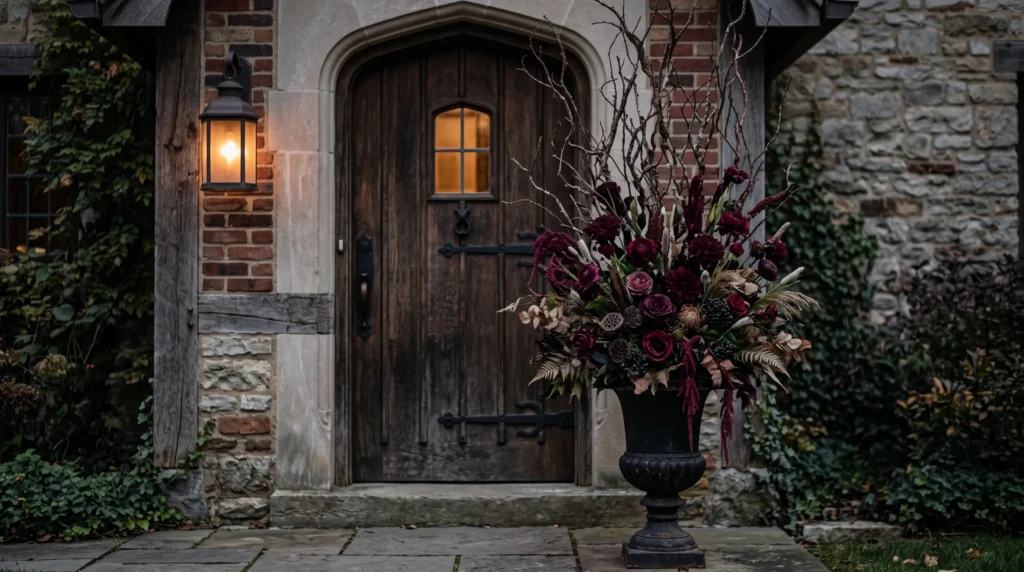
11. Gothic Floral Arrangement
For anyone who wants “elegant” over “spooky.”
What you’ll need:
- A tall black or dark urn or planter
- Faux or dried branches (birch or curly willow both hold their shape well)
- Dark burgundy or deep plum faux florals
- Muted dried foliage as filler
Building the arrangement:
- Start with the branches first, positioned toward the back and sides of the urn
- Add florals through the middle, letting a few stems extend outward
- Fill remaining gaps with dried foliage low in the urn
- Place the finished arrangement beside the doorway, balanced by a single lantern or small pumpkin grouping on the opposite side
Why height matters here: an arrangement below door-handle height reads as a regular planter, not a statement piece. Aim for the florals to reach at least the upper third of the doorway.
Weather consideration: faux stems hold up far better than dried ones if your porch gets direct rain — dried florals left exposed will droop and mildew within a week or two.
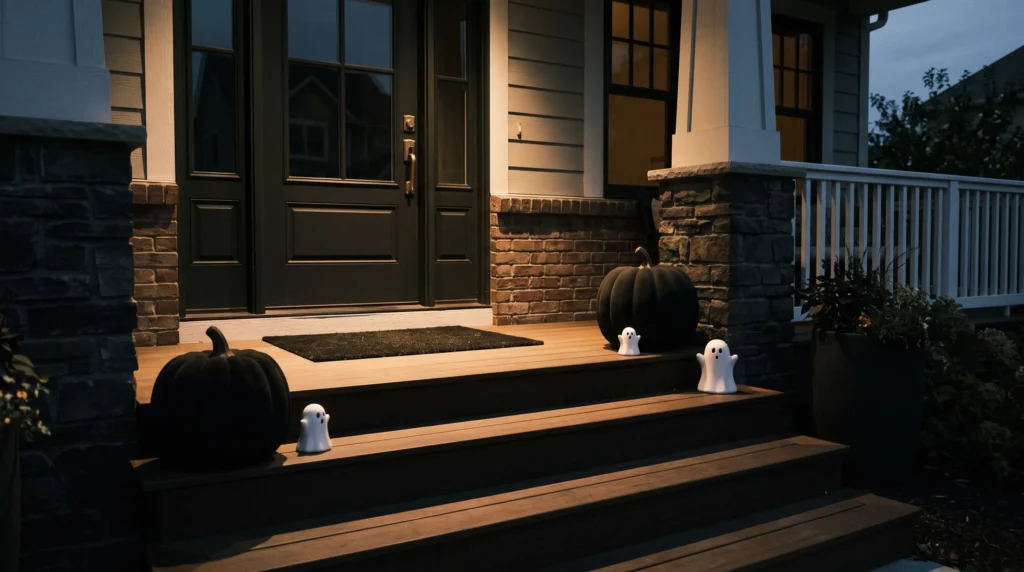
12. Minimal Spooky Steps
For anyone who doesn’t want to spend a whole weekend decorating.
What you’ll need:
- 2–3 matte black oversized pumpkins
- 1–2 small white or ghost-shaped accents
- One plain black doormat
- Warm, focused porch lighting (avoid floodlights here)
Placement:
- Set the black pumpkins along the sides of the steps, not the center
- Add the white accent pieces nearby for contrast
- Keep lighting warm and aimed at the display rather than lighting the whole porch evenly
- Leave any existing architectural details fully visible rather than covering them
Why fewer pieces actually look more expensive: repetition of a single strong shape reads as a deliberate design choice, where a dozen mismatched items reads as “whatever was on sale.”
Choosing the right pumpkin finish: matte finishes photograph far better than glossy plastic ones here. A light coat of matte spray sealant fixes glossy pumpkins for a few dollars.
Time cost: realistically a 20-minute setup once you own the pieces.
Quick Comparison: Which Style Fits Your Porch?
| Porch Type | Best-Fit Ideas |
|---|---|
| Small / narrow | Spiderweb Entry, Witch Hat Hanging, Minimal Spooky Steps |
| Covered porch | Cozy Haunted Nook, Glowing Doorway Lanterns |
| Traditional / older home | Vintage Pumpkin Corner, Gothic Floral Arrangement |
| Modern exterior | Black and White Wreath, Bold Painted Door |
| Has front steps | Pumpkin Stair Cascade, Classic Black and Orange |
| Renter-friendly | Witch Hat Hanging, Minimal Spooky Steps, Vintage Pumpkin Corner |
Final Thoughts
You really don’t need to go all out to make your porch feel like Halloween. Sometimes a few pumpkins, a good wreath, or even a couple of lanterns are enough to make the whole entrance look different.
The trick is to work with the porch you already have. If it’s small, keep things simple. If you’ve got stairs, use them. And if you don’t want to spend a whole weekend decorating, pick one idea and build around it.
Whatever style you choose, leave enough room to actually walk through the porch and don’t feel like you have to copy everything you see online. Pick the pieces you genuinely like, put them where they make sense, and call it done. That’s usually when a Halloween porch starts looking like your home instead of a store display.
How many pumpkins does a Halloween porch actually need?
Less than you think. Three to five well-placed pumpkins in varied sizes almost always look better than a dozen scattered around.
Are faux pumpkins worth it over real ones?
If your porch gets direct sun or rain, yes — real pumpkins soften and spoil faster in wet or hot conditions. Faux is the better call for anything meant to last through October, and it’s the only sensible option for stair displays where a soft pumpkin becomes a safety issue.
What’s the easiest Halloween porch idea for renters?
Witch Hat Hanging or Minimal Spooky Steps — both use hooks, string lights, and freestanding pieces with no painting, drilling, or permanent changes required.
How far in advance should I set up my porch?
Most of these styles take under an hour once you have the materials, but if your plan includes painting a door or building a floral arrangement, start at least a week before Halloween to allow for drying time and any reordering if a piece doesn’t work out.